
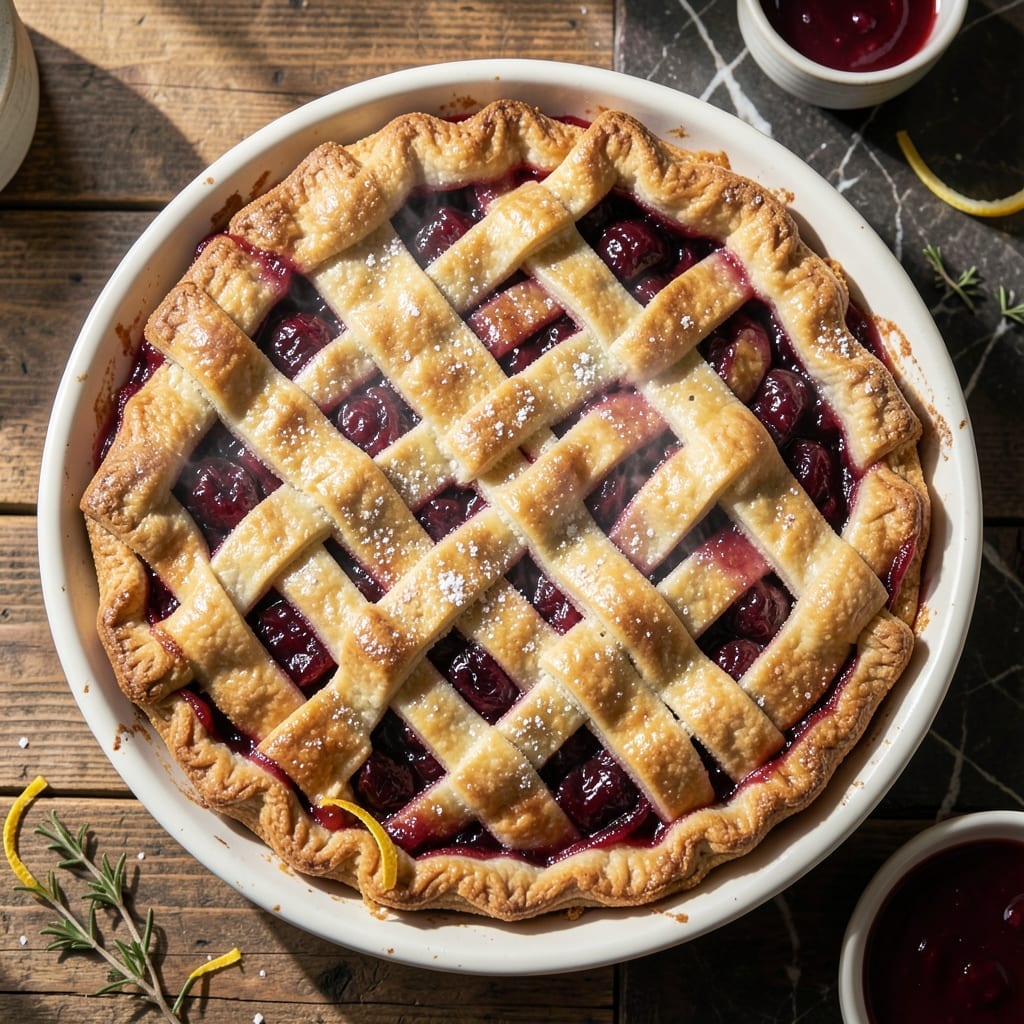
There’s something undeniably satisfying about a warm slice of cherry pie with a flaky, golden crust and a rich, fruity filling. This version streamlines the process without sacrificing quality or flavor.
By using a high-quality cherry pie filling, you eliminate the need for pitting and prepping fresh fruit while still achieving that bursting fruit texture. The focus shifts to crafting the perfect buttery crust that bakes to a golden brown finish.
The result is a dessert that looks and tastes homemade, with a tender, layered crust and a thick, glossy filling that holds its shape. It’s a foolproof way to deliver bakery-style results with minimal effort.
Serve it warm with a scoop of vanilla ice cream for a classic finish.
Ingredients for Cherry Pie Recipe Using Cherry Pie Filling
Pantry staples plus a can or two of filling. That’s all you need.
| Ingredient | Amount | Notes |
|---|---|---|
| All-Purpose Flour 🌾 | 2 ½ cups | Plus extra for dusting surface |
| Granulated Sugar 🍚 | 2 tbsp | Fine grain for even distribution |
| Salt 🧂 | 1 tsp | Fine sea salt preferred |
| Unsalted Butter 🧈 | 1 cup | Cold, cubed for flakiness |
| Ice Water 💧 | ½ cup | Plus more as needed |
| Cherry Pie Filling 🍒 | 2 cans | 21 oz cans, high quality |
| Lemon Juice 🍋 | 1 tsp | Freshly squeezed for brightness |
| Vanilla Extract 🌿 | 1 tsp | Pure extract for best flavor |
| Almond Extract 🌰 | ¼ tsp | Optional for depth |
| Large Egg 🥚 | 1 whole | For egg wash finish |
| Coarse Sugar 🍚 | 1 tbsp | For sprinkling on crust |
The butter is non-negotiable here—use a high-fat European style like Plugrá or Kerrygold for the flakiest crust. Most supermarkets carry it in the dairy case (look for 82% fat content). The flour? King Arthur or Gold Medal all-purpose both work beautifully. If your kitchen runs warm, chill the flour in the freezer for 15 minutes before starting—prevents the butter from softening too fast.
No almond extract? Skip it, no big deal. Vanilla is the star. For the pie filling, Lucky Leaf or Comstock are widely available and consistent. Want to doctor it up? Stir in a pinch of cinnamon or a splash of brandy. The egg wash can be swapped for heavy cream or milk (thicker coating with cream, lighter with milk).
The dough keeps 2 days wrapped in the fridge, or freeze for 3 months. Baked pie? Best the first day, but still great for 3 days at room temp. Reheat slices in a 350°F oven for 10 minutes to crisp the crust.
Why You’ll Love This Recipe
- No-Fuss Crust: I just pulse flour, sugar, salt, butter, and ice water—no fancy techniques, and it still turns out flaky every time.
- Sweet-Tart Magic: The cherry filling hits that perfect balance, and the buttery crust adds just the right richness.
- Impresses Every Time: I bring this to potlucks, and people think I slaved for hours. My little secret.
- Budget Dessert: A can of filling plus pantry staples means I spend under $5 for a dessert that feels special.
Step-by-Step Instructions for Cherry Pie With Buttery Crust
Here’s my tested method for a flaky crust with rich, bubbling cherry filling.
Step 1: Prepare the Pie Dough
In a large bowl, whisk together 2.5 cups all-purpose flour, 2 tbsp granulated sugar, and 1 tsp salt until evenly combined. I like to use fine sea salt here for even distribution throughout the dough.
Cut in 1 cup unsalted butter (cold and cubed) using a pastry cutter or your fingers until the mixture resembles coarse crumbs with pea-sized butter pieces. This creates the flaky layers we want. Then gradually add 0.5 cup ice water, mixing just until the dough comes together.
Step 2: Chill the Dough and Roll Out the Crust
Divide the dough into two equal portions, shape into discs, and wrap in plastic. Refrigerate for at least 1 hour (or up to 24 hours). This chilling step is crucial—it relaxes the gluten and prevents shrinking during baking.
On a lightly floured surface, roll one disc to a 12-inch circle. Transfer to a 9-inch pie dish, pressing gently into the bottom and sides. Trim the edges, leaving a ½-inch overhang. Save the second disc for the top crust.
Step 3: Prepare and Fill the Pie
In a bowl, combine 2 cans cherry pie filling, 1 tsp lemon juice, 1 tsp vanilla extract, and 0.25 tsp almond extract. The extracts deepen the cherry flavor beautifully. Pour this mixture into the prepared crust.
Roll out the second dough disc and place it over the filling. Crimp the edges to seal, then cut several slits in the top crust to allow steam to escape. This prevents the filling from boiling over and keeps the crust intact.
Step 4: Add Finishing Touches and Bake
Beat 1 whole large egg lightly and brush it over the entire top crust. This egg wash adds a glossy finish and helps the 1 tbsp coarse sugar (sprinkled next) adhere properly.
Preheat your oven to 375°F. Place the pie on a baking sheet to catch any drips, then bake for 45-50 minutes until the crust is golden brown and the filling is bubbling through the vents. If the edges brown too quickly, cover them with foil.
Step 5: Cool and Serve
Let the pie cool on a wire rack for at least 2 hours before slicing. This allows the filling to set properly—cutting too soon will give you a runny slice. The crust should be flaky and golden, with the filling thick and glossy.
Serve warm or at room temperature, ideally with a scoop of vanilla ice cream. Each slice will have that perfect balance of buttery crust and rich, fruity filling that makes this pie a standout.
Pro Tips For Making Cherry Pie Recipe Using Cherry Pie Filling
- Chill the Dough: After mixing your flour, butter, and ice water, let the dough rest in the fridge for at least 30 minutes—I learned this the hard way after my first few pies turned out tough and shrunk in the pan.
- Drain the Filling: Cherry pie filling can be watery, so strain it in a colander for 10 minutes before using to avoid a soggy crust.
- Dock the Crust: Poke the bottom crust all over with a fork before adding the filling to prevent air bubbles from ruining your pie’s shape.
- Use Cold Butter: Cut your unsalted butter into small cubes and keep it ice-cold until mixing—this makes a real difference in getting that flaky, layered crust.
Regional Styles of This Dish
Midwest Classic
In the Midwest, cherry pie often features a lattice crust instead of a full top crust. I use 1-inch strips of dough woven into a diamond pattern. This lets the filling peek through while baking to that perfect golden brown. It’s visually stunning and allows for even browning. 💛
Southern Comfort
Southern bakers love adding a streusel topping to their cherry pies. I mix ½ cup flour, ¼ cup brown sugar, and ¼ cup cold butter for a crumbly texture. Sprinkle it over the filling before baking for a sweet, crunchy contrast to the flaky crust.
Pacific Northwest
This region celebrates its famous cherries by adding 1 tbsp brandy or 1 tsp cinnamon to the filling. I like to use local Rainier cherries when in season. The brandy enhances the fruit’s natural sweetness while the cinnamon adds warmth to each bite.
New England Tradition
New Englanders often serve their cherry pie with a slice of sharp cheddar cheese on top. I know it sounds unusual, but the salty cheese cuts through the sweetness beautifully. It’s a tradition dating back to early colonial days when pie was a common dessert.
Amish Style
The Amish community favors a deep-dish pie with a thicker crust. I roll the dough to ⅛-inch thickness and use a 10-inch pie plate for extra filling capacity. The result is a hearty, satisfying slice with plenty of fruit in every bite.
California Twist
Out west, I’ve seen cherry pie with a glaze made from 2 tbsp apricot jam melted with 1 tsp water. Brush it over the baked pie for a glossy finish. This adds a subtle apricot note that complements the cherries perfectly. ✨
Nutrition Facts
Frequently Asked Questions
Can I use a store-bought crust instead?
Yes, a pre-made crust works perfectly for this recipe. Simply press it into your pie dish and proceed with the filling. For best results, choose a refrigerated rolled crust over frozen for flakier texture.
How do I prevent the crust from getting soggy?
Sprinkle 1 tbsp flour or breadcrumbs in the bottom crust before adding the filling. This creates a barrier that absorbs excess moisture, keeping your crust crisp and flaky.
Can I add fresh cherries to the filling?
Mix 1 cup pitted fresh cherries with the canned filling. This adds texture and freshness. Just toss them in a bit of sugar first to draw out excess juice.
How long can the pie sit at room temperature?
The pie stays fresh for 2-3 days at room temperature. For longer storage, refrigerate for up to 5 days or freeze for 2 months. Reheat in a 350°F oven for 10 minutes to restore flakiness.

- 6 Egg Cake Recipe with Oil: Light as Air With Buttery Moisture - October 4, 2026
- 4 Bean Casserole Recipe: One-Pan Heartiness With Smoky Paprika Depth - October 4, 2026
- 3-Ingredient Keto Mug Cake Recipe: Microwave Magic in 2 Minutes - October 4, 2026