
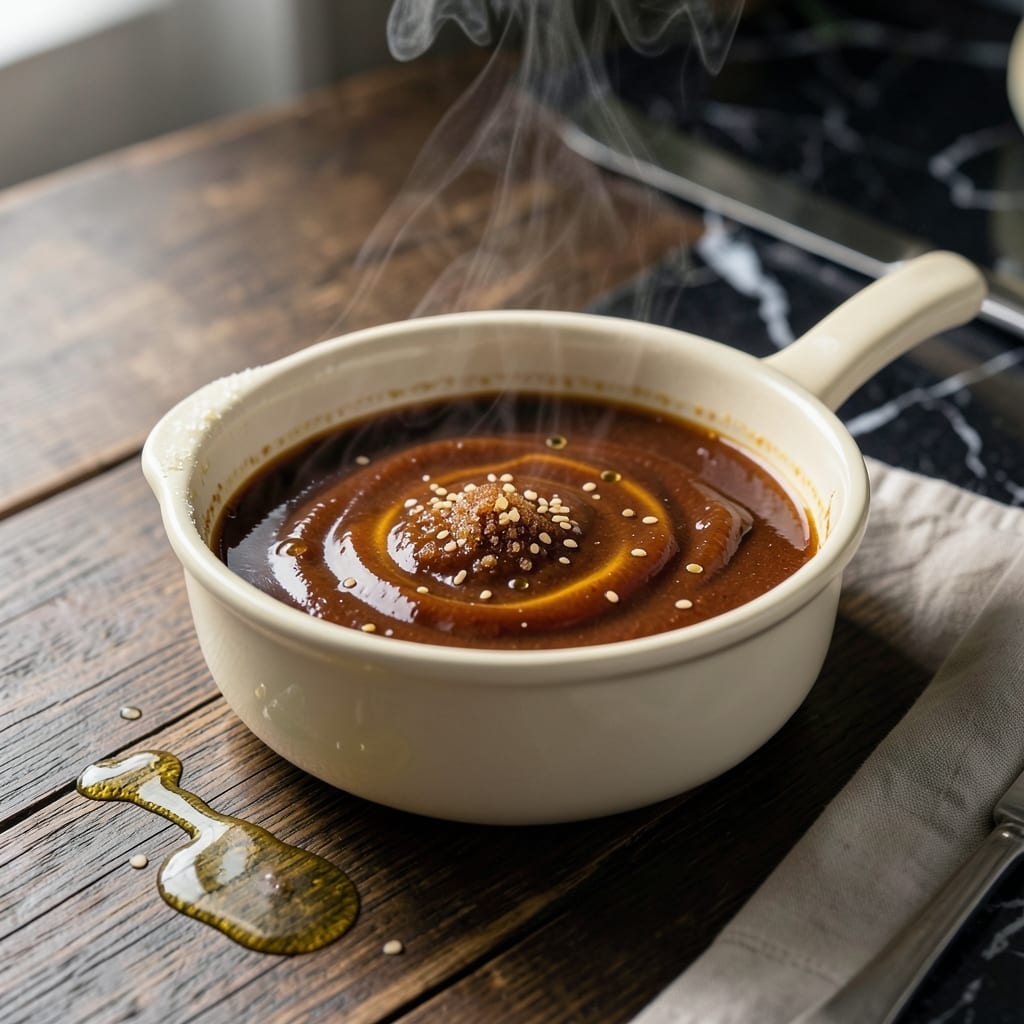
This silky glaze transforms plain steamed rice rolls into an irresistible Cantonese dim sum experience. The perfect balance of sweet, savory, and umami makes it the ideal companion for cheung fun.
With just 5 ingredients and 5 minutes of mixing, you’ll create a sauce that’s smoother and more flavorful than store-bought versions. The key lies in reducing the soy sauce slightly to intensify its richness.
The result is a glossy, amber-colored glaze that clings beautifully to rice noodles. Its mild sweetness and deep soy flavor enhance without overpowering the delicate rolls.
Store in an airtight container in the fridge for up to 2 weeks. Stir before each use as the mixture may settle.
Ingredients for Cheung Fun Sauce
Five ingredients create this glossy Cantonese glaze with perfect sweet-savory balance for rice rolls.
| Ingredient | Amount | Notes |
|---|---|---|
| Light Soy Sauce 💧 | ½ cup | Reduced for intensity |
| Dark Soy Sauce 💧 | 2 tbsp | For depth and color |
| Granulated Sugar 🍚 | 3 tbsp | Balances the saltiness |
| Shaoxing Wine 🍶 | 1 tbsp | Adds aromatic complexity |
| Sesame Oil 🫒 | 1 tsp | For nutty finish |
The soy sauces are critical—light soy sauce provides saltiness while dark soy sauce adds color and depth. Look for Pearl River Bridge or Lee Kum Kee brands at Asian markets for authentic flavor. Shaoxing wine should be cooking-grade (avoid drinking varieties with added salt). The reduction step intensifies the soy’s natural umami, so don’t skip it.
No Shaoxing wine? Dry sherry at equal amount works in a pinch. Out of dark soy? Use 1 tbsp light soy plus 1 tbsp molasses for similar color and sweetness. For a sweeter glaze, increase sugar by 1 tbsp. The sesame oil is non-negotiable—it adds that signature nutty aroma that defines Cantonese sauces.
This keeps beautifully for up to 2 weeks refrigerated. The flavors actually improve after 24 hours as they meld together. Always stir before using as the sugar may settle. Freezing isn’t recommended as it can separate.
Why You’ll Love This Recipe
- 5-Minute Magic: I just stir these five ingredients together—no cooking, no fuss. Honestly, it’s faster than waiting for takeout.
- Umami Bomb: The mix of light and dark soy sauce with that hit of Shaoxing wine gives it a deep, savory punch that clings to every bite.
- Drizzle on Everything: I use it on cheung fun, sure, but also dumplings, stir-fried veggies, even grilled chicken. Between us, it’s my shortcut to flavor.
- Pantry Staples: All the ingredients live in my cupboard already, so I’m never caught without a sauce. I’ll be real: it saves me from last-minute grocery runs.
Step-by-Step Instructions for Cheung Fun Sauce
Master this simple reduction technique for a glossy, restaurant-quality glaze that elevates any dish.
Step 1: Combine and Dissolve the Sugars
In a small saucepan, combine the 0.5 cup Light Soy Sauce, 2 tbsp Dark Soy Sauce, and 3 tbsp Granulated Sugar. The dark soy adds depth and color, while the light soy provides the base salinity for balance.
Place the pan over medium-low heat and stir constantly with a wooden spoon until the sugar fully dissolves. This should take 2-3 minutes. You’ll notice the mixture transition from cloudy to clear as the granules melt completely.
Step 2: Simmer for Reduction and Depth
Add the 1 tbsp Shaoxing Wine to the saucepan. This aromatic addition transforms the flavor profile significantly. Increase the heat to medium and bring the mixture to a gentle simmer.
Allow it to cook undisturbed for 5-7 minutes until the liquid reduces by about one-third. The sauce will thicken slightly and develop a glossy sheen. Watch for small bubbles breaking at the surface consistently—that’s your visual cue it’s ready for the next step.
Step 3: Finish with Sesame Oil and Cool
Remove the pan from heat and let the sauce cool for 1 minute. This brief rest prevents the 1 tsp Sesame Oil from losing its delicate nutty aroma when added to hot liquid. Stir in the sesame oil until fully incorporated.
The finished sauce should coat the back of a spoon with a light, syrupy consistency. As it cools further to room temperature, it will thicken slightly more, achieving that perfect silky texture ideal for drizzling over cheung fun or other steamed dishes.
Step 4: Strain and Store for Optimal Smoothness
For the smoothest possible texture, pour the sauce through a fine-mesh sieve into a clean bowl. This removes any undissolved sugar crystals or impurities, ensuring a perfectly uniform glaze.
Transfer to an airtight container once completely cooled. The sauce will keep at room temperature for up to 2 weeks, though I recommend using it within 1 week for peak flavor. Refrigeration extends its shelf life to 1 month but may cause slight thickening—simply warm and thin with a splash of water if needed.
Pro Tips For Making Cheung Fun Sauce
- Heat the Sauce Gently: I learned this the hard way—boiling the sauce too hard can make the sugar crystallize and turn grainy. Keep it at a low simmer just until the sugar dissolves.
- Balance the Soy Sauces: Use twice as much light soy sauce as dark soy sauce for a salty-sweet depth without overpowering color. My grandmother swore by this ratio, and she was right.
- Add Sesame Oil Last: Stir in the sesame oil off the heat at the very end to preserve its aroma. Sounds weird, but it works—heating it too long dulls that nutty punch.
- Dissolve Sugar First: Mix the sugar with a splash of warm water before adding to the saucepan. This small step prevents clumps and guarantees a smooth, glossy sauce.
Serving Suggestions for This cheung fun sauce
Drizzling Techniques
For the best presentation, warm the sauce slightly before drizzling—this makes it more fluid. I use a small squeeze bottle for precise zigzag patterns over the rolls. The warm sauce clings better to the rice noodles. 💛
Garnish Pairings
Sprinkle toasted sesame seeds or thinly sliced green onions over the sauce right before serving. These garnishes add texture and freshness that complement the sauce’s richness perfectly.
Dipping Station
Create a dipping station with small ramekins for individual servings. This works great for parties—guests can customize their dipping experience. I often add a side of chili oil for those who want heat.
Beyond Cheung Fun
This versatile glaze works beautifully with other dim sum like shumai or har gow. It also elevates simple dishes like steamed chicken or tofu. The possibilities are endless.
Temperature Tip
If the sauce thickens in the fridge, simply warm it in a small pan over low heat for 30 seconds. Add 1 tsp water if needed to restore its silky consistency.
Serving Temperature
I prefer serving the sauce at room temperature for the best flavor and texture. If you’re using it for dipping, slightly warm is ideal. The choice depends on your personal preference. ✨
Nutrition Facts
Frequently Asked Questions
Can I substitute regular soy sauce?
For best results, use both light and dark soy sauces as specified. If unavailable, use all-purpose soy sauce but reduce salt elsewhere. The flavor won’t be as complex.
How long does the sauce keep?
Stored in an airtight container in the fridge, it stays fresh for up to 2 weeks. Stir before using as ingredients may settle.
Can I make this sauce ahead?
The flavors deepen after 24 hours. Prepare it a day in advance for the best taste. Just reheat gently before serving.
What if my sauce is too thick?
Thin it with 1 tsp warm water at a time until it reaches your desired consistency. Avoid adding too much at once.

- 6 Egg Cake Recipe with Oil: Light as Air With Buttery Moisture - October 4, 2026
- 4 Bean Casserole Recipe: One-Pan Heartiness With Smoky Paprika Depth - October 4, 2026
- 3-Ingredient Keto Mug Cake Recipe: Microwave Magic in 2 Minutes - October 4, 2026