
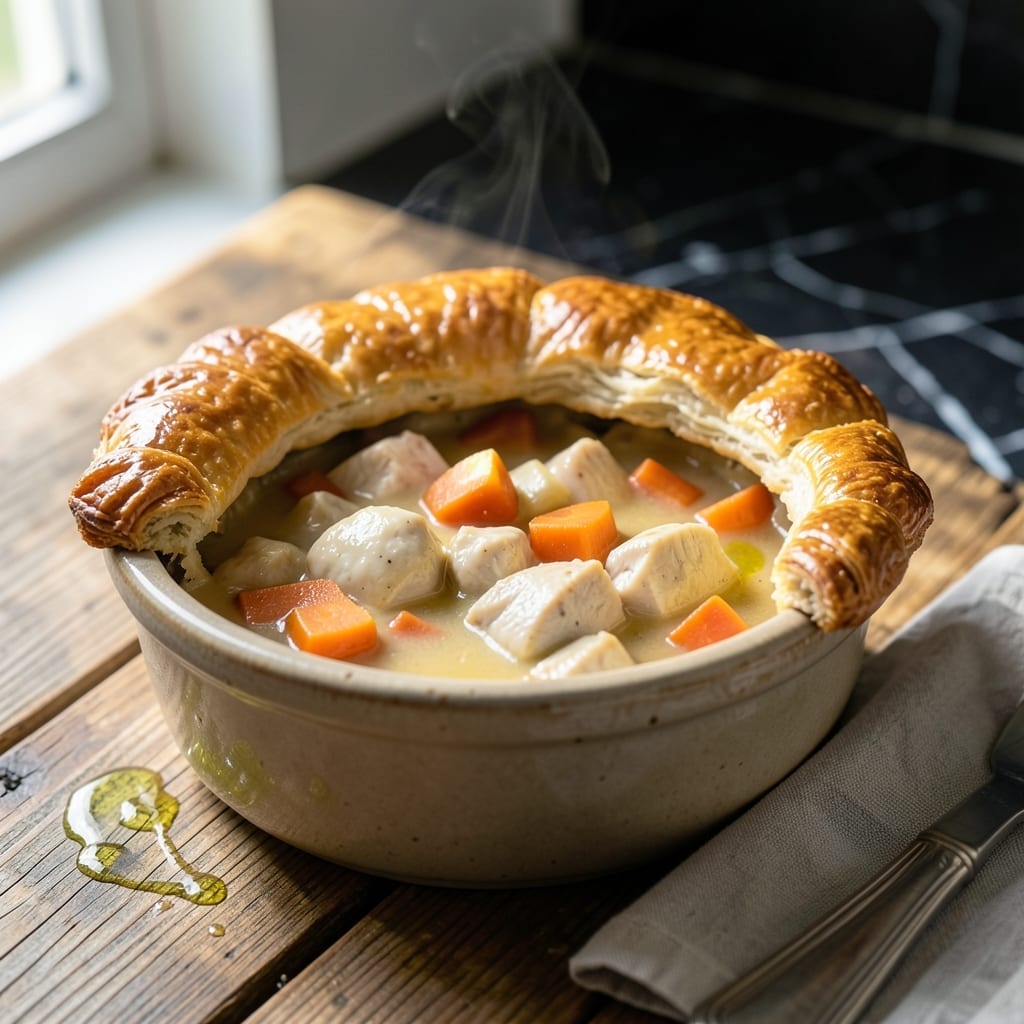
There’s something deeply satisfying about a flaky crust encasing a creamy, savory filling in these individual portions. I developed this method to deliver all the comfort of classic chicken pot pie in perfectly sized servings.
The secret lies in the crust technique—keeping it cold until baking ensures those coveted flaky layers. Meanwhile, the filling comes together with simple ingredients: tender chicken, vegetables, and a velvety sauce that thickens beautifully as it bakes.
Each personal pie offers the perfect ratio of golden crust to hearty filling, making it ideal for both intimate dinners and portion-controlled indulgence. The individual size also means every serving gets its own perfectly browned top.
This is comfort food at its most thoughtful—rich, satisfying, and designed to please without excess. The results speak for themselves.
Ingredients for Chicken Pot Pie Recipe Small
Fifteen simple ingredients create these individual pot pies with their signature flaky crusts and creamy fillings.
| Ingredient | Amount | Notes |
|---|---|---|
| All-Purpose Flour 🌾 | 2 ½ cups | Divided for crust and filling |
| Unsalted Butter 🧈 | 1 cup | Cold, cubed for flaky crust |
| Ice Water 💧 | ⅓ cup | For pie dough hydration |
| Salt 🧂 | 1 tsp | Divided for dough and filling |
| Boneless Skinless Chicken Breast 🍗 | 1 lb | Diced into 1/2-inch pieces |
| Carrots 🥕 | 2 whole | Peeled and diced small |
| Frozen Peas 🌱 | ¾ cup | No need to thaw |
| Yellow Onion 🧅 | 1 whole | Finely diced for filling |
| Celery Stalks 🌿 | 2 whole | Diced, strings removed |
| Garlic Cloves 🧄 | 2 cloves | Minced for sauce base |
| Chicken Stock 🍲 | 1 ½ cups | Low-sodium preferred for control |
| Whole Milk 🥛 | ½ cup | For creamy sauce |
| Heavy Cream 🥛 | ½ cup | Full-fat for richness |
| Fresh Thyme Leaves 🌿 | 1 tbsp | Stems discarded, chopped |
| Black Pepper 🌶️ | ½ tsp | Freshly ground preferred |
The butter is critical here. Plugrá or Kerrygold unsalted yield the flakiest crust—avoid margarine or vegetable shortening. For the flour, King Arthur or Gold Medal all-purpose work best; avoid bread flour as it’s too high-protein. The chicken should be fresh, not frozen (thawing adds moisture that can make the crust soggy). Whole Foods or local butchers typically carry high-quality, air-chilled chicken breasts ideal for this.
Need to swap the chicken? Rotisserie chicken at half the amount saves time, or use turkey breast for a leaner option. No fresh thyme? Dried thyme at one-third the amount works in a pinch. The peas can be swapped for corn or green beans (fresh or frozen). For a richer sauce, replace the milk with half-and-half, but don’t skip the cream entirely—it’s essential for that velvety texture.
The assembled pies freeze beautifully before baking. Wrap tightly in plastic and foil, then freeze for up to 2 months. Bake from frozen, adding 10-15 minutes to the cook time. Leftover baked pies keep in the fridge for 3-4 days—reheat in a toaster oven to revive the crust’s crispness.
Why You’ll Love This Recipe
- I’ll be real: the filling thickens up even better the next day, so I always make an extra mini pie for tomorrow’s lunch.
- One Bowl Magic: I mix the crust dough right in the same bowl I’ll use for the filling—no extra dishes, just flour, butter, and ice water coming together fast.
- Buttery Crust Love: That flaky, golden crust made with cold butter and a pinch of salt? It’s the kind of comfort that makes the whole dish.
- Weeknight Rescue: Honestly, this small batch is exactly what I need when I’m feeding just me and my partner on a busy night.
Step-by-Step Instructions for Chicken Pot Pie
Master the technique for individual servings with a golden, flaky crust every time.
Step 1: Prepare the Flaky Pie Dough
In a food processor, pulse 2.5 cups all-purpose flour with ½ tsp salt to combine. Add 1 cup cold unsalted butter, cubed, and pulse until the mixture resembles coarse crumbs with pea-sized butter pieces visible. This texture ensures layers in your final crust.
With the processor running, drizzle in ⅓ cup ice water through the feed tube until the dough just begins to come together. Stop immediately when it forms a shaggy mass—overworking develops gluten, which makes the crust tough. Turn the dough onto a floured surface, divide into four equal portions, and shape into discs. Wrap in plastic and chill for 1 hour.
Step 2: Cook the Chicken and Vegetable Filling
In a large skillet, heat 1 tbsp of the butter over medium heat. Add 1 lb diced boneless skinless chicken breast and cook for 5-6 minutes until no longer pink and lightly browned. Transfer to a plate and set aside.
In the same skillet, add the remaining butter. Sauté 1 finely diced yellow onion, 2 diced carrots, and 2 diced celery stalks for 6-7 minutes until the vegetables soften. Stir in 2 minced garlic cloves, 1 tbsp fresh thyme leaves, and ½ tsp black pepper and cook for 1 minute until fragrant.
Step 3: Create the Creamy Sauce and Combine
Sprinkle 3 tbsp all-purpose flour over the vegetables and stir to coat. Cook for 1 minute to remove the raw flour taste. Gradually whisk in 1½ cups chicken stock, ½ cup whole milk, and ½ cup heavy cream. Bring to a simmer and cook for 3-4 minutes until the sauce thickens and coats the back of a spoon.
Return the chicken to the skillet along with ¾ cup frozen peas. Stir to combine and cook for an additional 2 minutes until everything is heated through. Taste and adjust seasoning with ½ tsp salt, if needed. Remove from heat and let the filling cool slightly while you roll out the dough.
Step 4: Assemble and Bake the Individual Pies
On a floured surface, roll each dough disc into a 6-inch round. Place each round into a greased ramekin, pressing gently to fit. Divide the filling evenly among the four ramekins, mounding slightly in the center. Fold the excess dough over the filling, crimping the edges to seal.
Cut a small slit in the top of each pie to allow steam to escape. Brush the tops with a bit of milk or cream for extra browning. Place the ramekins on a baking sheet and bake at 375°F for 30-35 minutes until the crust is golden brown and the filling is bubbling. Let cool for 10 minutes before serving.
Pro Tips For Making Chicken Pot Pie Recipe Small
- Chill the Dough: Pop your flour-butter crust in the fridge for at least 30 minutes before rolling—I learned this the hard way after my first three pies turned into tough, chewy messes.
- Cut Chicken Small: Dice the boneless skinless chicken breast into 1/2-inch pieces so it cooks through quickly and evenly in the filling, no rubbery bites.
- Use Ice-Cold Water: Keep that water truly icy when mixing the dough, about 4-5 tablespoons, or your crust will be greasy instead of flaky.
- Vent the Top: Poke a few small slits in the crust before baking to let steam escape—my grandmother swore by this, and she never had a soggy bottom.
Pro Cooking Tips for Great chicken pot pie recipe small
Butter Temperature Control
Keep your butter ice cold until the very last moment before incorporating into the flour. I cut mine into ½-inch cubes and chill for 20 minutes before starting. This prevents the fat from melting prematurely, which would compromise those beautiful flaky layers. 🌡️
Dough Chilling Time
Don’t rush the 1-hour chill for your dough discs. This rest period allows the gluten to relax and the butter to firm up again. I set a timer to ensure I don’t cut this step short—patience here pays off with a tender, flaky crust.
Even Filling Distribution
When dividing the filling among ramekins, use a ¼-cup measure for accuracy. Mound it slightly in the center to prevent air pockets. This ensures each individual pie has the perfect ratio of creamy filling to golden crust.
Venting for Steam
Cutting a small slit in the top crust isn’t just for looks—it allows steam to escape, preventing soggy bottoms. I use a sharp paring knife to make a precise 1-inch cut in the center of each pie.
Baking Sheet Protection
Always place your ramekins on a baking sheet before putting them in the oven. This catches any potential spills and makes it easier to rotate the pies halfway through for even browning. Bake at 375°F for consistent results.
Cooling for Structure
The 10-minute rest after baking is crucial. It lets the filling set slightly so it doesn’t ooze out when sliced. I resist the urge to dig in immediately—this wait time ensures each bite holds its shape beautifully.
Nutrition Facts
Frequently Asked Questions
Can I use store-bought pie crust?
Yes, but homemade provides a flakier texture. If using store-bought, ensure it’s all-butter for best flavor. Thaw it completely before rolling to prevent cracks.
How do I prevent a soggy bottom crust?
Pre-bake the crust for 5-7 minutes before adding filling. Also, ensure your filling is slightly cooled to avoid melting the butter in the crust.
What’s the best way to reheat leftovers?
Use a toaster oven at 350°F for 10-12 minutes. This revives the crust’s crispness better than a microwave.
Can I make these ahead and freeze them?
Assemble, wrap tightly, and freeze unbaked for up to 2 months. Bake from frozen, adding 10-15 minutes to the cooking time.

- 6 Egg Cake Recipe with Oil: Light as Air With Buttery Moisture - October 4, 2026
- 4 Bean Casserole Recipe: One-Pan Heartiness With Smoky Paprika Depth - October 4, 2026
- 3-Ingredient Keto Mug Cake Recipe: Microwave Magic in 2 Minutes - October 4, 2026