
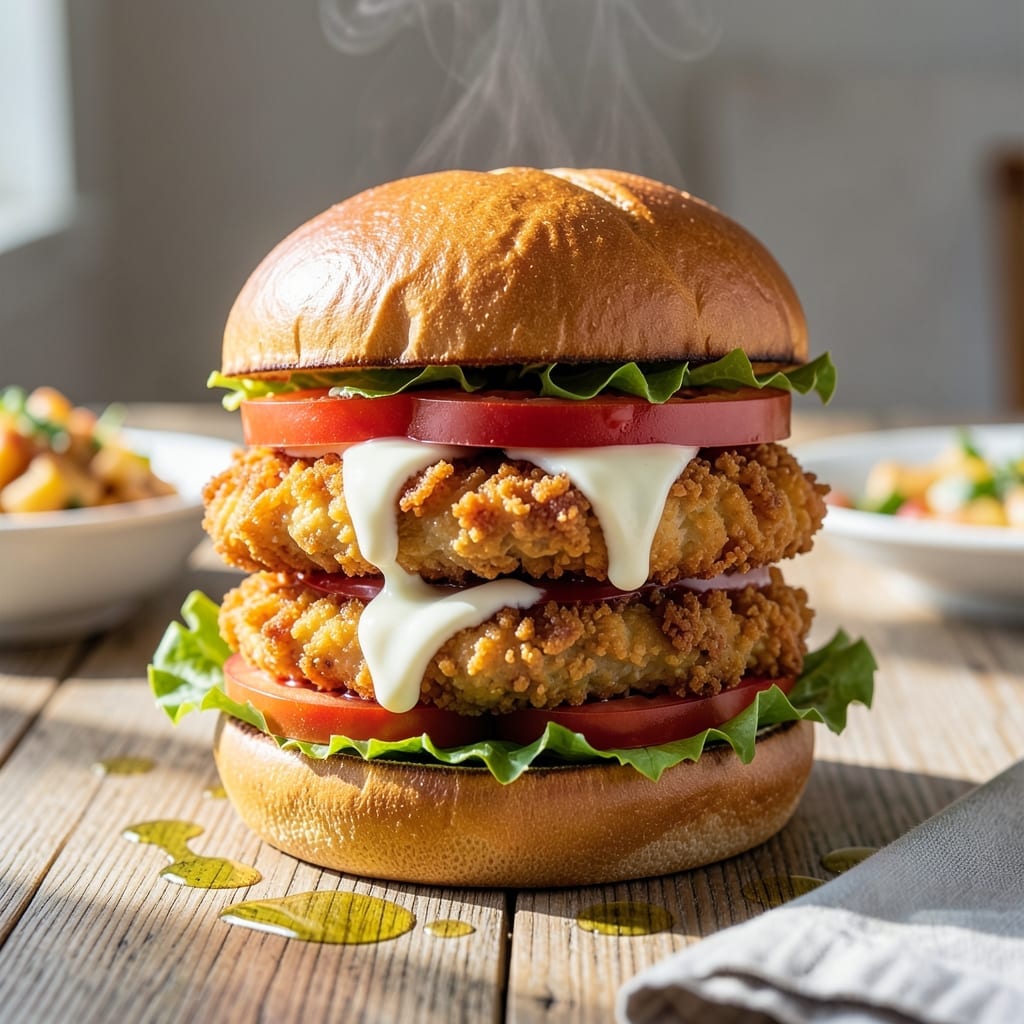
There’s a science to achieving that golden crunch and juicy center in a chicken sandwich, and this method delivers every time.
Double-dredging in seasoned flour and buttermilk creates a shatteringly crisp coating that locks in moisture. A hot oil bath at 350°F ensures even cooking without drying out the meat.
Resting the chicken for 5 minutes after frying keeps it tender. The result? A sandwich with a satisfying crunch that gives way to perfectly cooked, succulent chicken.
Serve on a soft bun with pickles and mayo for the ultimate bite.
Ingredients for Chicken Sandwich Recipe Crispy
Quality ingredients create that perfect balance of golden crunch and juicy tenderness in every bite.
| Ingredient | Amount | Notes |
|---|---|---|
| Boneless Skinless Chicken Breasts 🍗 | 1 ½ lb | Pounded to even thickness |
| All-Purpose Flour 🌾 | 2 cups | Divided for double-dredging |
| Buttermilk 🥛 | 1 cup | Full-fat for richness |
| Large Eggs 🥚 | 2 whole | For binding the coating |
| Kosher Salt 🧂 | 1 tbsp | Diamond Crystal preferred |
| Black Pepper 🌶️ | 1 tsp | Freshly ground for best flavor |
| Paprika 🌶️ | 1 tsp | Sweet or smoked variety |
| Garlic Powder 🧄 | 1 tsp | For depth of flavor |
| Onion Powder 🧅 | 1 tsp | Enhances savory notes |
| Cayenne Pepper 🔥 | ¼ tsp | Optional for heat |
| Vegetable Oil 🫒 | 4 cups | For frying, high smoke point |
| Soft Hamburger Buns 🍔 | 4 whole | Toasted before serving |
| Mayonnaise 🥄 | ½ cup | For spreading on buns |
| Dill Pickle Chips 🥒 | ½ cup | For tangy crunch |
The chicken is the foundation. Boneless, skinless breasts pounded to even thickness ensure even cooking and maximum crispiness. Buttermilk (full-fat for best results) tenderizes while the flour coating creates that signature shatter. Diamond Crystal kosher salt dissolves evenly, giving consistent seasoning throughout. For the oil, peanut or vegetable oil with a high smoke point is essential for achieving that deep golden color without burning.
Substitutions are possible but affect texture. Chicken thighs can replace breasts for more moisture (adjust cooking time). No buttermilk? Whole milk plus 1 tbsp vinegar works in a pinch. For gluten-free, swap all-purpose flour for rice flour—the crust won’t be as shattery but still crisp. The spices can be adjusted: smoked paprika adds depth, while extra cayenne brings heat for those who prefer it spicy.
Fry in batches to avoid crowding the pan—this keeps the oil temperature steady at 350°F. Drain finished pieces on a wire rack, not paper towels, to maintain crispness. The sandwich is best served immediately but holds up for 2-3 days if stored separately from the bun. Reheat in a toaster oven or air fryer to revive the crunch.
Why You’ll Love This Recipe
- One Pan Magic: I just use one bowl for the buttermilk-egg dip and another for the flour, then fry—easy cleanup.
- That Crunch Though: The buttermilk soak makes the coating stick perfectly, and the flour gives it that golden, shatter-with-every-bite crispiness.
- Lunchbox Hero: I pack these for picnics or work lunches, and they stay crispy even hours later.
- Budget Stretcher: A pound of chicken breasts makes four big sandwiches, and the pantry staples mean no extra grocery runs.
Step-by-Step Instructions for Chicken Sandwich
Master the technique for achieving that perfect golden crunch while keeping the meat impossibly juicy.
Step 1: Prepare and Season the Chicken
Begin by pounding the 1.5 lb Boneless Skinless Chicken Breasts to an even ½-inch thickness between plastic wrap. This ensures uniform cooking and prevents dry spots. Season both sides aggressively with 1 tbsp Kosher Salt, 1 tsp Black Pepper, 1 tsp Paprika, 1 tsp Garlic Powder, 1 tsp Onion Powder, and 0.25 tsp Cayenne Pepper.
The spices should create a visible, even coating. Let the seasoned chicken rest for 10 minutes—this allows the salt to penetrate the meat, ensuring every bite is flavorful and the juices stay locked in during cooking.
Step 2: Create the Double-Dredge Breading
Set up a breading station with three shallow dishes. In the first, whisk together 1 cup Buttermilk and 2 whole Large Eggs until fully combined. In the second, place 1 cup of the All-Purpose Flour. In the third, add the remaining 1 cup All-Purpose Flour.
Dredge each piece of chicken in the flour, shaking off excess, then dip into the buttermilk mixture, letting any excess drip off. Finally, press the chicken into the second dish of flour, coating thoroughly for that extra-crispy texture. The double-dredge creates a shatteringly crisp crust that seals in moisture.
Step 3: Fry to Golden Perfection
Heat 4 cups Vegetable Oil in a deep, heavy pot to 350°F. Use a thermometer for accuracy—oil that’s too cool will make the coating greasy, while oil that’s too hot will burn the outside before the inside cooks. Carefully lower the breaded chicken into the oil, working in batches to avoid crowding.
Fry for 6-8 minutes per side until the coating is deep golden brown and the internal temperature reaches 165°F. Drain on a wire rack set over a baking sheet to maintain crispness—never on paper towels, which can make the coating soggy.
Step 4: Assemble the Sandwiches
Lightly toast the 4 whole Soft Hamburger Buns until golden. Spread a generous layer of 0.5 cup Mayonnaise on both the top and bottom buns—this adds creaminess and helps the crispy coating adhere. Place a piece of fried chicken on the bottom bun and top with 0.5 cup Dill Pickle Chips for a tangy contrast.
Cap with the top bun and press gently. The pickles cut through the richness while the mayonnaise enhances the crunch. Serve immediately while the chicken is still hot and crispy for the ultimate texture contrast between the juicy meat and the golden crust.
Pro Tips For Making Chicken Sandwich Recipe Crispy
- Double-Dredge the Chicken: Dip the chicken in buttermilk, then flour, then back in buttermilk, then flour again—I learned this the hard way after my first few sandwiches had sad, wimpy crusts.
- Rest the Coated Chicken: Let the dredged chicken rest on a wire rack for 10 minutes before frying. Sounds weird, but it works: the coating sets better and stays put during cooking.
- Use Hot Oil: Get that oil screaming hot—around 350°F—before adding the chicken. After burning three batches, I finally figured out that lukewarm oil makes greasy, soggy breading.
- Pound the Breasts: Even out the chicken breasts to ½-inch thickness with a rolling pin or heavy pan. My grandmother swore by this, and she was right: no more dry, overcooked edges while waiting for the thick parts to finish.
Creative Variations of This Recipe
Spicy Nashville Hot
Whisk 2 tbsp cayenne pepper and 1 tbsp brown sugar into the buttermilk for heat. After frying, drizzle with ¼ cup hot oil mixed with 1 tbsp cayenne and 1 tsp honey. This creates that signature fiery, sticky coating Nashville is famous for. 🌶️
Honey Butter Glaze
Melt 4 tbsp butter with 2 tbsp honey and 1 tsp vanilla extract. Brush this sweet glaze over the fried chicken before assembling. The contrast between the salty crisp coating and sweet glaze is irresistible.
Parmesan Crust
Add ½ cup grated Parmesan cheese to the second flour dredge. The cheese melts into the coating during frying, creating an extra-savory, umami-rich crust. I love this variation for a more sophisticated flavor profile.
Buffalo Style
Toss the fried chicken in ½ cup Buffalo sauce (like Frank’s RedHot) mixed with 2 tbsp melted butter. Serve with blue cheese dressing and shredded lettuce on the bun. This gives you that classic Buffalo wing flavor in sandwich form. 🔥
Lemon Herb
Add 1 tbsp lemon zest and 1 tbsp chopped fresh rosemary to the flour mixture. The bright citrus and herbal notes cut through the richness. Serve with a garlic aioli for an extra layer of flavor.
Double Crunch
For maximum crunch, dip the fried chicken in beaten egg, then coat with 1 cup crushed cornflakes mixed with 1 tsp salt. Fry again for 2-3 minutes until golden. This creates an incredibly crispy texture that’s hard to resist.
Nutrition Facts
Frequently Asked Questions
Why do you pound the chicken to ½-inch thickness?
Pounding ensures even cooking and prevents dry spots. A uniform ½-inch thickness guarantees the coating crisps at the same rate as the meat cooks through. Skipping this step risks a dry, overcooked exterior.
Can I bake instead of frying?
Yes! Bake at 400°F for 20-25 minutes on a wire rack for crispiness. The texture won’t be identical, but it’s a healthier alternative that still delivers crunch.
How do I keep the coating crispy?
Drain on a wire rack, not paper towels, to avoid steam. Serve immediately and store leftovers separately from buns. Reheat in an air fryer at 375°F for 3-4 minutes.
Can I use chicken thighs?
Thighs stay juicier and can handle frying better than breasts. Adjust cooking time slightly, as they may need 1-2 minutes less per side.

- 6 Egg Cake Recipe with Oil: Light as Air With Buttery Moisture - October 4, 2026
- 4 Bean Casserole Recipe: One-Pan Heartiness With Smoky Paprika Depth - October 4, 2026
- 3-Ingredient Keto Mug Cake Recipe: Microwave Magic in 2 Minutes - October 4, 2026