
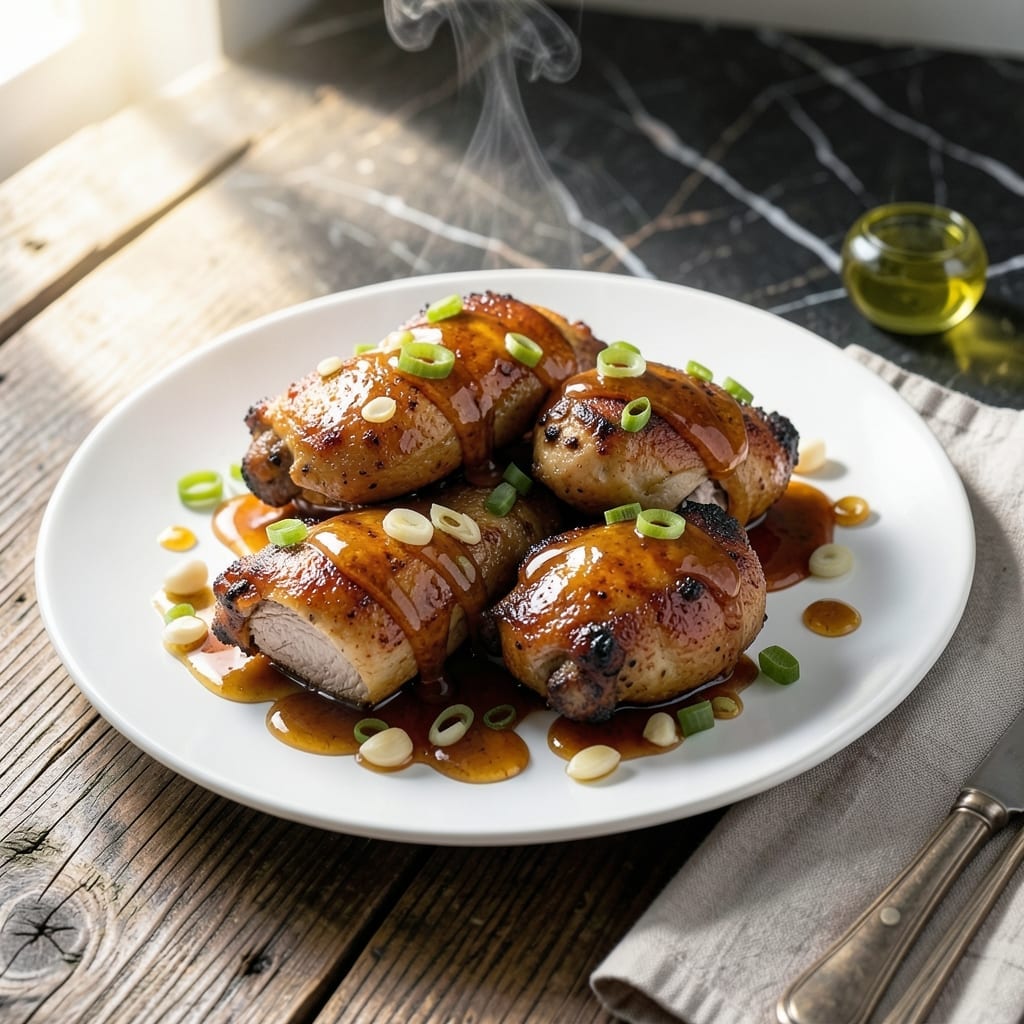
This recipe transforms ordinary chicken thighs into something extraordinary with a sticky honey garlic glaze and crispy edges. I developed this method after years of testing to achieve the perfect balance of sweet, savory, and caramelized texture.
The secret lies in searing the thighs skin-side down first to render the fat and create that coveted crispiness. A simple glaze of honey, garlic, and soy sauce builds layers of flavor as it reduces into a glossy coating.
What emerges from the pan is tender, juicy chicken with golden edges and a sauce so rich you’ll want to lick the plate. The glaze thickens as it cooks, creating a sticky, finger-licking finish that clings to every bite.
Serve with rice or steamed vegetables to soak up every drop of sauce. Here’s how to make it.
Ingredients for Chicken Thigh Recipe Honey Garlic
Bone-in chicken thighs and a handful of pantry staples create this dish with golden edges.
| Ingredient | Amount | Notes |
|---|---|---|
| Chicken Thighs 🍗 | 2 lb | Bone-in, skin-on for crispiness |
| Honey 🍯 | ⅓ cup | Pure, natural variety |
| Garlic Cloves 🧄 | 6 cloves | Minced for maximum flavor |
| Soy Sauce 🫒 | ⅓ cup | Low-sodium preferred |
| Olive Oil 🫒 | 2 tbsp | For searing chicken |
| Apple Cider Vinegar 🍏 | 1 tbsp | Balances sweetness |
| Fresh Ginger 🌿 | 1 tbsp | Grated for zing |
| Kosher Salt 🧂 | 1 tsp | Adjust to taste |
| Black Pepper 🌶️ | ½ tsp | Freshly ground preferred |
| Red Pepper Flakes 🔥 | ½ tsp | Optional for heat |
| Fresh Parsley 🌿 | 2 tbsp | Chopped for garnish |
| Sesame Seeds 🌾 | 1 tsp | Toasted for topping |
The chicken thighs are key here—bone-in, skin-on gives you that crispy finish. I always grab mine from Whole Foods or a trusted butcher; look for even sizing so they cook uniformly. The honey should be pure (none of that corn syrup stuff), and local varieties add depth. For the soy sauce, Kikkoman low-sodium is my go-to for consistent flavor without overwhelming saltiness.
No honey? Maple syrup at equal volume works in a pinch. Swap soy sauce for tamari if gluten-free, but taste first—it’s saltier. Fresh ginger is ideal, but ground ginger at one-third the amount saves time. The apple cider vinegar can be rice vinegar or lemon juice, just keep the ratio the same. Chicken breasts work too, but they won’t get as crispy (and keep an eye on cooking time).
Leftovers keep 4 days in the fridge—reheat in a pan to crisp the skin. Freeze cooked thighs for up to 3 months (the sauce may separate slightly). Always bring honey and soy sauce to room temp before mixing for easier blending.
Why You’ll Love This Recipe
- One Pan Magic: I toss everything in a single pan—honey, garlic, soy sauce—and let the oven do the work.
- Sticky Sweet Perfection: The honey caramelizes with the garlic into this glossy, finger-licking glaze that coats every bite.
- Feeds the Crowd: I make a double batch for Sunday dinner and still have leftovers for lunches all week.
- Budget Hero: Chicken thighs stay juicy and cost half what breasts do, but taste like a million bucks.
Step-by-Step Instructions for Chicken Thighs With Honey Garlic Glaze
Master these steps to achieve that perfect balance of crispy skin and sticky glaze.
Step 1: Season and Sear the Chicken Thighs
Pat the 2 lb Chicken Thighs dry with paper towels—this is non-negotiable for crispy skin. Season both sides generously with 1 tsp Kosher Salt and 0.5 tsp Black Pepper. I always use freshly ground pepper for the best flavor.
Heat 2 tbsp Olive Oil in a large skillet over medium-high heat. When the oil shimmers, add the chicken skin-side down. Sear undisturbed for 6-7 minutes until the skin is deep golden brown and crispy. Flip and cook for another 5-6 minutes until the chicken is cooked through. Transfer to a plate.
Step 2: Build the Honey Garlic Glaze
In the same skillet, reduce heat to medium. Add the minced 6 cloves Garlic Cloves and 1 tbsp Fresh Ginger. Sauté for 1 minute until fragrant—don’t let the garlic burn, or it will turn bitter.
Pour in 0.33 cup Honey, 0.33 cup Soy Sauce, and 1 tbsp Apple Cider Vinegar. Stir to combine, scraping up any browned bits from the bottom of the pan. Add 0.5 tsp Red Pepper Flakes if you want a subtle kick. Simmer for 2-3 minutes until the mixture thickens slightly and becomes glossy.
Step 3: Glaze the Chicken and Finish
Return the seared chicken to the skillet, skin-side up. Spoon the honey garlic glaze over each piece, coating them thoroughly. Reduce the heat to medium-low and let it cook for another 2-3 minutes, basting occasionally, until the sauce has thickened into a sticky glaze and clings to the chicken.
The glaze should bubble and reduce, creating that signature sheen. If it thickens too quickly, add a splash of water to loosen it. The chicken should be fully coated and the edges should look lacquered and slightly caramelized.
Step 4: Garnish and Serve
Transfer the glazed chicken to a serving platter. Drizzle any remaining sauce from the pan over the top. Sprinkle with 2 tbsp Fresh Parsley and 1 tsp Sesame Seeds for a fresh, nutty finish.
Let the chicken rest for 5 minutes before serving. This allows the juices to redistribute, ensuring each bite is tender and flavorful. Serve immediately while the glaze is still glossy and the skin remains crispy.
Pro Tips For Making Chicken Thigh Recipe Honey Garlic
- Sear Skin First: Get your pan screaming hot—about medium-high—before adding the thighs skin-side down, and don’t touch them for 5-6 minutes. I learned this the hard way after pulling them too early and losing that crispy, caramelized base that holds up to the honey garlic glaze.
- Mince Garlic Fine: Sounds tedious, but finely minced garlic (not just smashed) distributes evenly in the sauce and prevents those harsh, bitter chunks. After burning a few cloves whole, I now take the extra 2 minutes to chop it properly.
- Reduce the Sauce: Simmer the honey, soy, and garlic mixture for 3-4 minutes until it thickens slightly—it should coat the back of a spoon. Skip this and you’ll end up with a watery mess that slides right off the chicken.
- Use Thighs with Skin: Boneless, skinless thighs work in a pinch, but the skin-on version adds richness and keeps the meat juicy under the sticky glaze. My grandmother swore by this, and she was right: the fat renders into the sauce for extra flavor.
Common Mistakes When Making This Recipe
Skipping the Dry
Always pat the 2 lb Chicken Thighs completely dry before seasoning. Even a little moisture prevents proper browning and crispy skin. I use paper towels and press firmly to absorb all liquid.
Overcrowding the Pan
Don’t overload your skillet—leave space between pieces so the chicken sears instead of steams. Use a 12-inch skillet or cook in batches. Crowding drops the oil temperature, leading to soggy skin.
Burning the Garlic
When sautéing the 6 cloves Garlic Cloves and 1 tbsp Fresh Ginger, keep the heat at medium. Burnt garlic turns bitter in 30 seconds. Stir constantly and pull the pan off heat if needed.
Skipping the Rest
Let the chicken rest for 5 minutes after glazing. This lets juices redistribute so every bite stays tender. Skipping this step means dry meat and sauce pooling on your plate.
I learned this the hard way—cutting too soon ruins the texture. 💡
Thickening Too Fast
If your glaze thickens before the chicken finishes cooking, add 2 tbsp water to loosen it. The sauce should coat the back of a spoon but still be pourable. It will thicken further as it cools.
Ignoring Internal Temp
Use a meat thermometer to check for 165°F in the thickest part. Bone-in thighs often need the full 5-6 minutes per side. Don’t rely on color alone—dark meat can look done before it’s safe.
Nutrition Facts
Frequently Asked Questions
Can I use boneless thighs instead?
Yes, but reduce cooking time by 3-4 minutes per side. Boneless cooks faster and won’t get as crispy since there’s no skin. For best results, still sear over medium-high heat to develop color.
Why is my glaze too thin?
Simmer it longer over medium heat until it coats the back of a spoon. If it’s still runny, mix 1 tsp cornstarch with 1 tbsp water and stir in. Let it bubble for 1-2 minutes to thicken.
How do I store leftovers?
Keep in an airtight container for up to 4 days in the fridge. Reheat in a skillet over medium-low to revive the crispiness. The sauce will thicken as it chills.
Can I make this ahead?
Marinate the thighs in the sauce for up to 24 hours before cooking. Store in the fridge, then sear and glaze just before serving. This deepens the flavor.

- 6 Egg Cake Recipe with Oil: Light as Air With Buttery Moisture - October 4, 2026
- 4 Bean Casserole Recipe: One-Pan Heartiness With Smoky Paprika Depth - October 4, 2026
- 3-Ingredient Keto Mug Cake Recipe: Microwave Magic in 2 Minutes - October 4, 2026