
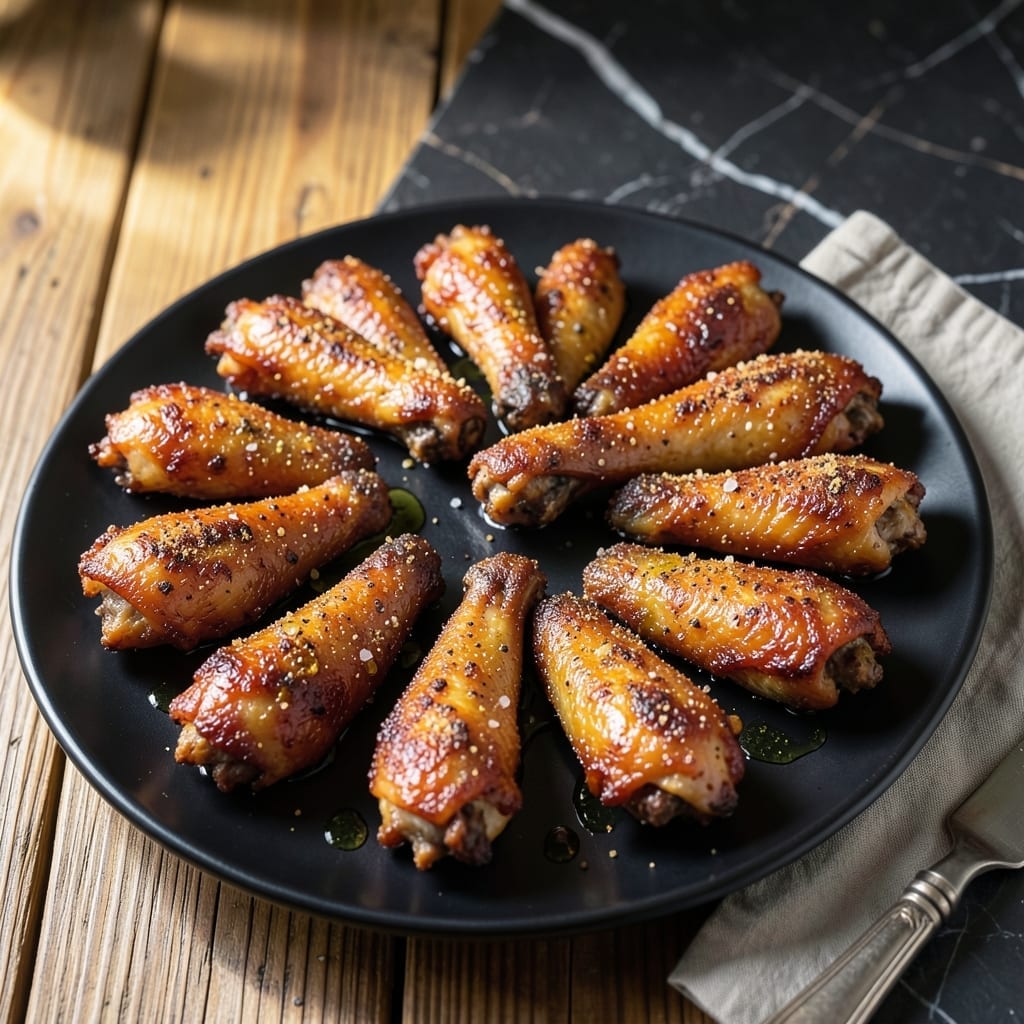
I’ve perfected the method for achieving extra crispy chicken wings straight from your oven—no deep fryer required. This technique delivers the same satisfying crunch you love, with far less mess and effort.
The secret is a two-step baking process that starts with a high-heat blast to render the fat, followed by a slightly lower temperature to ensure even cooking. A light coating of baking powder helps the skin crisp up beautifully without drying out the meat.
What you get is wings with a shatteringly crispy exterior and tender, juicy meat inside. They’re just as addictive as any restaurant version but made with simple, everyday ingredients.
Serve them with your favorite dipping sauce for a foolproof crowd-pleaser every time.
Ingredients for Chicken Wings Recipe Oven
Simple ingredients, extraordinary crunch. No deep fryer needed for these wings.
| Ingredient | Amount | Notes |
|---|---|---|
| Chicken Wings 🍗 | 3 lb | Split into drumettes and flats |
| Baking Powder 🧂 | 2 tbsp | Aluminum-free for best flavor |
| Kosher Salt 🧂 | 2 tsp | Diamond Crystal preferred |
| Black Pepper 🌶️ | 1 tsp | Freshly ground for best results |
| Garlic Powder 🧄 | 1 tsp | Not garlic salt |
| Onion Powder 🧅 | 1 tsp | Adds depth to seasoning |
| Paprika 🌶️ | 1 tsp | Sweet or smoked variety |
| Cayenne Pepper 🔥 | ¼ tsp | Adjust for heat preference |
| Olive Oil 🫒 | 1 tbsp | For light coating |
| Ranch Dressing 🥬 | 1 cup | For serving (optional) |
| Blue Cheese Dressing 🧀 | 1 cup | For serving (optional) |
| Celery Sticks 🥬 | 4 pieces | Cut into 3-inch lengths |
| Carrot Sticks 🥕 | 4 pieces | For serving (optional) |
The wings are the star here. Look for fresh, plump chicken wings—avoid any with a grayish tint or off smell. I grab mine from Costco for bulk savings, but any reputable grocery store works. The baking powder is non-negotiable (aluminum-free is best—it’s what gives that restaurant-style crispiness without drying out the meat). Don’t skip the kosher salt; Diamond Crystal is my go-to for its clean, bright flavor.
No baking powder? Cornstarch at half the amount works in a pinch, but the texture won’t be quite as shattery. Fresh garlic and onion powder can be swapped 1:1 for the powders, but dried minced garlic isn’t a great sub—it burns easily. Want more heat? Double the cayenne or add a pinch of crushed red pepper flakes. The oil can be any neutral type if you’re out of olive oil.
Wings are best eaten fresh but reheat surprisingly well. Spread them on a baking sheet at 400°F for 10 minutes to recapture that crispiness. Store leftovers in an airtight container for up to 3 days—though they rarely last that long.
Why You’ll Love This Recipe
- One Pan Magic: I toss the wings with baking powder, salt, and garlic powder, then let the oven do all the work—no frying, no mess.
- Crispy Perfection: That baking powder trick gives them an insane crunch without a deep fryer, and the garlic powder adds just the right punch.
- Crowd Pleaser: Honestly, these disappear faster than any appetizer I’ve made, whether it’s game day or a random Tuesday.
- Budget Friendly: A big batch costs pennies per serving, and leftovers (if there are any) reheat beautifully in the oven.
Step-by-Step Instructions for Chicken Wings Oven
Here’s my foolproof oven method for achieving that irresistible crispiness without frying.
Step 1: Dry and Season the Chicken Wings
Start by thoroughly patting the 3 lb Chicken Wings completely dry with paper towels. Moisture is the enemy of crispiness, so take your time—especially between the drumettes and flats where water tends to hide.
In a large bowl, toss the wings with 2 tbsp Baking Powder, 2 tsp Kosher Salt, 1 tsp Black Pepper, 1 tsp Garlic Powder, 1 tsp Onion Powder, 1 tsp Paprika, and 0.25 tsp Cayenne Pepper until evenly coated. The baking powder is the secret here—it raises the pH for extra browning and crispiness.
Step 2: Arrange and Rest for Maximum Crisp
Place a wire rack on a rimmed baking sheet to allow air circulation. Arrange the wings in a single layer on the rack, leaving a little space between each piece. This prevents steaming, which would ruin the texture we’re after.
Let the wings rest at room temperature for 10-15 minutes while you preheat the oven to 425°F. This rest allows the seasoning to adhere better and the baking powder to start working its magic on the skin.
Step 3: Bake Until Deep Golden Brown
Drizzle the 1 tbsp Olive Oil lightly over the wings and toss gently to coat. This adds just enough fat to encourage browning without making them soggy. Slide the baking sheet into the oven and bake for 45 minutes.
At the 20-minute mark, flip the wings to ensure even browning. You’re looking for a deep golden color and a crisp texture—when they’re done, the skin should sound hollow when tapped. If they’re not crispy enough, bake for an additional 5-10 minutes.
Step 4: Rest and Serve with Dips
Remove the wings from the oven and let them rest on the rack for 5 minutes. This allows the juices to redistribute, keeping the meat moist inside while the skin stays crispy outside.
Serve immediately with the 4 pieces Celery Sticks and 4 pieces Carrot Sticks on the side. Offer 1 cup Ranch Dressing and 1 cup Blue Cheese Dressing for dipping—both pair perfectly with the smoky, spiced flavor of the wings.
Pro Tips For Making Chicken Wings Recipe Oven
- Dry the Wings: Pat the wings completely dry with paper towels before seasoning—any moisture will steam them instead of crisping, and I learned this the hard way after my first batch came out soggy.
- Use Baking Powder: Toss the wings in 1 teaspoon of baking powder per pound before seasoning. Sounds weird, but it works: it breaks down proteins for extra crispiness without any odd taste.
- High Heat First: Start at 425°F for 30 minutes, then drop to 400°F to finish. I used to bake at a steady 375°F and wondered why my wings never got that deep golden color everyone raves about.
- Skip the Crowding: Spread the wings in a single layer with space between each one—yes, even if you have to use two pans. I skip this when I’m lazy, but the wings crisp up much better when they’re not touching.
Common Mistakes When Making This Recipe
Skipping the Drying Step
Never skip patting the wings completely dry with paper towels. Moisture on the skin prevents crispiness and creates steam in the oven. I spend 2-3 minutes thoroughly drying each wing, especially between the drumettes and flats. 💡
Overcrowding the Pan
Always use a wire rack on a baking sheet and arrange wings in a single layer with space between each piece. Crowding causes steaming instead of crisping. I bake in batches if needed to avoid this common mistake.
Using the Wrong Baking Powder
Only use aluminum-free baking powder for the best flavor. Regular baking powder can leave a metallic taste. The 2 tbsp quantity is non-negotiable—it’s what creates that shatteringly crisp texture.
Not Flipping During Baking
Flip the wings at the 20-minute mark to ensure even browning. Without flipping, one side will be perfectly crisp while the other remains pale and soft. I set a timer to remember this crucial step.
Opening the Oven Too Often
Resist the urge to check on the wings constantly. Every time you open the oven, you lose heat and disrupt the cooking process. I only check at the 20-minute mark to flip and again near the end. 🔥
Skipping the Rest Period
Let the wings rest for 5 minutes after baking. This allows the juices to redistribute, keeping the meat moist while maintaining that crisp exterior. Cutting this short results in dry, tough wings.
Nutrition Facts
Frequently Asked Questions
Why use baking powder on wings?
Baking powder raises the skin’s pH, creating a super crispy texture without frying. Use aluminum-free for best flavor.
Can I make these ahead of time?
Yes! Reheat on a baking sheet at 400°F for 10 minutes to restore crispiness. Store in an airtight container for up to 3 days.
What if my wings aren’t crispy enough?
Bake 5-10 minutes longer at 425°F. Ensure the rack allows air circulation and you’ve patted them completely dry.
Can I use frozen wings?
Thaw completely and pat dry first. Frozen wings release moisture, which prevents crispiness. Plan for 24 hours of fridge thawing.

- 6 Egg Cake Recipe with Oil: Light as Air With Buttery Moisture - October 4, 2026
- 4 Bean Casserole Recipe: One-Pan Heartiness With Smoky Paprika Depth - October 4, 2026
- 3-Ingredient Keto Mug Cake Recipe: Microwave Magic in 2 Minutes - October 4, 2026