
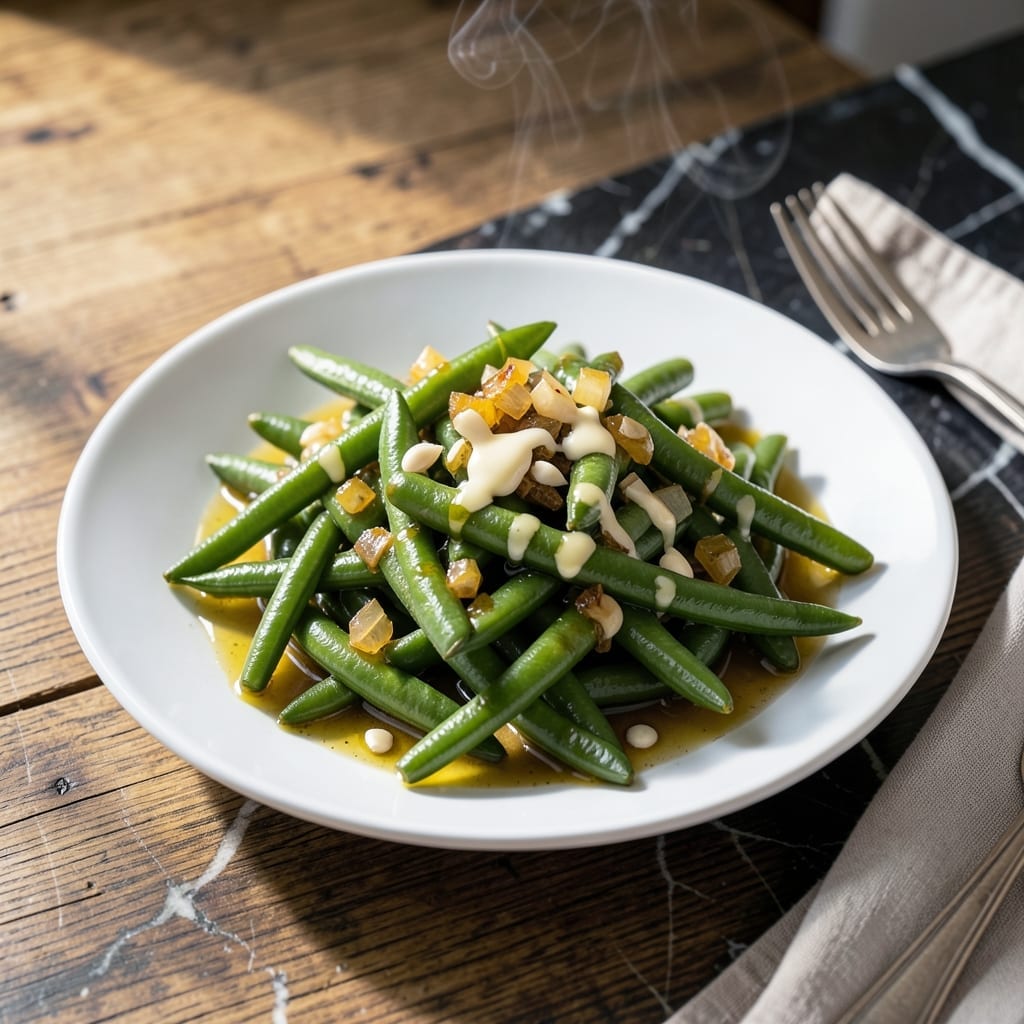
Canned green beans often get dismissed as bland, but with the right technique they become a flavor-packed side in under 10 minutes. This approach transforms them from forgettable to fantastic.
The secret is draining well, then sautéing with aromatics like garlic and onions. A splash of broth and butter creates a light sauce that clings to each bean. Simple seasonings elevate the natural flavor without overpowering.
You’ll end up with tender-crisp beans coated in savory goodness, ready to complement any main dish. The method works with any canned variety, making it a reliable last-minute solution.
Perfect for weeknight dinners when you need a quick, nutritious side. Here’s how to make them shine.
Ingredients for Recipe for Canned Green Beans
A handful of pantry staples transforms canned beans into something extraordinary for dinner tonight.
| Ingredient | Amount | Notes |
|---|---|---|
| Canned Green Beans 🥬 | 4 cans | Drained and rinsed well |
| Olive Oil 🫒 | 2 tbsp | Extra-virgin preferred |
| Yellow Onion 🧅 | 1 whole | Finely diced for even cooking |
| Garlic Cloves 🧄 | 3 cloves | Minced for maximum flavor |
| Vegetable Broth 💧 | ½ cup | Low-sodium preferred |
| Vegan Butter 🧈 | 2 tbsp | Or substitute olive oil |
| Sea Salt 🧂 | ½ tsp | Fine grain for even distribution |
| Black Pepper 🌶️ | ½ tsp | Freshly ground for best taste |
| Smoked Paprika 🌶️ | ½ tsp | Adds depth of flavor |
| Lemon Juice 🍋 | 1 tbsp | Freshly squeezed brightens dish |
| Fresh Parsley 🌿 | 2 tbsp | Chopped, for garnish |
The green beans are the foundation—any canned variety works but look for low-sodium options if available. Trader Joe’s and Whole Foods carry good organic options. The onion and garlic should be fresh (not pre-minced) for the best aromatic base. For the broth, Better Than Bouillon vegetable base makes a rich, quick solution if you don’t have pre-made on hand.
No vegan butter? Extra olive oil works just fine. Out of fresh parsley? Dried at one-third the amount is acceptable (or skip entirely). The smoked paprika adds a subtle depth—regular paprika can substitute but loses that smoky note. For extra brightness, add a pinch of red pepper flakes with the black pepper.
Leftovers keep 3-4 days in the fridge, though they’re best fresh. The beans will soften more over time but still taste great. For meal prep, cook the aromatics base separately and combine with drained beans when reheating.
Why You’ll Love This Recipe
- I’ll be real: it’s a lifesaver when the fresh veggies run out, but no one complains when this hits the table.
- Open and Go: No chopping marathons here—just open the can, sauté with onion and garlic, and dinner’s halfway done.
- Garlicky Depth: The olive oil and garlic turn those humble beans into something rich and savory, with the broth adding just the right hint of warmth.
- Weeknight Hero: Between us, this is my Tuesday-saving side. Pairs with roasted chicken, pasta, or even a fried egg on top.
Step-by-Step Instructions for Flavor-Boosted Canned Green Beans
Transform ordinary canned green beans into an elevated side dish with these professional techniques.
Step 1: Drain and Rinse the Green Beans
Drain all 4 cans Canned Green Beans in a colander, then rinse thoroughly under cold running water. This step removes excess sodium and any metallic taste from canning.
Shake the colander gently to remove as much water as possible. I always blot them with paper towels afterward—dry beans absorb the seasonings better and prevent a watery final dish.
Set the prepared beans aside while you build the flavor base. This preparation ensures your finished dish tastes fresh and vibrant, not tinny or oversalted.
Step 2: Sauté Aromatics in Olive Oil
Heat 2 tbsp Olive Oil in a large skillet over medium heat. Add the finely diced Yellow Onion and cook for 4-5 minutes until translucent and just beginning to caramelize at the edges.
Add the 3 cloves minced Garlic Cloves and cook for 30 seconds until fragrant—don’t let it brown or it will turn bitter. Stir in the 0.5 tsp Smoked Paprika at this stage to bloom its earthy depth in the warm oil.
This aromatic foundation creates layers of flavor that simple steamed beans lack. The smoked paprika adds a subtle complexity that complements the natural sweetness of the beans.
Step 3: Simmer with Broth and Vegan Butter
Pour in the 0.5 cup Vegetable Broth and scrape up any browned bits from the bottom of the pan. Add the 2 tbsp Vegan Butter and let it melt into the liquid, creating a rich, glossy base.
Return the drained green beans to the skillet and stir to coat evenly. Season with 0.5 tsp Sea Salt and 0.5 tsp Black Pepper, then reduce heat to medium-low.
Simmer uncovered for 5-7 minutes until the liquid reduces by half and the beans absorb the flavors. The liquid should coat the beans lightly without pooling at the bottom of the pan.
Step 4: Finish with Lemon and Fresh Parsley
Remove the skillet from heat and stir in the 1 tbsp Lemon Juice. The acidity brightens all the flavors and cuts through the richness of the vegan butter.
Taste and adjust seasoning if needed—remember the beans were rinsed, so you may need a pinch more salt. The flavor should be balanced: savory from the broth, slightly smoky from the paprika, with a fresh finish.
Just before serving, sprinkle with the 2 tbsp chopped Fresh Parsley. The parsley adds a pop of color and fresh herbal note that completes the dish. Transfer to a serving bowl and enjoy immediately while warm.
Pro Tips For Making Recipe For Canned Green Beans
- Drain and Rinse: Always rinse canned green beans under cold water after draining—they’ll taste fresher and lose that metallic canned flavor. I learned this the hard way after serving a tinny-tasting side dish.
- Sauté Onions First: Cook the yellow onion in olive oil for at least 3-4 minutes until soft before adding garlic. Sounds simple, but it actually changes the outcome by building a real flavor base.
- Skip the Overcooking: Warm the beans just until heated through, about 3-5 minutes—any longer and they turn mushy. My grandmother swore by this, and she was right.
- Boost with Broth: Use vegetable broth instead of water for extra depth, but let it reduce by half before serving. Does it look weird? Yes. Does it work? Every single time.
Common Mistakes When Making This Dish
Skipping the Rinse
Never skip rinsing the beans after draining—this removes up to 40% of the sodium and eliminates that metallic canned taste. I use a fine-mesh colander and rinse under cold water for 30 seconds per can. 💡
Overcrowding the Pan
Cook in batches if needed to avoid steaming the beans. Overcrowding prevents proper browning of the aromatics and results in soggy beans. I use a 12-inch skillet for 4 cans to ensure even cooking.
High Heat Cooking
Keep the heat at medium or medium-low—high heat burns the garlic and makes the broth evaporate too quickly. The beans should simmer gently, not boil vigorously. This ensures even flavor absorption.
Under-Seasoning
Rinsed beans need more seasoning than you might think. Taste after adding the initial 0.5 tsp Sea Salt and adjust—you’ll likely need at least another ¼ tsp to compensate for the sodium removed during rinsing.
Skipping the Acid
The 1 tbsp Lemon Juice at the end isn’t optional—it brightens all the flavors and balances the richness. Without it, the dish tastes flat. I add it off-heat to preserve its fresh, citrusy punch.
Using Old Spices
Check your Smoked Paprika—if it’s been in your pantry for over 6 months, it loses potency. Fresh spices make a noticeable difference in this simple dish. Store them in airtight containers away from light. ✨
Nutrition Facts
Frequently Asked Questions
Should I drain the liquid before cooking?
Always drain and rinse canned beans thoroughly before using. This removes excess sodium and any metallic taste, ensuring your dish tastes fresh and clean.
Can I use frozen green beans instead?
Yes, but thaw and drain them completely first. Frozen beans may need 2-3 minutes extra cooking time since they release more moisture than canned. Adjust seasoning to taste.
What can I substitute for smoked paprika?
Regular paprika works in a pinch, though it lacks the smoky depth. For a similar effect, add a tiny pinch of ground cumin or chipotle powder.
How do I make this dish ahead of time?
Cook the beans fully, then store in an airtight container for up to 3 days. Reheat gently on the stove with a splash of broth to refresh the flavors.

- 6 Egg Cake Recipe with Oil: Light as Air With Buttery Moisture - October 4, 2026
- 4 Bean Casserole Recipe: One-Pan Heartiness With Smoky Paprika Depth - October 4, 2026
- 3-Ingredient Keto Mug Cake Recipe: Microwave Magic in 2 Minutes - October 4, 2026