
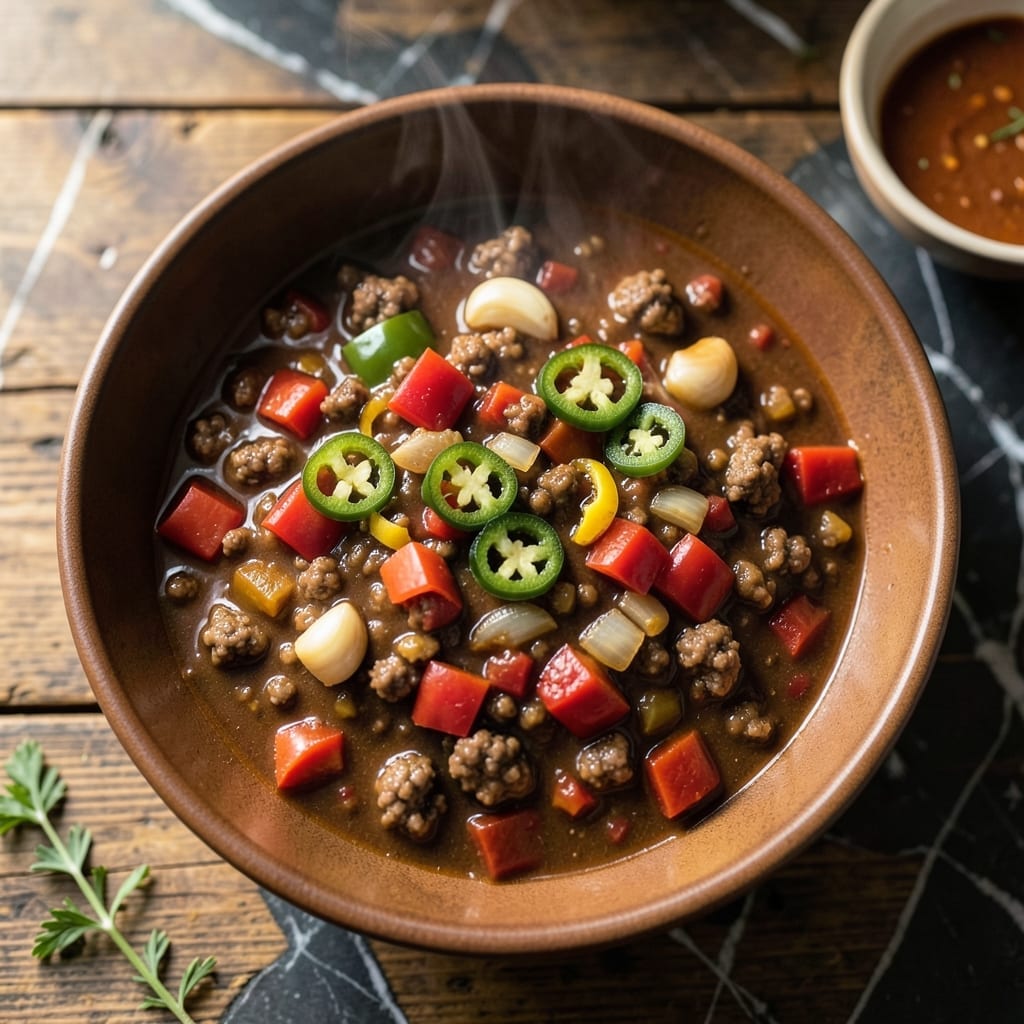
There’s nothing quite like a bowl of chili that delivers both depth of flavor and a slow-building heat. This recipe balances smoky notes with the vibrant kick of fresh peppers, creating a dish that’s as comforting as it is exciting.
The key lies in layering flavors—browning the meat properly, blooming the spices, and giving the peppers time to soften and meld. Every spoonful offers a complex blend of textures and tastes that improve with each reheating.
What emerges is a rich, hearty chili with tender meat, softened peppers, and a sauce that’s thick enough to coat the back of a spoon. The heat builds gradually, never overwhelming but always present.
Perfect for a cold evening or a casual gathering, this chili only gets better the next day. Here’s how to make it right.
Ingredients for Chili Recipe with Peppers
A rich, hearty chili starts with fresh peppers, quality beef, and a blend of smoky spices.
| Ingredient | Amount | Notes |
|---|---|---|
| Ground Beef 🥩 | 1 ½ lb | 80/20 lean-to-fat ratio preferred |
| Bell Peppers 🌶️ | 2 whole | Mixed colors, diced |
| Jalapeño Pepper 🌶️ | 1 whole | Seeds removed for less heat |
| Yellow Onion 🧅 | 1 whole | Medium size, finely diced |
| Garlic Cloves 🧄 | 4 cloves | Minced for depth of flavor |
| Canned Diced Tomatoes 🍅 | 2 cans | 14.5 oz each, with juices |
| Tomato Paste 🍅 | 2 tbsp | For thickening and richness |
| Kidney Beans 🫘 | 2 cans | 15 oz each, drained and rinsed |
| Chili Powder 🌶️ | 2 tbsp | Adjust for preferred heat level |
| Ground Cumin 🌿 | 1 tbsp | Toasted for enhanced aroma |
| Smoked Paprika 🌶️ | 1 tsp | For smoky depth |
| Beef Broth 🥣 | 2 cups | Low-sodium preferred |
| Olive Oil 🫒 | 2 tbsp | For browning meat and veggies |
| Salt 🧂 | 1 tsp | Adjust to taste |
| Black Pepper 🌶️ | ½ tsp | Freshly ground preferred |
The ground beef is the foundation here. Optimal quality requires 80/20 lean-to-fat ratio for the best flavor and texture. Whole Foods or Costco are reliable sources for consistently good meat. For the peppers, a mix of colors adds visual appeal and layered sweetness. The jalapeño brings the heat—keep the seeds for extra spice or remove them for a milder kick.
No ground beef? Ground turkey or plant-based crumbles work well as substitutes. Swap kidney beans for black beans or pinto beans if that’s what’s on hand. Fresh peppers can be replaced with frozen (thaw and drain first), but they won’t have the same crispness. The chili powder is non-negotiable for authentic flavor—Penzeys offers a high-quality blend if you’re looking to upgrade.
This chili tastes even better the next day once the flavors meld. Store in an airtight container in the fridge for up to 5 days or freeze for up to 3 months. Portion intosingle-serving containers for easy reheating.
Why You’ll Love This Recipe
- One Pot Meal: I love throwing everything into a single pot—ground beef, peppers, garlic—and letting it simmer while I do something else.
- Smoky Heat: The jalapeño and bell peppers bring just the right kick, balanced by the sweetness of the onions.
- Feeds the Crew: This chili is my go-to for game nights, potlucks, or when I need to feed a hungry family.
- Budget Stretcher: Ground beef and fresh peppers make this hearty and affordable—leftovers taste even better the next day.
Step-by-Step Instructions for Chili With Peppers
This method delivers rich, smoky chili with balanced heat and tender beans every time.
Step 1: Brown the Ground Beef
Heat the 2 tbsp olive oil in a large Dutch oven or heavy pot over medium-high heat. Add the 1.5 lb ground beef and cook, breaking it up with a wooden spoon, for 5-7 minutes until it’s no longer pink.
You’ll know it’s ready when the meat develops a rich brown color and releases its fat. Drain off all but 1 tbsp of the rendered fat—this adds flavor without making the dish greasy. Season the beef with the 1 tsp salt and 0.5 tsp black pepper during this step.
Step 2: Sauté the Aromatic Vegetables
Add the 1 whole yellow onion (finely diced), 2 whole bell peppers (diced), and 1 whole jalapeño pepper (seeds removed, finely diced) to the pot. Cook for 5-6 minutes until the vegetables soften and the onion becomes translucent.
Stir in the 4 cloves garlic cloves (minced) and cook for 30 seconds until fragrant. Be careful not to burn the garlic—it should release its aroma without turning brown. This base builds the foundation of flavor for your chili.
Step 3: Build the Flavor Base
Add the 2 tbsp chili powder, 1 tbsp ground cumin, and 1 tsp smoked paprika to the vegetable mixture. Stir well and cook for 1 minute to toast the spices—this deepens their flavor and removes any raw taste.
Next, add the 2 tbsp tomato paste and cook for another 1-2 minutes, stirring constantly. The tomato paste should darken slightly and coat the bottom of the pot. This step creates a rich, concentrated base for your chili.
Step 4: Simmer with Liquid and Tomatoes
Pour in the 2 cups beef broth and scrape up any browned bits from the bottom of the pot. Add the 2 cans canned diced tomatoes (with juices) and stir to combine. Bring the mixture to a boil, then reduce the heat to low.
Add the 2 cans kidney beans (drained and rinsed) and stir gently. Cover and let the chili simmer for 25-30 minutes, stirring occasionally. You’ll know it’s ready when the liquid has thickened slightly and the flavors have melded together.
Step 5: Adjust and Serve
Taste and adjust the seasoning if needed—you may want to add more salt or a pinch of sugar to balance the acidity. The chili should have a deep red color and a thick, hearty consistency with the beans and vegetables suspended in the sauce.
Let the chili rest for 5-10 minutes off the heat before serving. This allows the flavors to develop fully. Serve hot with your favorite toppings like shredded cheese, sour cream, or fresh cilantro.
Pro Tips For Making Chili Recipe With Peppers
- Brown the Beef Well: Cook the ground beef until deeply browned, not just gray—about 5-7 minutes over medium-high heat. This builds a rich, meaty base that carries the whole chili.
- Char the Peppers: Let the bell peppers and jalapeños sit in the hot pan for 2-3 minutes before stirring to get some blackened edges. Sounds weird, but it adds a smoky depth you can’t get otherwise.
- Skip Raw Garlic: I learned this the hard way—sauté the garlic with the onions first for 30 seconds until fragrant. Tossing it in raw leaves bitter, harsh bits throughout the chili.
- Seed the Jalapeños: Unless you want serious heat, remove the seeds and white membranes from the jalapeños before dicing. I skip this when I’m in a hurry, but the dish is way more balanced when I don’t.
Essential Equipment for This Recipe
Dutch Oven Essential
A heavy 5-6 quart Dutch oven is my go-to for chili. The thick walls distribute heat evenly, preventing hot spots that can burn your spices. I use my Lodge enameled cast iron—it’s affordable and built to last decades. The deep pot gives you plenty of room for stirring without spills. 🔥
Wooden Spoon Advantage
A sturdy wooden spoon won’t scratch your cookware and is perfect for breaking up ground beef. I prefer a flat-edged spoon for scraping up browned bits from the bottom. Avoid metal utensils with enameled surfaces to prevent chipping.
Quality Knife Set
Precision dicing matters—8-inch chef’s knife from Wüsthof makes quick work of onions and peppers. Pair it with a cutting board that has a juice groove to catch runaway bits. Keep your knives sharp; a dull blade crushes rather than slices.
Measuring Tools
Accurate spice measurements are crucial. I use stainless steel measuring spoons that nest together for easy storage. For liquids, a 2-cup glass measuring cup with clear markings ensures you’re adding the right amount of broth every time.
Slow Cooker Option
Want hands-off cooking? Transfer everything to a 6-quart slow cooker after browning the meat. Cook on low for 6-8 hours or high for 3-4 hours. Crock-Pot models with programmable timers work great for this.
Final Touch Tools
A ladle makes serving easy, and a pot holder protects your hands from the hot Dutch oven. I also keep a small bowl nearby for tasting and adjusting seasoning as the chili simmers. 💡
Nutrition Facts
Frequently Asked Questions
Can I use different types of peppers?
Swap in poblano for mild heat, or habanero for extra spice.
How long should I simmer for the best flavor?
Simmer for at least 25-30 minutes, but up to 2 hours for deeper, richer taste.
Why do I need to toast the spices?
Toasting chili powder and cumin for 1 minute wakes up their flavors and removes any raw taste.
Can I make this in a slow cooker?
Yes! Brown the meat first, then transfer to a slow cooker on low for 6-8 hours.

- 6 Egg Cake Recipe with Oil: Light as Air With Buttery Moisture - October 4, 2026
- 4 Bean Casserole Recipe: One-Pan Heartiness With Smoky Paprika Depth - October 4, 2026
- 3-Ingredient Keto Mug Cake Recipe: Microwave Magic in 2 Minutes - October 4, 2026