
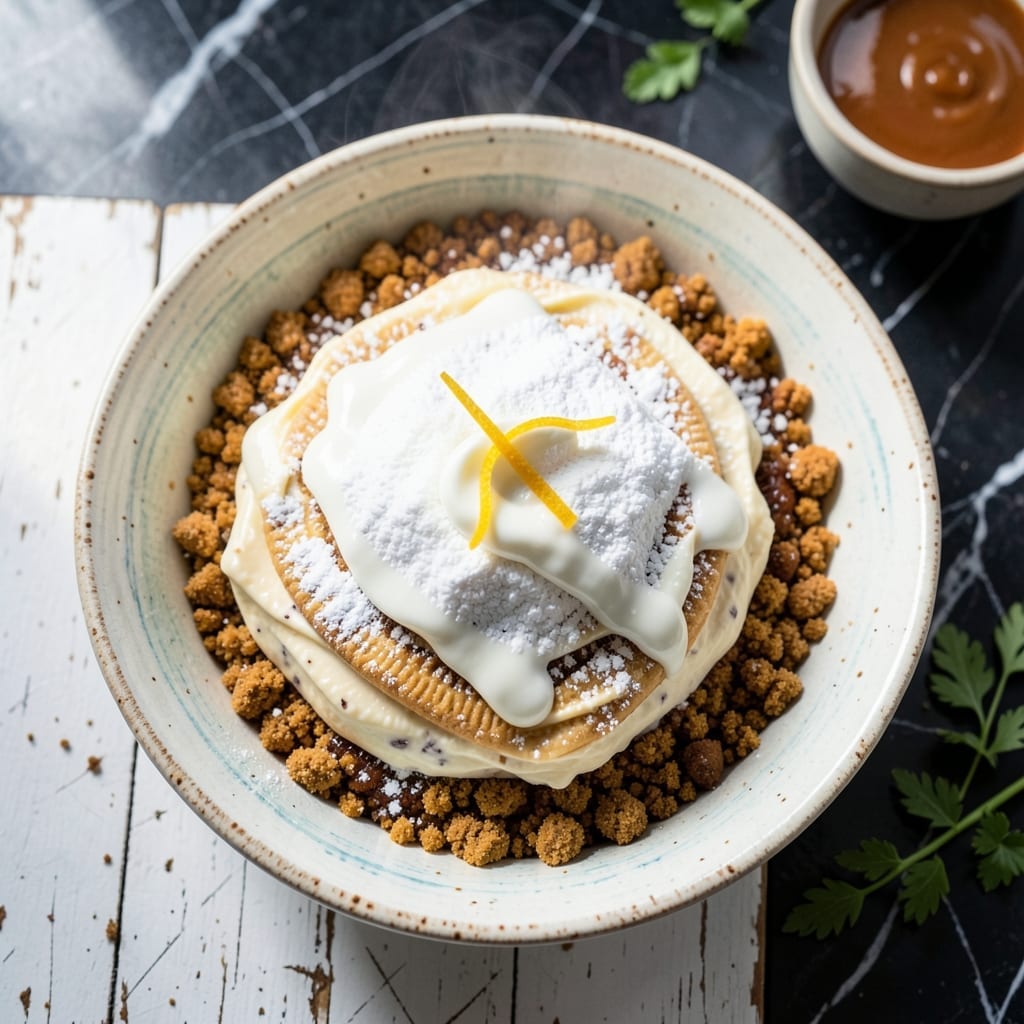
These no-bake sandwich cookie bars capture the magic of a classic treat with minimal effort. The crumbly base and creamy filling come together without ever turning on the oven, making them perfect for warm days or last-minute dessert cravings.
I’ve refined this recipe to deliver that signature crumbly texture and sweet, creamy center in every bite. The layers set up beautifully in the fridge, so you can focus on the fun part—assembling and enjoying them.
With just a handful of pantry staples, you’ll create a batch that tastes like a bakery original. The contrast between the soft filling and the crisp cookie layers is what makes these bars irresistibly good.
Serve chilled for the best texture, or pack them for picnics and potlucks. They’re sure to disappear fast.
Ingredients for Dolly Madison Bars
Pantry raid plus a few fridge staples. Golden Oreos are the secret here.
| Ingredient | Amount | Notes |
|---|---|---|
| Golden Oreo Cookies 🍪 | 14 pieces | Regular or double-stuffed both work |
| Unsalted Butter 🧈 | ½ cup | Melted for binding crust |
| Cream Cheese 🧀 | 8 oz | Full-fat, softened to room temperature |
| Powdered Sugar 🍚 | 1 ½ cups | Sifted for smooth filling |
| Vanilla Extract 🌿 | 1 tsp | Pure vanilla for flavor depth |
| Heavy Whipping Cream 🥛 | ½ cup | Cold, for fluffy texture |
| Granulated Sugar 🍚 | ¼ cup | For sweetening cream if needed |
| Salt 🧂 | ¼ tsp | Fine sea salt preferred |
| Marshmallow Fluff ⬜ | 1 cup | Store-bought or homemade |
| Chocolate Chips 🍫 | ½ cup | Semi-sweet for topping |
The Oreos are doing most of the work here—Golden gives that classic vanilla cookie flavor, but regular chocolate ones work in a pinch. I grab mine from Target or Walmart since they’re always stocked. The cream cheese needs to be full-fat (trust me on this one) for that smooth, creamy center. Philadelphia is my go-to, but store brand is fine too. Just let it sit out for an hour to soften.
No cream cheese? Mascarpone at one-to-one ratio gets you close but pricier. Out of powdered sugar? Blend granulated in a food processor until fine—works in 30 seconds. Vanilla extract is worth the splurge—McCormick or Nielsen-Massey if you want to treat yourself. The heavy cream can be swapped for coconut cream if you’re avoiding dairy (just use the thick part from the can).
These bars set up best with 4 hours in the fridge, but 2 hours works if you’re impatient. Store covered for up to 5 days, or freeze for 2 months (thaw in the fridge overnight).
Why You’ll Love This Recipe
- No-Bake Magic: I just crush, mix, and chill—no oven, no stress, just layers of Golden Oreo crumbs and creamy filling.
- Sweet & Tangy: The vanilla-kissed cream cheese filling cuts through the buttery cookie base in the best way.
- Party Ready: I bring these to potlucks and they’re always the first to disappear.
- Budget Friendly: Golden Oreos and cream cheese stretch farther than you’d think—one batch makes 24 bars.
Step-by-Step Instructions for Crumbly Sandwich Cookie Bars
Here is my no-bake method that delivers creamy, dreamy layers with zero oven time.
Step 1: Create the Cookie Crust Base
Place the 14 pieces Golden Oreo Cookies in a food processor and pulse until they become fine crumbs. I like to let the processor run for 20-30 seconds to ensure an even texture without any large chunks.
Transfer the cookie crumbs to a bowl and mix with the 0.5 cup Unsalted Butter that you’ve melted. The mixture should resemble wet sand and hold together when pressed. Press this firmly into the bottom of a 9×9-inch baking dish lined with parchment paper. Use the bottom of a glass to compact it evenly.
This creates a sturdy base that won’t fall apart when sliced. Chill in the refrigerator for 15 minutes to set while you prepare the filling.
Step 2: Whip the Creamy Filling
In a large bowl, beat the 8 oz Cream Cheese (make sure it’s softened to room temperature) with an electric mixer until smooth. Add the 1.5 cups Powdered Sugar, 1 tsp Vanilla Extract, and 0.25 tsp Salt, mixing until fully combined and fluffy.
In a separate bowl, whip the 0.5 cup Heavy Whipping Cream until stiff peaks form. Gently fold this into the cream cheese mixture until no streaks remain. The filling should be light and airy, almost like a mousse. If you prefer it sweeter, you can fold in the 0.25 cup Granulated Sugar at this stage.
Step 3: Add the Marshmallow Layer
Spread the cream cheese filling evenly over the chilled cookie crust. I use an offset spatula to create a smooth, even layer that reaches all the edges. This ensures every bite has the perfect ratio of crust to filling.
Next, carefully spread the 1 cup Marshmallow Fluff over the cream cheese layer. It’s sticky, so I wet my spatula with warm water to make spreading easier. Press gently to create an even layer that adheres to the filling beneath.
Return the dish to the refrigerator and chill for at least 1 hour to allow the layers to set firmly.
Step 4: Finish with Chocolate and Chill
Once the marshmallow layer is set, sprinkle the 0.5 cup Chocolate Chips evenly over the top. Press them lightly so they stick to the marshmallow. For extra decadence, you can melt the chocolate chips slightly and drizzle them over the bars instead.
Cover the dish and refrigerate for an additional 2-3 hours, or until completely firm. This chilling time is crucial—it allows all the layers to meld together and makes slicing clean and easy.
When ready to serve, lift the bars out of the pan using the parchment paper and cut into 12 equal squares. Store any leftovers in an airtight container in the refrigerator for up to 5 days.
Pro Tips For Making Dolly Madison Bars
- Soften the Cream Cheese: Let it sit at room temperature for at least 30 minutes before mixing—I learned this the hard way after ending up with lumpy filling that refused to smooth out.
- Crush Cookies Fine: Pulse the Golden Oreos into fine crumbs, not chunks, or your crust will be uneven and hard to press into the pan.
- Chill Between Layers: Pop the crust in the fridge for 15 minutes before adding the cream cheese layer—this keeps the crust from mixing into the filling.
- Use Real Vanilla: Skip the imitation stuff; a splash of pure vanilla extract makes a real difference in the filling’s flavor, especially with the buttery Golden Oreos.
Perfect Pairings for dolly madison bars
Beverage Pairings
These bars pair beautifully with a cold glass of whole milk—the creaminess complements the rich filling perfectly. For a caffeine boost, try iced coffee with a splash of vanilla syrup to echo the cookie flavors. 🥛
Dessert Wine
A sweet Moscato d’Asti from Italy offers a light, fizzy contrast to the dense texture. The peach and apricot notes harmonize with the vanilla and chocolate. Barefoot or Ruffino brands are affordable and widely available.
Tea Options
For a non-alcoholic choice, chamomile tea with a drizzle of honey enhances the vanilla notes. A robust Earl Grey with bergamot cuts through the sweetness. I keep Tazo or Bigelow in my pantry for this. 🍵
Fruit Sides
Serve with fresh strawberries or raspberries for a bright, acidic contrast. A quick berry compote—simmer 1 cup berries with 2 tbsp sugar for 5 minutes—adds a gourmet touch.
Ice Cream
Add a scoop of vanilla bean ice cream on top for an à la mode experience. Ben & Jerry’s or Häagen-Dazs work well. The cold ice cream against the chilled bars creates a delightful texture contrast.
Nutrition Facts
Frequently Asked Questions
Can I use regular Oreos instead of Golden?
Yes! Regular Oreos will work, though the flavor will be chocolate-based rather than vanilla. The texture will remain the same.
Why do I need to chill the bars for so long?
Chilling for 4+ hours lets the layers set firmly. This prevents the bars from falling apart when sliced and ensures clean layers in every bite.
Can I make these ahead of time?
Prepare them up to 2 days in advance. Store covered in the fridge. For longer storage, freeze for up to 2 months.
What if my filling is too runny?
Chill the filling for 30 minutes before spreading. This thickens it up. Also, ensure your cream cheese is fully softened but not melted.

- 6 Egg Cake Recipe with Oil: Light as Air With Buttery Moisture - October 4, 2026
- 4 Bean Casserole Recipe: One-Pan Heartiness With Smoky Paprika Depth - October 4, 2026
- 3-Ingredient Keto Mug Cake Recipe: Microwave Magic in 2 Minutes - October 4, 2026