
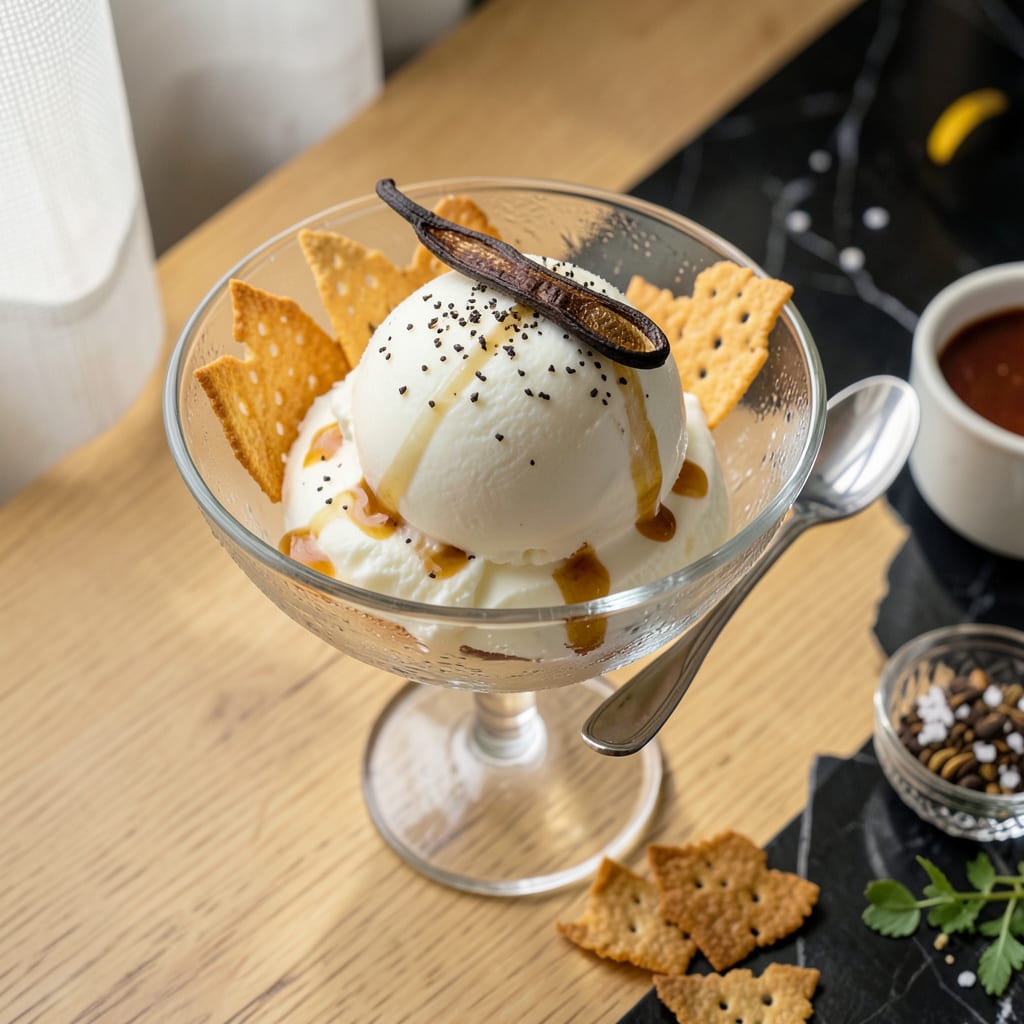
There’s something deeply satisfying about homemade vanilla ice cream that store-bought versions simply can’t match. This Eagle Brand recipe delivers that classic creamy texture and rich vanilla flavor with minimal effort, using just a handful of pantry staples. The sweetened condensed milk creates an ultra-smooth base that freezes beautifully without ice crystals.
The process couldn’t be simpler: no cooking required, just mix, chill, and freeze. Within hours, you’ll have velvety ice cream that’s perfect on its own or as a base for mix-ins like chocolate chips, crushed cookies, or fresh fruit. This is the kind of recipe that creates lasting memories and becomes a family favorite for generations.
Ingredients for Eagle Brand Vanilla Ice Cream
Eight simple ingredients create this ultra-creamy homemade vanilla ice cream with minimal effort.
| Ingredient | Amount | Notes |
|---|---|---|
| Sweetened Condensed Milk 🥛 | 14 oz | Eagle Brand preferred |
| Heavy Whipping Cream 🥛 | 2 cups | Cold, for best texture |
| Pure Vanilla Extract 🌿 | 2 tsp | High-quality for best flavor |
| Granulated Sugar 🍬 | ½ cup | Optional for extra sweetness |
| Table Salt 🧂 | ¼ tsp | Balances sweetness |
| Vanilla Bean 🌱 | 1 whole | Seeds scraped (optional) |
| Whole Milk 🥛 | ½ cup | For creamier texture |
| Light Corn Syrup 🧃 | 2 tbsp | Prevents ice crystals |
The sweetened condensed milk is the foundation here. Eagle Brand is the gold standard—its consistency and sweetness level are perfectly balanced for this recipe. Use the full-fat version (not reduced-fat) for that signature velvety texture. The heavy whipping cream should be ultra-cold—straight from the fridge or even chilled in the freezer for 15 minutes before using. For the vanilla, Nielsen-Massey or Rodelle extracts deliver superior depth of flavor compared to generic brands.
No vanilla bean? The extract alone works perfectly fine. For a richer base, substitute half-and-half for the whole milk. If avoiding corn syrup, light agave nectar works at the same ratio, though the texture may be slightly softer. The sugar is optional but recommended if you prefer a sweeter profile—vanilla bean paste can replace both the extract and bean seeds for convenience.
This ice cream keeps beautifully for up to 2 weeks in an airtight container. For optimal texture, let it soften at room temperature for 10-15 minutes before scooping. The mixture can be prepared 24 hours ahead and stored in the fridge before churning—this actually improves the flavor.
Why You’ll Love This Recipe
- No-Churn Magic: Honestly, this might be the laziest ice cream I’ve ever made—and I mean that as a compliment. Just whip the heavy cream, fold in the sweetened condensed milk and vanilla, then freeze. No fancy equipment, no constant stirring, just creamy results.
- That Condensed Milk Richness: Here’s what sold me—the sweetened condensed milk gives it this velvety, almost caramel-like depth that regular vanilla ice cream lacks. The sugar isn’t just sweet; it’s smooth, like the difference between a candy bar and a proper truffle.
- Party or Pajamas: I’ve served this at summer cookouts (with berries and hot fudge) and also eaten it straight from the container in my sweatpants at 10 p.m. It’s unfussy enough for solo cravings but impressive enough that guests ask for the recipe.
- Freezer Stash Hero: Between us, this keeps better than store-bought. The texture stays scoopable for weeks, and because it’s just five ingredients, I always have them on hand. Last-minute dessert crisis? Not anymore.
Step-by-Step Instructions for Eagle Brand Vanilla Ice Cream
This professional method ensures ultra-creamy homemade ice cream with perfect texture every time.
Step 1: Prepare the Vanilla Base
Begin by splitting the vanilla bean lengthwise with a sharp knife and scraping out the seeds. Combine these seeds with the 2 cups Heavy Whipping Cream and 0.5 cup Whole Milk in a medium saucepan over medium heat.
Heat the mixture until it reaches 170°F, stirring occasionally to prevent scorching. You’ll notice small bubbles forming around the edges of the pan—this indicates the mixture is properly heated without boiling. Remove from heat immediately once temperature is reached.
Step 2: Create the Sweetened Mixture
In a large mixing bowl, whisk together the 14 oz Sweetened Condensed Milk, 0.5 cup Granulated Sugar, 0.25 tsp Table Salt, and 2 tbsp Light Corn Syrup until fully combined. The corn syrup is essential for preventing ice crystals from forming during freezing.
Gradually whisk in the warm cream mixture from Step 1, tempering it to prevent curdling. Add the 2 tsp Pure Vanilla Extract and continue whisking until the mixture is completely smooth and all ingredients are fully incorporated. The mixture should have a pale cream color and velvety texture.
Step 3: Chill and Develop Flavors
Cover the mixture with plastic wrap, pressing it directly against the surface to prevent a skin from forming. Refrigerate for at least 4 hours, or preferably overnight. This chilling process allows the flavors to meld completely and ensures the mixture is thoroughly cold before churning.
The ideal temperature for churning is 40°F or below. You’ll know it’s ready when the mixture feels icy cold to the touch and has thickened slightly. This step is crucial for achieving the creamiest possible texture in your final product.
Step 4: Churn to Perfect Consistency
Pour the chilled mixture into your ice cream maker and churn according to the manufacturer’s instructions, typically for 20-25 minutes. The mixture will transform from liquid to soft-serve consistency, increasing in volume by about 50%.
You’ll know it’s ready when the ice cream holds its shape but is still slightly soft. The color should be a uniform pale cream with no visible ice crystals. At this point, the ice cream will have a smooth, velvety texture that coats your spoon.
Step 5: Freeze to Optimal Firmness
Transfer the soft ice cream to a lidded container, smoothing the top with a spatula. Freeze for at least 4 hours or until firm. The ideal serving temperature is 10°F, which provides the perfect balance between scoopability and creaminess.
When ready to serve, let the ice cream sit at room temperature for 5-10 minutes to soften slightly. The finished product should have a rich vanilla flavor with a luxurious, creamy mouthfeel that melts smoothly on the tongue.
Common Mistakes When Making This Dish
Overmixing the Base
When combining the sweetened condensed milk and cream mixture, it’s easy to over-whisk and incorporate too much air. This creates a foamy texture that leads to icy, grainy ice cream. I gently fold the ingredients just until combined—about 15-20 strokes with a silicone spatula is perfect. 💡
Skipping the Chill Time
Rushing the chilling process is the #1 mistake I see. The mixture must reach 40°F before churning—otherwise, you’ll end up with a soupy mess that never properly sets. I always chill mine overnight for the creamiest results. The wait is worth it when you taste that velvety texture.
Using Warm Ingredients
All dairy components need to be ice cold before mixing. If your heavy whipping cream isn’t straight from the fridge (or even better, chilled in the freezer for 15 minutes), the emulsion won’t form properly. I learned this the hard way after my first batch turned out grainy.
Overfilling the Machine
Most home ice cream makers have a 1.5 quart capacity, but you should never fill beyond ¾ full. The mixture expands as it freezes, and overfilling causes messy overflows. I measure my mixture into the canister, leaving that crucial 1-inch headspace at the top.
Impatient Freezing
After churning, the ice cream needs 4-6 hours in the freezer to reach ideal consistency. Digging in too soon gives you soft serve rather than scoopable ice cream. I set a timer and distract myself with toppings prep—crushed Oreos or hot fudge make excellent distractions. ⏰
Ignoring the Salt
That ¼ tsp table salt might seem insignificant, but it’s crucial for balancing sweetness and enhancing vanilla flavor. I once skipped it thinking “how much difference could it make?”—the result tasted flat and one-dimensional. Now I never omit this tiny but mighty ingredient.
Nutrition Facts

- 6 Egg Cake Recipe with Oil: Light as Air With Buttery Moisture - October 4, 2026
- 4 Bean Casserole Recipe: One-Pan Heartiness With Smoky Paprika Depth - October 4, 2026
- 3-Ingredient Keto Mug Cake Recipe: Microwave Magic in 2 Minutes - October 4, 2026