
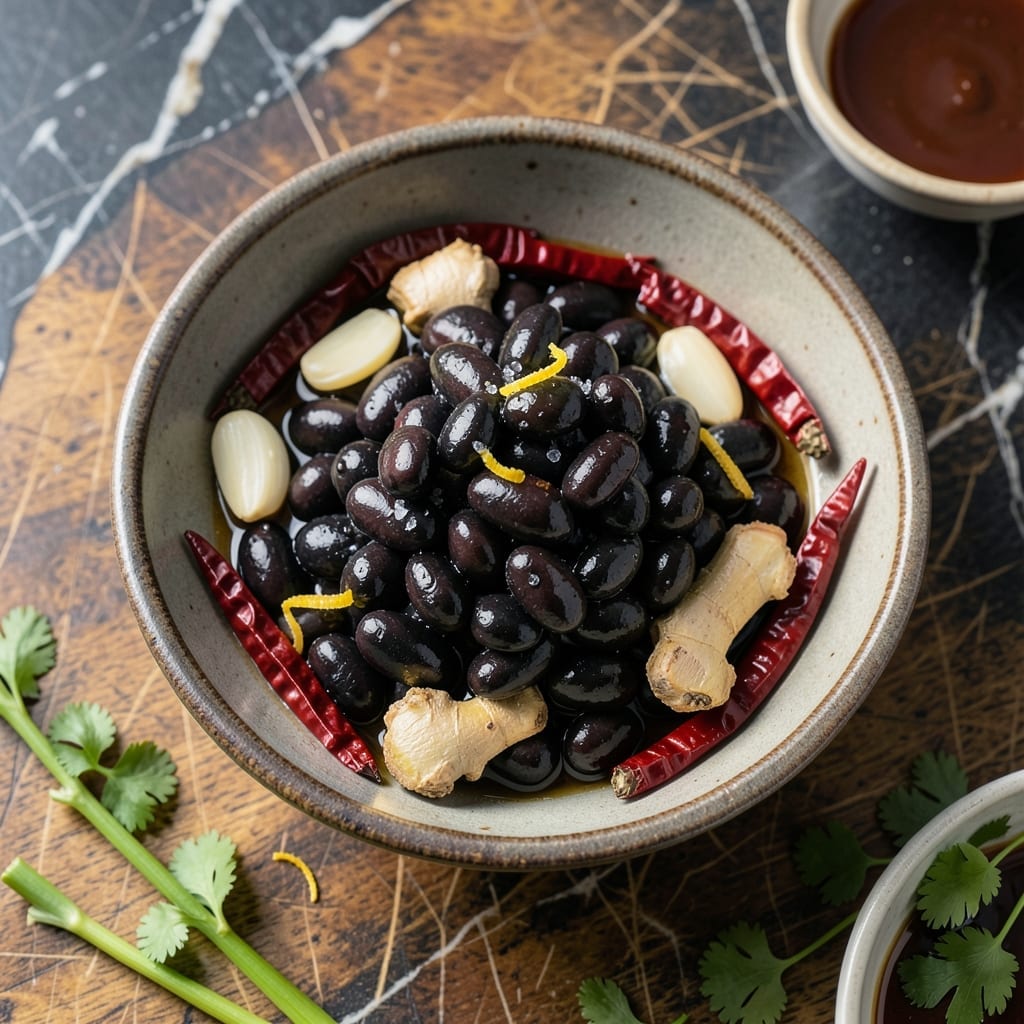
I discovered the power of fermented black beans while exploring plant-based umami sources that could transform simple dishes into something extraordinary. This method unlocks deep, savory flavors that elevate any meal.
The fermentation process develops bold, complex notes naturally. With just black beans, salt, and time, you create a versatile ingredient that adds richness to stir-fries, soups, or rice bowls without artificial additives.
What emerges after a few days is a deeply flavorful component with a satisfying texture. The beans soften slightly while maintaining their shape, absorbing the tangy, umami-rich liquid they create.
This technique requires minimal effort for maximum payoff. The result is a pantry staple that brings restaurant-quality depth to your home cooking.
Ingredients for Fermented Black Beans
Just a handful of pantry staples transform into umami-packed fermented black beans.
| Ingredient | Amount | Notes |
|---|---|---|
| Dried Black Beans 🫘 | 1 lb | Rinsed and picked over |
| Filtered Water 💧 | 4 cups | Enough to cover beans |
| Sea Salt 🧂 | 1 tbsp | Non-iodized preferred |
| Garlic Cloves 🧄 | 4 cloves | Smashed but left whole |
| Fresh Ginger 🌿 | 1 whole | 2-inch piece, sliced |
| Dried Red Chili Peppers 🌶️ | 2 whole | Optional for heat |
| Star Anise Pods ⭐ | 2 whole | Optional for depth |
| Bay Leaves 🍃 | 2 whole | For aromatic complexity |
| Soy Sauce 🫒 | 2 tbsp | Low-sodium for control |
| Rice Vinegar 🍚 | 1 tbsp | For tangy balance |
| Brown Sugar 🍚 | 1 tsp | Optional for rounding flavors |
The beans are everything here. Buy from a store with high turnover—old dried beans won’t soften properly. I get mine in bulk from Whole Foods or Natural Grocers. Sea salt is non-negotiable; iodized can inhibit fermentation. The ginger and garlic add layers, but the real magic is time. Don’t rush it—three to five days at room temp develops that deep, funky flavor.
No star anise? Skip it—the dish will still be delicious. Out of rice vinegar? Apple cider vinegar at the same amount works. Want more heat? Add extra chili peppers or a pinch of red pepper flakes. The soy sauce is key for umami, but tamari or coconut aminos are solid swaps. If you’re watching sodium, reduce the soy and boost the salt to taste.
Fermented beans keep up to 3 weeks refrigerated in their liquid. The flavor deepens over time, so I always make a double batch. Freeze extras for 6 months in airtight containers. The brine is gold—use it in dressings or marinades for an instant umami boost.
Why You’ll Love This Recipe
- Set and Forget: I just soak the beans, add salt, garlic, and ginger, then let them ferment—no babysitting required.
- Umami Bomb: The garlic and ginger turn these black beans into a deep, savory powerhouse that punches up any dish.
- Meal Prep MVP: I make a big batch and use them all week in stir-fries, soups, or even as a quick rice bowl topping.
- Pennywise Protein: Dried beans cost almost nothing, and this fermentation stretch them even further without losing flavor.
Step-by-Step Instructions for Fermented Black Beans
Here’s the method. Straightforward, tested, works every time.
Step 1: Soak and Prepare the Beans
Rinse the 1 lb Dried Black Beans thoroughly under cold water, picking out any stones or debris. Place them in a large bowl and cover with the 4 cups Filtered Water. The water should extend at least 2 inches above the beans to allow for expansion.
Let the beans soak at room temperature for 12-18 hours until they’ve doubled in size and the skins wrinkle slightly when pinched. This rehydration step is crucial—it kickstarts the fermentation process and softens the beans for even flavor absorption. Drain and rinse before proceeding.
Step 2: Combine Aromatics and Seasonings
In a clean, large jar or fermentation vessel, combine the soaked beans with the 4 cloves Garlic Cloves, 1 whole Fresh Ginger (sliced), 2 whole Dried Red Chili Peppers, 2 whole Star Anise Pods, and 2 whole Bay Leaves.
Add the 1 tbsp Sea Salt, 2 tbsp Soy Sauce, 1 tbsp Rice Vinegar, and 1 tsp Brown Sugar. The salt inhibits harmful bacteria while allowing beneficial lactic acid bacteria to thrive. Stir gently but thoroughly to distribute the seasonings evenly.
Step 3: Submerge and Begin Fermentation
Pour enough additional Filtered Water into the jar to completely submerge the beans by at least 1 inch. This anaerobic environment is essential for proper fermentation. Use a fermentation weight or a smaller jar filled with water to keep the beans submerged throughout the process.
Cover the jar loosely with a lid or clean cloth secured with a rubber band. This allows gases to escape while preventing dust or insects from entering. Store at room temperature, away from direct sunlight, for 3-5 days.
Step 4: Monitor and Maintain
Check the beans daily. You should see small bubbles forming within 24-48 hours, signaling that fermentation has begun. Skim off any foam or mold that may appear on the surface—this is normal and harmless.
If the water level drops below the beans, top it up with more Filtered Water to maintain submersion. The beans are ready when they have a tangy aroma and a slightly soft texture when tasted. The liquid will darken and develop a rich, complex flavor profile.
Step 5: Store and Use
Once fermented to your liking, transfer the jar to the refrigerator to slow down the fermentation process. The beans will keep for up to 3 months refrigerated, and the flavor will continue to develop over time.
Use these fermented black beans as a base for stews, stir-fries, or as a bold, umami-rich condiment. The liquid is equally valuable—use it to add depth to sauces, dressings, or marinades. The longer you ferment, the more intense the flavor becomes.
Pro Tips For Making Fermented Black Beans
- Rinse Twice: Always give your dried black beans two thorough rinses before soaking—I learned this the hard way after one batch turned out gritty. It removes dust and any residual dirt that can affect fermentation.
- Use Warm Water: Start your soak with warm (not hot) filtered water, around 85°F, to kickstart the fermentation process faster than cold water ever could.
- Skip the Metal: Ferment in glass or ceramic, never metal, as it can react with the salt and beans. My first stainless steel batch had a weird metallic tang that ruined the flavor.
- Smash the Aromatics: Lightly crush the garlic and ginger before adding—they’ll release more flavor into the brine. I was skeptical until I tried it, but the difference in depth is noticeable.
Regional Styles of This Dish
Chinese Douchi Style
This traditional Chinese version uses yellow or black soybeans fermented with wheat flour, salt, and sometimes ginger. The result is a salty, pungent condiment called douchi, essential in dishes like mapo tofu. I use it sparingly—about 1 tsp per serving adds incredible depth. 🌟
Korean Doenjang
Korea’s doenjang is a thick, chunky fermented soybean paste with a deep, earthy flavor. It’s made by fermenting soybean blocks in brine for months. Try 2 tbsp mixed with 1 tbsp gochujang for a bold marinade or stew base.
Japanese Natto
Japan’s natto features whole soybeans fermented with Bacillus subtilis, creating a sticky, slimy texture with a strong ammonia-like aroma. It’s often eaten for breakfast with rice and soy sauce. The fermentation takes 12-24 hours at 100°F.
Mexican Frijoles Negros
In Mexico, black beans are fermented with epazote and garlic for a milder, tangy flavor. The process is similar to ours but often includes 1 tsp cumin seeds and 1 dried chile de árbol for heat. This style works perfectly in tacos or soups.
Indonesian Tempeh Bongkrek
Indonesia uses a unique fermentation with Rhizopus oligosporus mold to bind soybeans into cakes. For a twist, add 1 tbsp coconut vinegar to the brine for a tropical tang. The texture is firm, almost nutty.
Filipino Tao-Si
Filipino tao-si are salted, fermented black beans preserved in a sweet-salty brine. They’re smaller and less pungent than Chinese douchi. Use 1 tbsp in adobo or kare-kare for authentic Filipino flavor. 💛
Nutrition Facts
Frequently Asked Questions
How long do I need to soak the beans first?
Soak them for 12-18 hours in enough water to cover by 2 inches. This ensures proper rehydration and jumpstarts fermentation.
What if white mold appears during fermentation?
Skimming off white mold is normal and safe. Harmful molds are colorful or fuzzy. Ensure beans stay submerged under liquid to prevent issues.
Can I use iodized salt instead?
Avoid iodized salt—it can inhibit fermentation. Use 1 tbsp of sea salt or kosher salt for best results.
How do I know when they’re ready?
Look for bubbles within 24-48 hours and a tangy aroma. Taste test after 3 days—they should be slightly soft with rich flavor.

- 6 Egg Cake Recipe with Oil: Light as Air With Buttery Moisture - October 4, 2026
- 4 Bean Casserole Recipe: One-Pan Heartiness With Smoky Paprika Depth - October 4, 2026
- 3-Ingredient Keto Mug Cake Recipe: Microwave Magic in 2 Minutes - October 4, 2026