
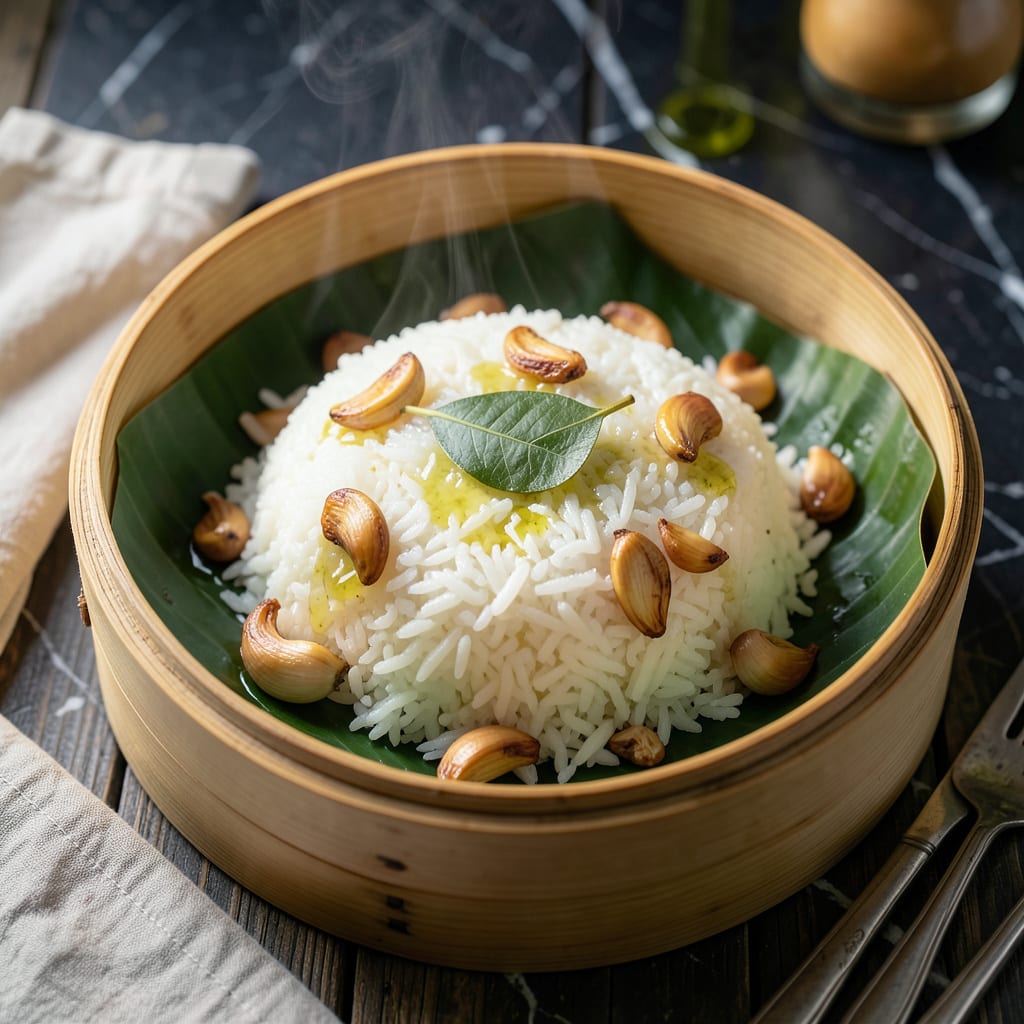
Achieving perfectly pillowy soft Filipino steamed rice requires precise technique and the right water-to-rice ratio. This fundamental dish forms the heart of every Filipino meal.
Using a rice cooker or traditional steaming method, you’ll master the art of fluffy, separate grains that complement any main course. The secret lies in the rinse and rest process.
Ingredients for Filipino Steamed Rice
Six ingredients deliver that signature Filipino rice texture. Simple yet precise.
| Ingredient | Amount | Notes |
|---|---|---|
| Jasmine Rice 🌾 | 2 cups | Long-grain white preferred |
| Water 💧 | 2 ½ cups | Filtered for best texture |
| Kosher Salt 🧂 | ½ tsp | Diamond Crystal preferred |
| Coconut Oil 🥥 | 1 tbsp | Optional for aroma |
| Bay Leaf 🍃 | 1 whole | Dried, optional for scent |
| Garlic Cloves 🧄 | 2 cloves | Smashed lightly, optional |
Jasmine rice is non-negotiable here. Look for Thai or Vietnamese brands at Asian markets—Golden Phoenix or Elephant are reliable. The grains should be uniform and unbroken. Water quality matters more than you think; filtered water prevents any off flavors. For the coconut oil, unrefined virgin adds a subtle sweetness that complements the rice beautifully.
No jasmine rice? Long-grain white rice works but texture will differ slightly. Skip the coconut oil? Neutral oils like avocado or vegetable oil are fine. Bay leaf can be omitted, but it adds a traditional depth. If using garlic, fresh cloves only—no pre-minced or jarred. The salt can be adjusted to taste, but Diamond Crystal dissolves more evenly than table salt.
Uncooked rice keeps in a sealed container for 6-12 months. Once cooked, store in the fridge for up to 5 days or freeze for 3 months. Reheat with a splash of water to restore moisture (worth the extra minute).
Why You’ll Love This Recipe
- Set and Forget: I just dump everything in the rice cooker and walk away—jasmine rice, water, a swipe of coconut oil, and that bay leaf does all the work.
- Rich Aroma: The coconut oil and bay leaf give it this warm, fragrant depth that plain rice just can’t touch.
- Pairs With Anything: Honestly, it’s my base for adobo, sinigang, even just a fried egg on top when I’m lazy.
- Stretches Far: One batch feeds us for two meals, and leftovers reheat like a dream—no mushy mess.
Step-by-Step Instructions for Filipino Steamed Rice
Here’s the method. Straightforward, tested, works every time.
Step 1: Rinse and Prepare the Rice
Place the 2 cups Jasmine Rice in a fine-mesh strainer and rinse under cold running water until the water runs clear. This removes excess starch and prevents gummy rice. I always use my hand to agitate the grains gently, ensuring thorough cleaning without breaking them.
Drain the rice completely—any remaining water will throw off your liquid ratio. Transfer it to your rice cooker or heavy-bottomed pot. The rice should look clean and separate, with no cloudy residue. This step is non-negotiable for achieving those distinct, fluffy grains.
Step 2: Add Aromatics and Seasonings
To the rice, add the 0.5 tsp Kosher Salt, 1 tbsp Coconut Oil, 1 whole Bay Leaf, and 2 cloves Garlic Cloves. The coconut oil adds a subtle sweetness that’s characteristic of Filipino rice, while the bay leaf and garlic infuse gentle aroma.
I lightly smash the garlic cloves with the flat side of my knife—just enough to release their essence without mincing them. The bay leaf can be added whole; it will steep like tea during cooking. Stir these into the rice so they distribute evenly, ensuring every bite carries these flavors.
Step 3: Add Water and Soak Briefly
Pour in the 2.5 cups Water and stir once to settle the rice and aromatics. The water should cover the rice by about an inch. For Filipino-style rice, the ratio of 1:1.25 rice to water is ideal—slightly more water than standard steamed rice for that pillowy texture.
Let the rice soak for 10-15 minutes before cooking. This step allows the grains to absorb some moisture, promoting even cooking and preventing a dry, crumbly result. You’ll notice the rice plumps slightly during this time.
Step 4: Cook Until Water Absorbs and Rice Steams
If using a rice cooker, close the lid and select the standard white rice setting. For stovetop, bring to a boil over medium-high heat, then immediately reduce to low heat, cover, and simmer. In both methods, resist the urge to lift the lid—releasing steam disrupts the cooking process.
Cook for 15-18 minutes until all the water has been absorbed and the rice appears dry on top. You’ll see steam vents releasing a fragrant aroma, and the grains will look translucent. At this point, turn off the heat and let it sit covered for an additional 10 minutes to steam in its own moisture.
Step 5: Fluff and Rest Before Serving
After the resting period, remove the bay leaf and garlic cloves. Gently fluff the rice with a fork, lifting from the bottom to separate the grains without crushing them. The rice should be tender, with individual grains that hold their shape yet cling together slightly.
Let it rest for 5 minutes more before serving. This final rest ensures the texture is uniformly soft and the flavors have fully melded. The coconut oil will have perfumed every grain, and the salt will be evenly distributed, making this the perfect accompaniment to any Filipino dish.
Pro Tips For Making Filipino Steamed Rice
- Rinse the Rice: Wash the jasmine rice under cold water until the water runs clear—this removes excess starch so your steamed rice stays light and fluffy, not gummy.
- Use the Right Ratio: Stick to a 1:1.25 rice-to-water ratio (1 cup rice to 1.25 cups water) for perfect tenderness. I learned this the hard way after ending up with mushy rice more than once.
- Don’t Skip the Bay Leaf: Sounds weird, but it works: adding a single bay leaf to the water while steaming infuses a subtle aroma that makes the rice taste distinctly Filipino.
- Let It Steam: Once the water is absorbed, turn off the heat and let the rice sit covered for 10 minutes—this guarantees even cooking and prevents a burnt bottom.
Serving Suggestions for This filipino steamed rice
Traditional Pairings
Serve this rice alongside classic Filipino dishes like adobo or sinigang. The fluffy grains soak up sauces beautifully. I love pairing it with chicken adobo—the tangy vinegar sauce contrasts perfectly with the coconut-scented rice. 💛
Breakfast Style
For breakfast, serve it with garlic fried rice (sinangag) by sautéing day-old portions with minced garlic. Top with a fried egg and atoes (Filipino salted tomatoes) for a hearty morning meal. The rice holds up well to frying.
Banana Leaf Wrap
For special occasions, wrap the warm rice in banana leaves before serving. This adds a subtle earthy aroma and keeps the rice moist. I use fresh leaves briefly passed over an open flame to soften them. 🌿
Simple Garnishes
Sprinkle with toasted garlic bits or green onion slices for a pop of color and texture. A drizzle of calamansi juice adds a refreshing citrus note that brightens the dish.
Kid-Friendly Shape
Use cookie cutters to shape the rice into fun forms—stars, hearts, or animals. My kids love this presentation, and it makes the dish more approachable for picky eaters. Press firmly to maintain the shape.
Leftovers Idea
Transform leftovers into rice balls (arroz valenciana style) by mixing with shredded chicken, peas, and carrots. Roll into balls and pan-fry until golden. This repurposing trick saves time and reduces waste.
Nutrition Facts
Frequently Asked Questions
Why rinse the rice before cooking?
Rinsing removes excess starch from the surface of the grains. This prevents the rice from becoming gummy or sticky. It also washes away any dust or debris.
Can I use a different type of rice?
Jasmine rice is ideal, but long-grain white rice works in a pinch. Avoid short-grain varieties as they tend to clump. The texture will be slightly different but still tasty.
What if my rice turns out too dry?
Add 2-3 tablespoons of hot water, cover, and let it steam for 5 minutes. This should restore moisture without making it mushy.
How do I store leftover rice?
Let it cool completely, then transfer to an airtight container. Store in the fridge for up to 5 days or freeze for 3 months.

- 6 Egg Cake Recipe with Oil: Light as Air With Buttery Moisture - October 4, 2026
- 4 Bean Casserole Recipe: One-Pan Heartiness With Smoky Paprika Depth - October 4, 2026
- 3-Ingredient Keto Mug Cake Recipe: Microwave Magic in 2 Minutes - October 4, 2026