
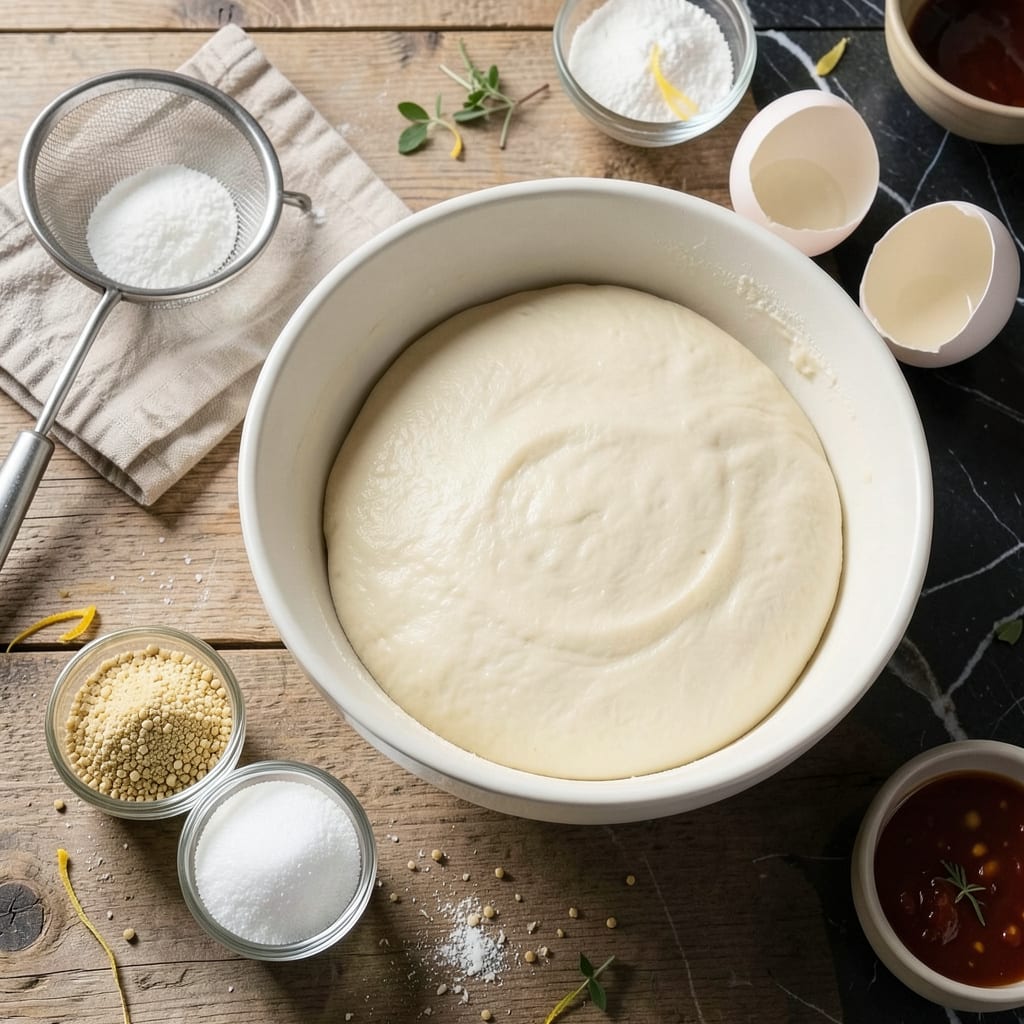
Creating gluten-free pierogi dough that’s both tender and stretchable requires the right balance of alternative flours and binders. This recipe delivers a dough that handles like traditional versions, without the gluten. The key lies in combining rice flour for structure with tapioca starch for elasticity, plus xanthan gum to mimic gluten’s binding properties.
Unlike many gluten-free doughs that crack or tear, this version rolls out smoothly and holds fillings beautifully. After testing multiple ratios, I’ve perfected a formula that boils without falling apart and pan-fries to golden perfection. The result is a dough that actually stretches when you pull it, making assembly nearly effortless for even first-time pierogi makers.
Ingredients for Gluten Free Pierogi Dough
Ten simple ingredients transform into a stretchy, gluten-free dough that actually behaves like traditional pierogi dough.
| Ingredient | Amount | Notes |
|---|---|---|
| White Rice Flour 🌾 | 1 ½ cups | Finely milled for best texture |
| Tapioca Starch 🌾 | 1 cup | Provides essential elasticity |
| Xanthan Gum 🧪 | 1 ½ tsp | Critical for gluten-like binding |
| Potato Starch 🥔 | ½ cup | Lightens dough structure |
| Salt 🧂 | 1 tsp | Fine sea salt preferred |
| Large Eggs 🥚 | 2 whole | Room temperature for binding |
| Sour Cream 🥛 | ½ cup | Full-fat for tenderness |
| Unsalted Butter 🧈 | 4 tbsp | Melted and slightly cooled |
| Apple Cider Vinegar 🍎 | 1 tsp | Balances dough chemistry |
| Warm Water 💧 | ¼ cup | About 110°F for activation |
The rice flour and tapioca starch are non-negotiable here—they create that perfect balance of structure and stretch. Bob’s Red Mill makes reliable versions of both (check the gluten-free label). Xanthan gum is the magic binder, but 1:1 substitution with guar gum works if that’s what you’ve got. I get mine from Whole Foods bulk section—cheaper and fresher. The potato starch is what keeps the dough from getting gummy when boiled, so don’t skip it (look for pure starch, not flour).
No sour cream? Full-fat Greek yogurt works in a pinch, though the dough might be slightly denser. For vegan versions, unsweetened coconut yogurt is your best bet. The eggs are crucial for binding, but if you’re allergic, try 2 tbsp ground flaxseed + 6 tbsp water (let it gel first). Butter can be swapped for refined coconut oil if dairy’s an issue—just make sure it’s fully melted. The vinegar might seem odd, but it tenderizes the dough (apple cider’s my go-to, but white wine vinegar works too).
This dough keeps beautifully—wrap it tight in plastic and refrigerate for up to 3 days, or freeze for 2 months. Let it come to room temp before rolling (about 30 minutes). If it cracks when rolling, you likely need more water (add by the teaspoon). The filled pierogi freeze like dreams—boil from frozen, just add 2 minutes to cook time. Pro tip: dust everything with rice flour to prevent sticking during assembly.
Why You’ll Love This Recipe
- No-Knead Magic: Honestly, I was skeptical about gluten-free dough until I tried this. Just mix the white rice flour, tapioca starch, and xanthan gum with warm water—no rolling pin battles, no sticky mess. It comes together smoother than my old wheat-flour version ever did.
- That Perfect Bite: Here’s what sold me—the potato starch gives these pierogi a tender, almost buttery texture that doesn’t turn gummy when boiled. Paired with savory fillings, the dough holds its own without that weird aftertaste some gluten-free blends leave behind.
- Freezer-Friendly Lifesaver: I make a double batch on Sundays, freeze the uncooked pierogi on a tray, then toss them into bags. Straight from freezer to boiling water in 5 minutes means I’ve got a solid dinner (yes, even on a Tuesday night) without last-minute stress.
- Budget Stretch Champion: A 2-pound bag of white rice flour costs me less than specialty GF blends, and this recipe uses just 1 cup per batch. Between us, I’ve fed six people for under $8—fillings included—with leftovers that reheat like a dream. No sad, dry pierogi here.
Step-by-Step Instructions for Gluten-Free Pierogi Dough
This method delivers stretchable, tender dough that handles just like traditional pierogi dough.
Step 1: Combine Dry Ingredients for Perfect Structure
In a large mixing bowl, whisk together the 1.5 cups white rice flour, 1 cup tapioca starch, 0.5 cup potato starch, 1.5 tsp xanthan gum, and 1 tsp salt. I use a fine-mesh sieve for the rice flour to eliminate any potential grittiness in the final dough.
The xanthan gum is critical here—it mimics gluten’s elasticity, so don’t skip it. Whisk vigorously for at least 1 minute until the mixture is completely uniform and any lumps from the starches are broken up. You should see a pale, slightly off-white powder that feels silky when rubbed between your fingers.
Step 2: Create the Wet Ingredient Base
In a separate medium bowl, beat the 2 whole large eggs lightly with a fork until just combined—you want them broken up but not frothy. Add the 0.5 cup sour cream, 4 tbsp melted unsalted butter (cooled to room temperature), and 1 tsp apple cider vinegar. Whisk until the mixture is smooth and fully emulsified.
The vinegar might seem odd, but it tenderizes the dough by relaxing the proteins in the eggs. The mixture should look like thin custard and coat the back of a spoon. If your butter was too hot, you’ll see it separate—let it cool slightly and whisk again until homogeneous.
Step 3: Bring the Dough Together
Create a well in the center of your dry ingredients and pour in the wet mixture. Use a silicone spatula to fold everything together until you see no dry spots remaining. The dough will be shaggy at this point—that’s normal. Now drizzle in the 0.25 cup warm water (about 110°F) while continuing to fold.
Switch to your hands and knead gently in the bowl for 2-3 minutes until the dough forms a smooth, slightly sticky ball. It should feel pliable but not wet—if it sticks to your hands, dust with a bit more rice flour. The dough is ready when you can press your finger into it and it springs back slowly, leaving a slight indentation.
Step 4: Rest for Optimal Texture
Divide the dough into 4 equal portions (about 120g each) and shape them into discs. Wrap each tightly in plastic wrap, pressing the wrap directly against the dough to prevent drying. Let rest at room temperature for 30 minutes—this relaxation period is crucial for stretchability.
After resting, the dough should feel noticeably softer and more elastic. When you roll it out, it should stretch thinly without tearing. If the dough resists rolling, let it rest another 10 minutes—gluten-free doughs need this extra time to hydrate fully and develop the right consistency for wrapping fillings.
Dietary Considerations for This gluten free pierogi dough
Dairy-Free Adaptations
For a completely dairy-free version, I’ve had great success replacing the sour cream with unsweetened coconut yogurt—just make sure it’s thick and full-fat. The 4 tbsp butter can be swapped for refined coconut oil (melted and cooled), which won’t add coconut flavor. I’ve tested this with Nutiva brand and the results were indistinguishable from the original. 🌱
If you’re avoiding dairy but can tolerate ghee, clarified butter works beautifully here. For the eggs, try 2 tbsp ground flaxseed + 6 tbsp water (let it sit for 5 minutes to gel). The dough may be slightly denser but still holds together well when boiled.
Vegan Modifications
To make this fully vegan, combine the dairy-free swaps above with a flax egg replacement. The key is maintaining the fat content—use full-fat coconut milk (the canned kind) instead of sour cream. I’ve found Thai Kitchen brand gives the best texture. Add 1 extra tbsp tapioca starch to compensate for the lack of egg proteins.
The dough will be slightly more delicate when rolling, so work quickly and keep everything well-floured with rice flour. Boil the pierogi gently—vegan versions can be more fragile until cooked through. They’ll still pan-fry to golden perfection with a crisp exterior.
Nut-Free Options
While this recipe is naturally nut-free, be cautious with your flour brands. I recommend Bob’s Red Mill or Authentic Foods for their dedicated gluten-free facilities. If you’re making sweet pierogi fillings, skip nut-based options and try sunflower seed butter or pumpkin puree instead.
For extra safety, wipe down all surfaces with hot soapy water before starting, as gluten-free flours can sometimes be processed in facilities that handle nuts. The dough itself contains no nuts, but cross-contamination is always a risk with specialty flours.
Low-FODMAP Adjustments
To make this FODMAP-friendly, replace the sour cream with lactose-free yogurt and use garlic-infused oil in your fillings instead of fresh garlic. The tapioca starch is naturally low-FODMAP, but check your rice flour brand—some can be high in resistant starch.
I’ve successfully used Green Valley Creamery lactose-free sour cream with excellent results. The dough’s texture remains virtually identical, though you might need an extra 1-2 tsp water during kneading since lactose-free products can be slightly drier.
Allergen Awareness
This dough contains eggs and dairy in its standard form. For egg allergies, the flax egg substitution works well, though the dough may be slightly less elastic. Always check your xanthan gum source—some brands derive it from wheat (though it’s gluten-free after processing). I use Modernist Pantry for their corn-based version. 💡
If you’re cooking for someone with celiac disease, ensure all ingredients are certified gluten-free and use separate cooking equipment. The dough handles cross-contamination well, but it’s better to be safe with dedicated rolling pins and cutting boards.
Make-Ahead Tips
The dough can be made 2 days ahead and refrigerated, or frozen for up to 2 months. Wrap individual discs tightly in plastic, then place in a ziplock bag with all air removed. Thaw overnight in the fridge before using. I’ve found the texture actually improves after 24 hours of chilling—the starches fully hydrate. ✨
For filled pierogi, freeze them on a tray first, then transfer to bags. Boil from frozen, adding 2 extra minutes to the cooking time. They’ll keep their shape beautifully and reheat like fresh-made.
Nutrition Facts
Frequently Asked Questions
Why does my gluten-free dough keep cracking?
Cracking usually means the dough needs more hydration or rest time. Try adding 1-2 tsp warm water and kneading gently. If it’s still problematic, let it rest another 15-20 minutes covered with a damp towel—the starches need time to fully absorb moisture.
Can I make this without xanthan gum?
Xanthan gum is crucial for elasticity, but psyllium husk powder works as a substitute. Use 1 tbsp instead of the xanthan gum. The texture will be slightly denser, but it’ll still hold together when boiled.
What’s the best way to roll out the dough?
Dust your surface and rolling pin generously with rice flour. Roll to 1/8-inch thickness—any thinner risks tearing. If it sticks, lift and re-flour frequently. For perfect circles, use a 3-inch cutter and avoid twisting.
How do I prevent pierogi from sticking together?
After shaping, place them on a flour-dusted tray and freeze for 20 minutes before boiling. This sets the shape. When boiling, work in small batches and stir gently to prevent contact. Cooked pierogi can be tossed with 1 tsp oil to prevent sticking.

- 6 Egg Cake Recipe with Oil: Light as Air With Buttery Moisture - October 4, 2026
- 4 Bean Casserole Recipe: One-Pan Heartiness With Smoky Paprika Depth - October 4, 2026
- 3-Ingredient Keto Mug Cake Recipe: Microwave Magic in 2 Minutes - October 4, 2026