
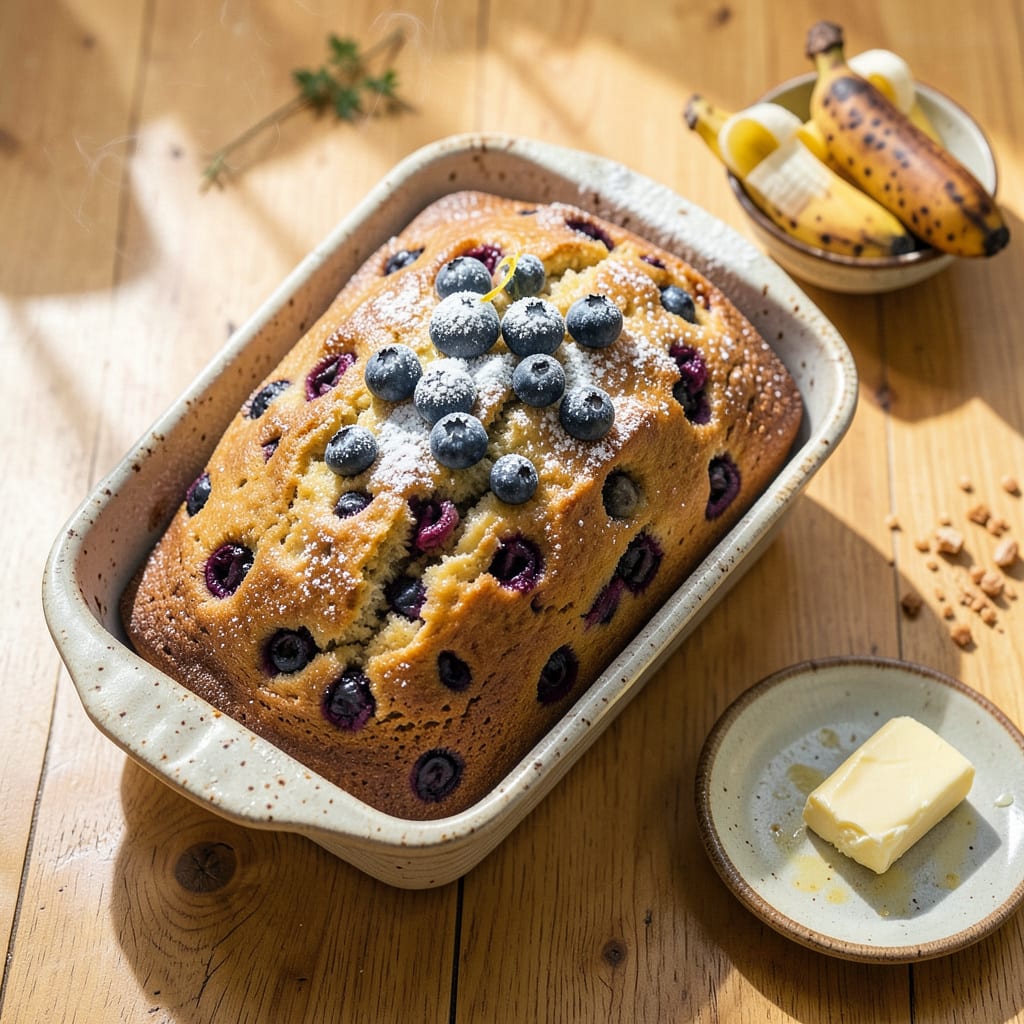
Some recipes carry more than just ingredients—they hold memories. Grandma Marrs’ banana blueberry bread is one of those timeless creations, where every slice delivers the perfect balance of moist, tender crumb and bursts of juicy blueberries. This isn’t just quick bread; it’s a family tradition that turns overripe bananas into something extraordinary.
The secret lies in the details: ripe bananas for natural sweetness, fresh blueberries folded in at just the right moment, and a precise baking time that ensures a golden crust without drying out the center. Whether you serve it warm for breakfast or as an afternoon treat, this bread brings comfort in every bite. Let’s honor Grandma Marrs’ legacy with a loaf that’s as delicious as it is nostalgic.
Ingredients for Grandma Marrs Banana Blueberry Bread
Grandma Marrs knew simple ingredients could create magic—ripe bananas, juicy blueberries, and pantry staples you already have.
| Ingredient | Amount | Notes |
|---|---|---|
| Ripe Bananas 🍌 | 3 whole | Very ripe with brown spots |
| Fresh Blueberries 🫐 | 1 ½ cups | Rinsed and dried thoroughly |
| All-Purpose Flour 🌾 | 2 cups | Spoon and level for accuracy |
| Granulated Sugar 🍚 | ¾ cup | White or raw cane sugar |
| Light Brown Sugar 🍚 | ¼ cup | Packed for moisture |
| Unsalted Butter 🧈 | ½ cup | Melted and slightly cooled |
| Large Eggs 🥚 | 2 whole | Room temperature preferred |
| Vanilla Extract 💧 | 1 tsp | Pure extract for best flavor |
| Baking Soda 🧂 | 1 tsp | Fresh for proper rise |
| Salt 🧂 | ½ tsp | Fine sea salt or table salt |
| Ground Cinnamon 🌿 | ½ tsp | Freshly opened for potency |
| Lemon Juice 🍋 | 1 tbsp | Freshly squeezed preferred |
| Sour Cream 🥛 | ½ cup | Full-fat for moisture |
The bananas are everything here. Wait for deep brown spots—that’s when they’re sweetest and mash easiest. I grab mine from Trader Joe’s when they’re marked down for quick bread. Blueberries should be plump and firm (the frozen kind work too, just don’t thaw them first). For flour, King Arthur is my go-to, but any all-purpose works—just don’t pack it into the measuring cup. The butter matters more than you’d think: unsalted European-style gives that tender crumb Grandma was famous for.
No sour cream? Full-fat Greek yogurt works perfectly (maybe even better). Out of brown sugar? All white sugar plus 1 tbsp molasses gets you close. The cinnamon can be skipped if you’re not a fan, but it adds that warm background note. If your blueberries are huge, chop half of them so you get bursts in every bite. And yes, you can use vegetable oil instead of butter—it’ll be slightly denser but still delicious (Grandma would approve in a pinch).
This bread stays moist for 3 days wrapped at room temp, but good luck making it last that long. Freeze slices for up to 3 months—just toast straight from frozen. The batter keeps 24 hours in the fridge if you want to bake later. Pro tip: Brush the warm loaf with melted butter for extra shine (worth the extra minute).
Why You’ll Love This Recipe
- Mash & Mix: I don’t even need my stand mixer for this—just a fork to mash those overripe bananas and a wooden spoon to fold everything together. The blueberries burst just enough while baking, so no fancy techniques required.
- Brown Sugar Magic: Here’s what sold me—the combo of granulated and light brown sugar. It gives that caramelized crust on top while keeping the inside moist, and the bananas? They turn jammy around the blueberries. Ridiculously good.
- Breakfast or Dessert?: I’ve served this warm with coffee for weekend brunches and also as a “sorry-your-day-was-rough” treat after dinner. The leftovers (if there are any) toast up like a dream the next morning.
- Overripe Banana Rescue: Between us, I used to toss spotty bananas until this recipe. Now I freeze them just for this bread—saves me money, and those frozen bananas make the texture even more tender. No waste, all reward.
Step-by-Step Instructions for Banana Blueberry Bread
Here’s how to make this family favorite—simple steps, big flavor, perfect every time.
Step 1: Prepare the Fruit and Wet Ingredients
Start by mashing the 3 whole ripe bananas in a large bowl until mostly smooth with just a few small lumps. I like to use a potato masher for this, but a fork works too. The bananas should be very ripe with brown spots—they’re sweeter and mash easier.
Add the 0.5 cup melted butter, 2 whole large eggs, 0.75 cup granulated sugar, 0.25 cup light brown sugar, 1 tsp vanilla extract, 0.5 cup sour cream, and 1 tbsp lemon juice to the mashed bananas. Whisk everything together until fully combined and smooth. The mixture should be pale yellow and slightly frothy on top.
Step 2: Combine Dry Ingredients and Blueberries
In a separate bowl, whisk together the 2 cups all-purpose flour, 1 tsp baking soda, 0.5 tsp salt, and 0.5 tsp ground cinnamon. I always spoon and level my flour to avoid packing it down—this ensures the bread isn’t too dense.
Take the 1.5 cups fresh blueberries and toss them gently with about 1 tablespoon of the flour mixture. This light coating helps prevent the berries from sinking to the bottom during baking. Fold the remaining flour mixture into the wet ingredients just until combined—don’t overmix or the bread will be tough.
Step 3: Fold in Blueberries and Prepare Pan
Gently fold the flour-dusted blueberries into the batter using a silicone spatula. Be careful not to crush the berries—you want them to stay whole for those beautiful bursts of flavor. The batter will be thick but still pourable, with swirls of purple from the blueberries.
Preheat your oven to 350°F and grease a 9×5-inch loaf pan thoroughly. I like to use butter for this, making sure to get into all the corners. For extra insurance against sticking, you can also line the pan with parchment paper, leaving an overhang on the sides for easy removal.
Step 4: Bake to Golden Perfection
Pour the batter into your prepared loaf pan and smooth the top with your spatula. Bake at 350°F for 55-65 minutes, or until a toothpick inserted in the center comes out clean with just a few moist crumbs. You’ll know it’s done when the top is deep golden brown and the edges start to pull away from the pan slightly.
About halfway through baking, I like to tent the pan loosely with foil if the top is browning too quickly. This prevents the crust from getting too dark while the center finishes baking. The bread should spring back slightly when pressed gently in the middle.
Step 5: Cool and Serve
Let the bread cool in the pan for 15 minutes, then transfer it to a wire rack to cool completely. I know it’s tempting to slice it right away, but waiting ensures the bread holds together and doesn’t crumble. The interior should be moist but not gummy when fully cooled.
Once completely cool, slice with a serrated knife using gentle sawing motions. Each slice should reveal those beautiful blueberry pockets throughout the golden-brown loaf. Store leftovers wrapped tightly at room temperature for up to 3 days, or freeze for longer storage.
Serving Suggestions for This Recipe
Warm and Buttery
There’s nothing quite like serving this bread still warm from the oven. I love slicing it thick—about 1-inch pieces—and spreading each slice with salted butter that melts right in. The contrast between the warm, moist crumb and cool butter is pure comfort. For extra indulgence, try honey butter (just mix 2 tbsp softened butter with 1 tbsp honey). 🧈
Breakfast Delight
This bread transforms a simple breakfast into something special. Toast slices until golden, then top with cream cheese and a drizzle of wildflower honey. The tangy cream cheese balances the sweetness beautifully. For protein, add a side of scrambled eggs or Greek yogurt with granola. It’s how I start my weekends—nostalgic and satisfying.
Afternoon Tea Pairing
Grandma Marrs always served this with tea, and I’ve found it pairs perfectly with Earl Grey or chamomile. The citrus notes in the tea complement the blueberries wonderfully. For a cozy gathering, arrange slices on a wooden board with clotted cream and fresh berries. The presentation feels special, but the prep is effortless.
Dessert Transformation
Turn this bread into dessert by serving it slightly warmed with vanilla ice cream and a sprinkle of cinnamon sugar. The contrast of temperatures and textures is magical. Another favorite: drizzle slices with caramel sauce and chopped pecans. It’s simple enough for weeknights but feels like a restaurant-quality treat.
Picnic Perfect
This bread travels beautifully for picnics or potlucks. Pack slices in parchment paper to prevent sticking, then wrap in a checkered cloth for that vintage touch. It pairs well with lemonade or iced herbal tea. The sturdy texture holds up without getting soggy, making it ideal for outdoor gatherings.
Gift-Worthy Presentation
For a heartfelt gift, bake the bread in a disposable foil loaf pan, wrap it in cellophane, and tie with baker’s twine. Include a handwritten tag with serving suggestions. I often add a small jar of local jam or honey for an extra-special touch. This is how Grandma Marrs shared her love—and it never fails to impress. 💛
Nutrition Facts

- 6 Egg Cake Recipe with Oil: Light as Air With Buttery Moisture - October 4, 2026
- 4 Bean Casserole Recipe: One-Pan Heartiness With Smoky Paprika Depth - October 4, 2026
- 3-Ingredient Keto Mug Cake Recipe: Microwave Magic in 2 Minutes - October 4, 2026