
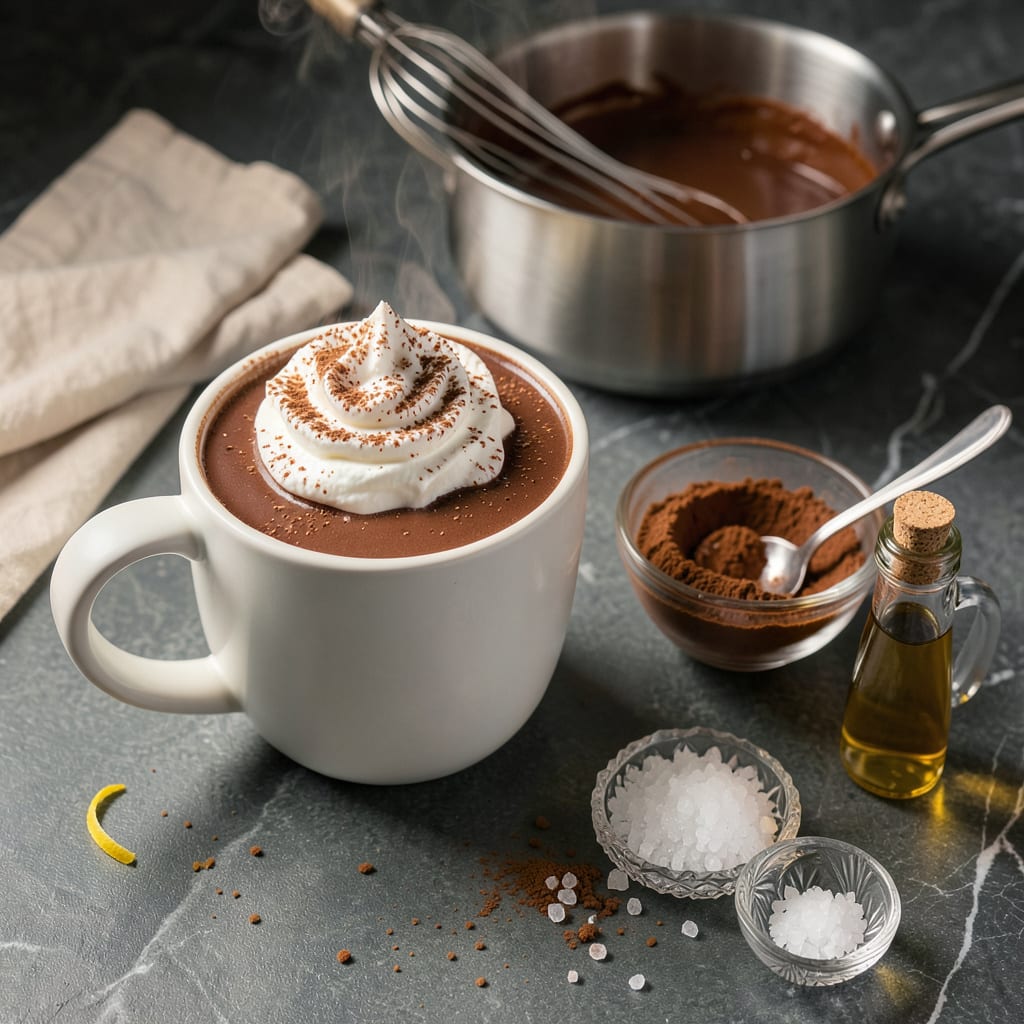
There’s nothing quite like a mug of rich, creamy hot chocolate made with Hershey’s cocoa powder—especially when it’s perfectly balanced between sweet and chocolatey. This recipe delivers that classic, velvety texture you crave, without any graininess or artificial aftertaste. After years of testing ratios, I’ve found the precise combination of cocoa, sugar, and milk that creates the ideal sip.
The secret lies in gentle heat and constant whisking, which ensures the cocoa dissolves completely into the milk. Whether you prefer it topped with whipped cream or marshmallows, this method guarantees a smooth, luxurious drink every time. Perfect for chilly evenings or whenever you need a comforting treat that feels indulgent yet remains simple to prepare.
Ingredients for Hershey’s Cocoa Powder Hot Chocolate
Just nine simple ingredients transform into that velvety, nostalgic mug of hot chocolate you remember.
| Ingredient | Amount | Notes |
|---|---|---|
| Hershey's Cocoa Powder 🍫 | ¼ cup | Unsweetened, for rich chocolate flavor |
| Granulated Sugar 🍚 | ¼ cup | Adjust to taste for sweetness |
| Salt 🧂 | 0.125 tsp | Enhances chocolate depth |
| Whole Milk 🥛 | 2 cups | Full-fat for creaminess (or oat milk) |
| Vanilla Extract 🌿 | ½ tsp | Pure extract for best flavor |
| Heavy Whipping Cream 🥛 | ¼ cup | Optional, for extra richness |
| Mini Marshmallows 🍡 | ½ cup | For topping (or whipped cream) |
| Whipped Cream 🍦 | ¼ cup | Freshly whipped, optional garnish |
| Chocolate Shavings 🍫 | 1 tbsp | For garnish (Hershey's bar) |
| Ground Cinnamon 🌿 | 0.125 tsp | Optional, for warmth |
The cocoa powder is everything here—Hershey’s unsweetened gives that classic flavor. I grab mine at Target or Walmart (always check the expiration date, as old cocoa loses potency). Whole milk is ideal for creaminess, but oat milk works surprisingly well if you’re avoiding dairy. The vanilla extract should be pure, not imitation—it makes a noticeable difference in the depth of flavor. A pinch of salt might seem odd, but it actually makes the chocolate taste more chocolatey (science!).
No whole milk? Half-and-half or 2% works, though the texture won’t be quite as luxurious. Swap sugar for maple syrup or honey if you prefer, but start with less—liquids change the balance. The whipped cream can be store-bought (I won’t tell), but homemade whips up in 2 minutes with a hand mixer. For a spiced twist, a dash of cayenne pairs beautifully with the chocolate (trust me on this one).
The cocoa powder keeps indefinitely in a cool, dark place, but the milk and cream are obviously perishable. Make the hot chocolate fresh—it doesn’t reheat well. Leftovers? Pour into popsicle molds for chocolate fudgesicles. The marshmallows will last 6 months in the pantry if unopened, but once the bag’s open, use them within 2 months before they get stale.
Why You’ll Love This Recipe
- 5-Minute Magic: I’ve made this while still half-asleep on weekend mornings—just whisk the cocoa, sugar, and salt in a saucepan, warm the milk, and boom. The vanilla extract at the end? That’s the lazy chef’s trick for making it taste like you fussed.
- Rich Without Fuss: Hershey’s cocoa powder gives that deep, chocolatey punch without needing actual chocolate bars (or their price tag). The pinch of salt cuts the sweetness just enough that it’s not cloying—honestly, it’s the little things that make this taste like a café version.
- Snow Day or Tuesday: This isn’t just for holidays. I’ve served it after soccer practice, stirred it into oatmeal for a mocha twist, and even frozen leftovers into popsicles when the kids begged. Between us, it’s my secret weapon for making ordinary days feel cozy.
- Pantry Hero: No special trips, no weird ingredients—just staples I always have. And if I double the batch, the extra keeps in the fridge for three days (reheat with a splash of milk). I’ll be real: that’s saved me when unexpected guests showed up craving something warm.
Step-by-Step Instructions for Creamy Hot Chocolate
Here’s how to transform simple ingredients into the richest, most velvety hot chocolate you’ve ever tasted.
Step 1: Whisk the Dry Ingredients Together
In a medium saucepan, combine the 0.25 cup Hershey’s Cocoa Powder, 0.25 cup Granulated Sugar, and 0.125 tsp Salt. I like to use a small whisk for this step to break up any lumps in the cocoa powder. You’ll notice the mixture takes on a rich, chocolatey aroma as you stir – that’s the Hershey’s cocoa working its magic.
Whisk vigorously for about 1 minute until the ingredients are completely blended and the mixture becomes uniform in color. This step ensures your hot chocolate will be perfectly smooth without any grainy texture. The salt might seem like a small amount, but it’s crucial for enhancing the chocolate flavor and balancing the sweetness.
Step 2: Gradually Add and Heat the Milk
Slowly pour in the 2 cups Whole Milk while continuing to whisk constantly. Start with just a splash to create a smooth paste with the dry ingredients, then gradually add the rest. This gradual incorporation prevents lumps from forming and creates that signature creamy texture we’re after.
Place the saucepan over medium heat and continue whisking for 3-5 minutes until the mixture begins to steam gently. Watch for tiny bubbles to form around the edges of the pan – that’s your cue that it’s heating properly. Don’t let it come to a boil, as this can cause the milk to scorch and develop an unpleasant flavor.
Step 3: Finish with Cream and Vanilla
Once the mixture is steaming, stir in the 0.25 cup Heavy Whipping Cream and 0.5 tsp Vanilla Extract. The cream adds that luxurious velvety texture, while the vanilla extract deepens the flavor profile. I always use pure vanilla extract rather than imitation for the best results.
Reduce the heat to low and let it warm through for another 2-3 minutes, stirring occasionally. You’ll know it’s ready when the surface develops a slight sheen and the aroma becomes even more pronounced. Taste and adjust sweetness if needed – the sugar amount can be increased slightly if you prefer a sweeter drink.
Step 4: Assemble and Garnish
Pour the hot chocolate into two mugs, dividing it evenly. Immediately top each serving with 0.25 cup Mini Marshmallows – they’ll begin to melt slightly from the heat, creating that classic hot chocolate look. The marshmallows add a fun textural contrast and a touch of extra sweetness.
For the finishing touches, add a dollop of 0.25 cup Whipped Cream to each mug, then sprinkle with 1 tbsp Chocolate Shavings and a pinch of 0.125 tsp Ground Cinnamon. The cinnamon adds a warm, aromatic note that complements the rich chocolate beautifully. Serve immediately while hot and creamy.
Troubleshooting This Recipe
Grainy Texture Fix
If your hot chocolate turns out grainy, it’s usually because the cocoa powder didn’t dissolve properly. The fix is simple: strain the mixture through a fine-mesh sieve into a clean pot, then reheat gently while whisking. I keep a mesh strainer from OXO just for this purpose—it catches any undissolved cocoa particles beautifully. 💡
Prevent it next time by whisking the dry ingredients with just ¼ cup of milk first to make a smooth paste before adding the rest. This extra step ensures perfect smoothness every time.
Too Sweet or Bitter
If your drink is overly sweet, balance it with ½ tsp of instant coffee granules—it deepens the chocolate flavor without adding bitterness. For a bitter batch, stir in 1 tbsp of brown sugar or honey until dissolved. I always taste before serving and adjust with these quick fixes.
Remember that Hershey’s cocoa powder is naturally more bitter than Dutch-processed varieties. If you prefer milder chocolate, reduce the cocoa to 3 tbsp and increase sugar slightly.
Skin Formation
That unappetizing skin forms when hot chocolate sits too long. Prevent it by covering the surface with plastic wrap pressed directly onto the liquid while heating. If skin already formed, simply whisk vigorously before serving—it’ll blend right back in. I learned this trick from my grandma’s old recipe card.
For serving later, pour into a thermos immediately after making. The insulated container keeps it warm for 2 hours without skin forming, perfect for travel mugs or picnic thermoses.
Lumpy Milk Mixture
Lumps happen when milk heats too quickly. The solution: remove from heat immediately and whisk vigorously for 1 minute. If stubborn lumps remain, blend with an immersion blender for 10 seconds. I keep a small Bamix blender just for sauces and drinks—it’s a game-changer. ✨
Prevent lumps by heating milk to just 160°F (tiny bubbles at edges) before adding to cocoa mixture. A candy thermometer helps, but you can judge by sight with practice.
Weak Chocolate Flavor
If your hot chocolate tastes weak, boost it with 1 oz of melted dark chocolate (I use Hershey’s Special Dark bars). Stir until fully incorporated for instant richness. Another trick: replace 1 tbsp of milk with espresso—it intensifies chocolate notes without adding coffee flavor.
For future batches, increase cocoa powder to ⅓ cup or use Dutch-process cocoa for deeper flavor. The difference is noticeable, especially if you’re using alternative milks that can dilute chocolate intensity.
Separation Issues
If your hot chocolate separates after sitting, the fat in the milk has risen. Simply whisk vigorously for 30 seconds to re-emulsify. For prevention, add ½ tsp cornstarch to the dry ingredients—it acts as a stabilizer. I discovered this trick when making hot chocolate for large gatherings.
When using plant-based milks, they separate more easily. Oat milk works best for stability, while almond milk may require constant whisking during heating to maintain a smooth texture.
Nutrition Facts

- 6 Egg Cake Recipe with Oil: Light as Air With Buttery Moisture - October 4, 2026
- 4 Bean Casserole Recipe: One-Pan Heartiness With Smoky Paprika Depth - October 4, 2026
- 3-Ingredient Keto Mug Cake Recipe: Microwave Magic in 2 Minutes - October 4, 2026