
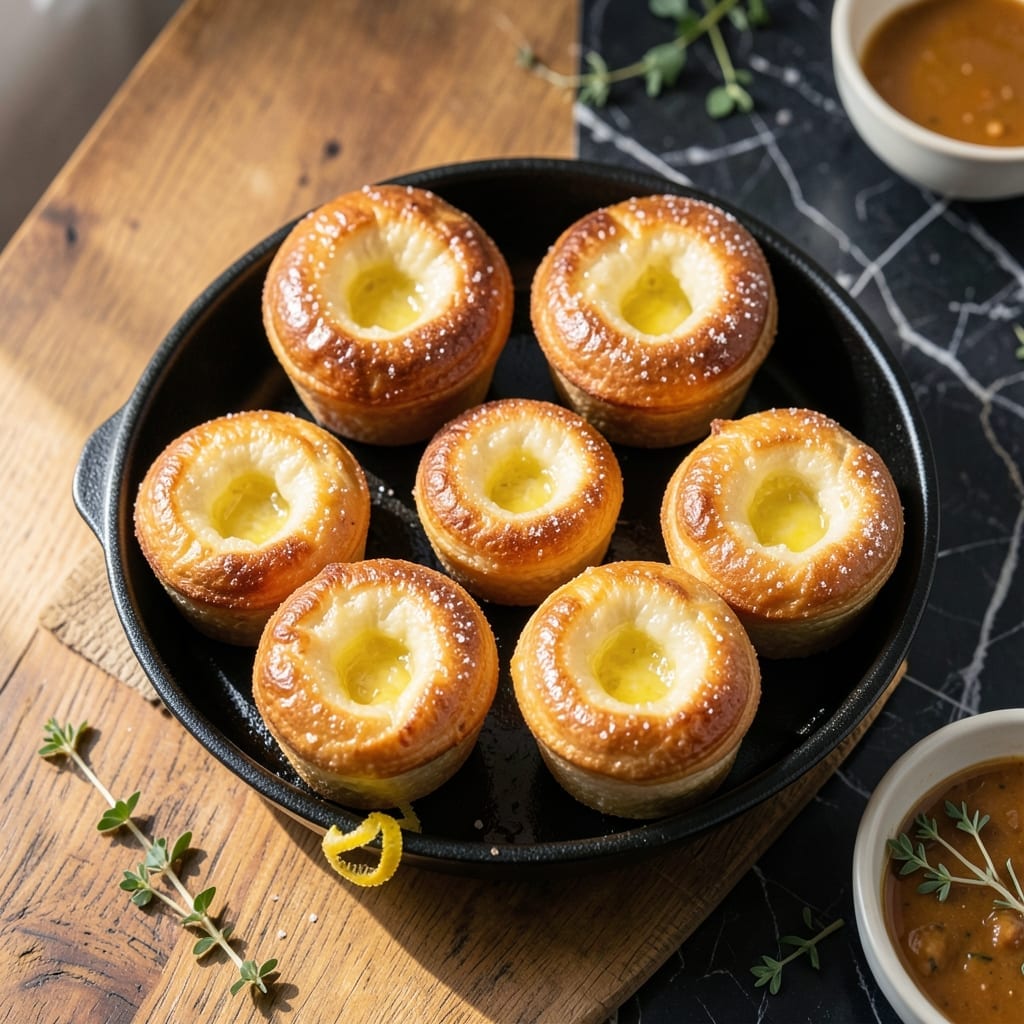
Living at high altitude presents unique baking challenges, but this popover recipe solves them with precision. The key lies in adjusted liquid ratios and oven temperature to account for lower air pressure.
These airy pastries rise dramatically thanks to a simple batter of eggs, flour, and milk. The high-altitude modifications ensure they puff properly without collapsing, delivering that signature hollow center.
You’ll achieve golden, towering popovers with a crisp exterior and custardy interior. The process requires just 5 minutes of prep before baking transforms the batter.
Serve warm with butter or jam for a dish that feels special yet comes together effortlessly. This method guarantees success where standard recipes often fail.
Ingredients for High Altitude Popover
Seven essential ingredients create these towering popovers with high-altitude adjustments for perfect rise.
| Ingredient | Amount | Notes |
|---|---|---|
| All-Purpose Flour 🌾 | 1 ½ cups | Sifted for lighter texture |
| Whole Milk 🥛 | 1 ½ cups | Room temperature preferred |
| Large Eggs 🥚 | 4 whole | Room temperature for maximum rise |
| Unsalted Butter 🧈 | 2 tbsp | Melted for pan greasing |
| Kosher Salt 🧂 | ¾ tsp | Diamond Crystal preferred |
| Granulated Sugar 🍚 | 1 tbsp | Optional, for subtle sweetness |
| Vanilla Extract 🌿 | ½ tsp | Pure extract for best flavor |
The flour must be all-purpose—cake flour lacks the structure needed for proper rise. King Arthur or Gold Medal are reliable choices. Use whole milk for richness; skim lacks the fat content that contributes to the custardy interior. Eggs at room temperature incorporate more air, which is critical at altitude. For greasing, unsalted butter prevents any bitterness that could affect flavor.
No whole milk? 2% works in a pinch but avoid skim. For a dairy-free version, use unsweetened almond milk with 1 tbsp added oil. Out of all-purpose flour? Bread flour at a 1:1 ratio works but may yield a slightly denser popover. The sugar is optional—omit it for savory applications or increase to 2 tbsp for a sweeter profile.
Batter can rest up to 1 hour at room temperature before baking. Leftovers? Reheat in a 350°F oven for 5-10 minutes to restore crispness. Best served fresh, but will keep in an airtight container for 2 days.
Why You’ll Love This Recipe
- Mix and Bake: I just whisk flour, milk, eggs, butter, and salt, then let the oven do the rest.
- Buttery Clouds: That rich whole milk and butter create a golden, airy popover with a crisp edge.
- Sunday Brunch Star: Honestly, these disappear faster than pancakes at my house.
- Pocket Change Feast: Five basic ingredients I always have—no special shopping trip needed.
Step-by-Step Instructions for High Altitude Popovers
Master this technique and you’ll achieve towering, airy popovers with a crisp exterior and tender interior.
Step 1: Prepare the Pan and Preheat Oven
Position a popover pan on the center rack of your oven. Place 2 tbsp Unsalted Butter in a small microwave-safe bowl and melt completely. Using a pastry brush, coat the bottom and sides of each popover cup with the melted butter, ensuring full coverage.
Preheat the oven to 425°F with the prepared popover pan inside. This critical step heats the pan and butter simultaneously, creating an immediate sizzle when the batter hits the cups—a necessity for proper rise at altitude.
Step 2: Whisk the Liquid Base
In a large mixing bowl, whisk together 1.5 cups Whole Milk, 4 whole Large Eggs, 0.75 tsp Kosher Salt, 1 tbsp Granulated Sugar, and 0.5 tsp Vanilla Extract until fully combined. The mixture should appear smooth with no visible streaks of egg or sugar.
At high altitude, the lower air pressure causes liquids to evaporate more quickly, so using room temperature milk and eggs helps maintain stability in the batter. This temperature also promotes better volume when baked.
Step 3: Incorporate the Dry Ingredients
Gradually add 1.5 cups All-Purpose Flour to the wet mixture while whisking continuously. Whisk vigorously for 1-2 minutes until the batter is completely smooth and lump-free. The consistency should resemble heavy cream, thin enough to pour but thick enough to coat the back of a spoon.
Unlike lower altitude baking where overmixing develops gluten, popover batter benefits from this extended whisking. It creates a slightly elastic structure that can trap steam and expand dramatically in the oven, compensating for the reduced atmospheric pressure.
Step 4: Fill Cups and Bake Immediately
Carefully remove the hot popover pan from the oven. The butter should be sizzling but not browned. Fill each cup ¾ full with batter. Work quickly—the contrast between the hot pan and cold batter is essential for that dramatic initial rise.
Return the pan to the 425°F oven and bake undisturbed for 20 minutes. Do not open the oven door during this time, as the sudden temperature change can cause the popovers to collapse. You’ll see them rise dramatically and develop a deep golden color.
Step 5: Finish Baking and Cool
After 20 minutes, reduce the oven temperature to 350°F and bake for an additional 15-20 minutes until the popovers are deep golden brown and crisp to the touch. The internal structure should be completely set with a large air pocket inside.
Remove from the oven and pierce each popover with a sharp knife to release steam, preventing sogginess. Transfer to a wire rack and cool for 2-3 minutes before serving. The exterior should crack slightly when pressed, revealing the airy interior. Serve warm for the best texture.
Pro Tips For Making High Altitude Popover
- Preheat Aggressively: I learned this the hard way—crank your oven to 450°F for at least 20 minutes before baking. High altitude needs that extra heat to give popovers their initial rise.
- Warm Your Milk: After burning a few batches, I finally figured out lukewarm whole milk blends better with the eggs and prevents the butter from clumping. About 10-15 seconds in the microwave does it.
- Skip Cold Ingredients: Sounds weird, but it works: pull your eggs and milk out of the fridge 30 minutes before mixing. Cold ingredients can shock the batter and kill your popovers’ lift at altitude.
- Butter the Pan Well: My grandmother swore by this, and she was right: use about 1 tablespoon of melted unsalted butter to thoroughly coat each cup of the popover pan—it’s non-negotiable for that golden crust.
Regional Styles of This Recipe
Colorado Rockies Style
At 7,000+ feet in Denver, I increase oven temp to 450°F for the initial 20 minutes to compensate for thin air. The extra heat helps the batter rise before the structure sets. Use 1¾ cups milk instead of 1½ cups to prevent dryness. 🌄
New Mexico Adaptation
Santa Fe bakers often add 1 tsp green chile powder to the batter for a Southwestern twist. The altitude here (7,200 feet) requires reducing flour by 2 tbsp to maintain the right consistency. Serve with honey butter for contrast.
Utah Valley Approach
In Salt Lake City (4,200 feet), the adjustment is milder. I use the standard recipe but extend baking time by 5 minutes at each phase. The key is ensuring your popover pan is well-seasoned cast iron for even heat distribution.
Alpine Mountain Style
At extreme altitudes (9,000+ feet), reduce sugar to ½ tbsp as it caramelizes faster. Some bakers replace ¼ cup milk with club soda for extra lift. The results are lighter but equally impressive.
I’ve found ceramic popover pans work better than metal at these heights, retaining heat more consistently.
Nutrition Facts
Frequently Asked Questions
Why do popovers collapse at high altitude?
They often fall because the lower air pressure causes steam to escape too quickly. Using a hot pan and not opening the oven door during baking helps maintain structure.
Can I use a muffin tin instead of a popover pan?
Yes, but fill cups only ½ full and bake at 425°F for 15-18 minutes. The results will be smaller but still airy.
How do I adjust for very high elevations?
Above 7,000 feet, increase oven temp by 25°F and add 2 tbsp extra milk. This compensates for faster evaporation.
What’s the secret to extra crispy popovers?
Pierce each with a knife immediately after baking to release steam. Cooling on a wire rack prevents sogginess.

- 6 Egg Cake Recipe with Oil: Light as Air With Buttery Moisture - October 4, 2026
- 4 Bean Casserole Recipe: One-Pan Heartiness With Smoky Paprika Depth - October 4, 2026
- 3-Ingredient Keto Mug Cake Recipe: Microwave Magic in 2 Minutes - October 4, 2026