
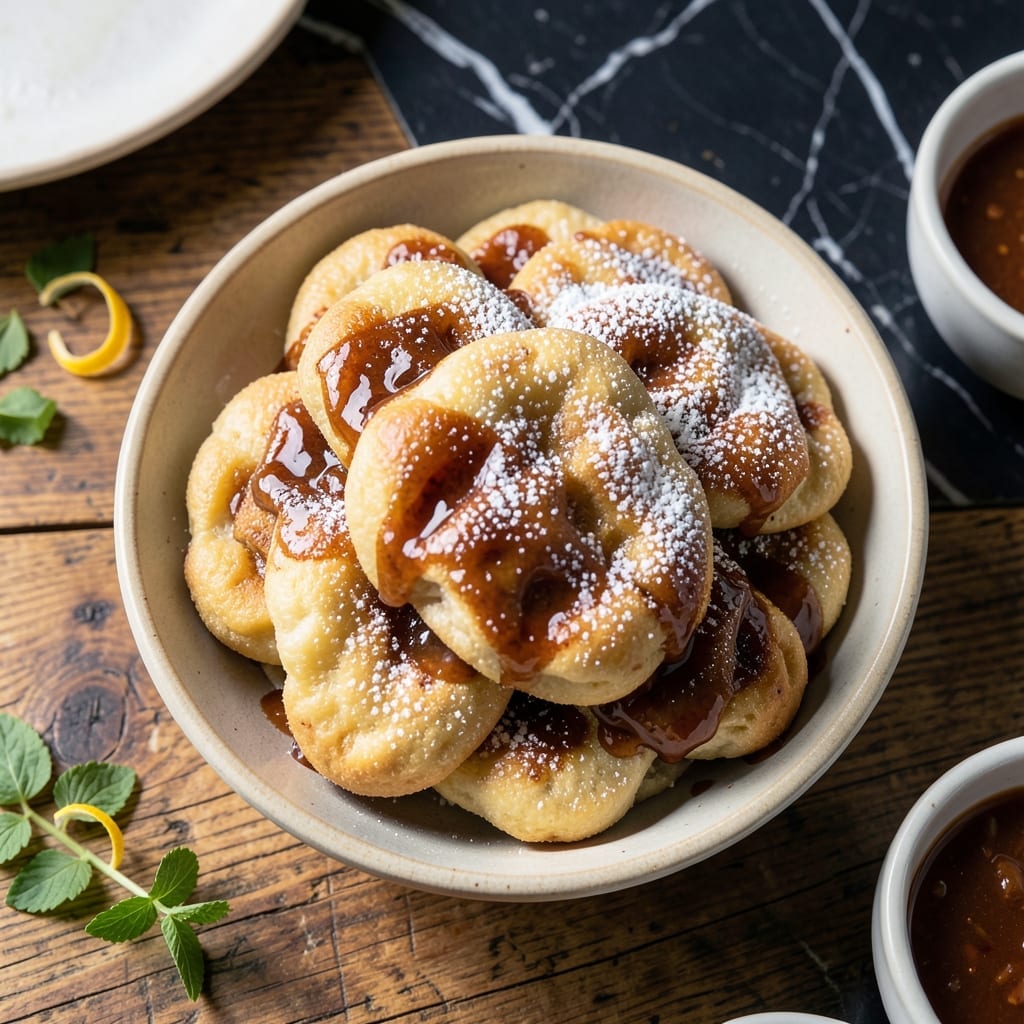
This yeast-free hotteok delivers the same crispy edges and sweet, gooey filling as traditional versions. I developed this method after years of struggling with yeast-based recipes that often failed to rise properly.
The secret is using baking powder for lift, creating light, airy pancakes without the need for proofing time. The dough comes together quickly with simple pantry staples, making these Korean treats accessible for spontaneous cravings.
Each bite offers a perfect balance of textures—the exterior shatters between your teeth while the brown sugar, cinnamon, and nut filling remains luxuriously molten. The contrast is what makes these pancakes so addictive.
Serve warm for the best experience, as the filling softens slightly when cooled. This recipe proves you don’t need yeast for authentic results.
Ingredients for Hotteok Recipe Without Yeast
Simple pantry ingredients create these crispy, sweet Korean pancakes with ease.
| Ingredient | Amount | Notes |
|---|---|---|
| All-Purpose Flour 🌾 | 2 cups | Plus extra for dusting |
| Baking Powder 🧂 | 2 tsp | For leavening without yeast |
| Granulated Sugar 🍚 | 2 tbsp | For dough sweetness |
| Salt 🧂 | ¼ tsp | Fine sea salt preferred |
| Milk 🥛 | ¾ cup | Whole milk for richness |
| Vegetable Oil 🫒 | 1 tbsp | For dough, plus extra for frying |
| Light Brown Sugar 🍯 | ½ cup | Packed for filling |
| Ground Cinnamon 🌿 | 1 tbsp | Fresh for best flavor |
| Chopped Nuts 🌰 | ½ cup | Pecans or walnuts work well |
| Unsalted Butter 🧈 | 2 tbsp | Melted for filling |
| Vanilla Extract 🌿 | 1 tsp | Pure extract recommended |
| Water 💧 | ¼ cup | As needed for dough consistency |
The baking powder is critical here—Clabber Girl or Rumford are reliable brands that provide consistent lift without any yeast. For the flour, King Arthur all-purpose is my go-to for its consistent protein content. The brown sugar should be light and moist—if yours is hard, microwave it for 10 seconds to soften. Most supermarkets carry all these items in their baking aisles.
No brown sugar? White sugar plus 1 tbsp molasses works in a pinch. For the nuts, almonds or cashews can replace pecans or walnuts—just chop them fine. If avoiding dairy, coconut oil stands in for the butter in the filling. The milk can be swapped for any plant-based milk without affecting the texture much.
Store unused dough covered in the fridge for up to 2 days—though it’s best used fresh. The filling mixture can be made ahead and kept at room temperature. Cooked hotteok are best eaten immediately but can be reheated in a skillet for 1-2 days.
Why You’ll Love This Recipe
- No Yeast Needed: I skip the waiting around—baking powder does all the leavening work in minutes.
- Sweet Crispy Bites: The sugar caramelizes in the pan, giving that hotteok crunch with a gooey center.
- Breakfast or Dessert: Honestly, I’ve served these for brunch and midnight snacks—equally perfect.
- Pantry Staples: All-purpose flour, milk, and a few basics are all it takes. Between us, I always have these on hand.
Step-by-Step Instructions for Sweet Crispy Korean Pancakes
This method ensures golden, crisp edges with a gooey filling every time.
Step 1: Prepare the Dough Base
In a large mixing bowl, whisk together the 2 cups All-Purpose Flour, 2 tsp Baking Powder, 2 tbsp Granulated Sugar, and 0.25 tsp Salt until evenly combined. The baking powder replaces yeast, creating lift without the wait.
Create a well in the center and add the 0.75 cup Milk, 1 tbsp Vegetable Oil, and 0.25 cup Water. Stir with a wooden spoon until the dough just comes together—it should be slightly sticky but manageable. If it feels too dry, add a splash more water, but don’t overdo it.
Step 2: Craft the Cinnamon-Sugar Filling
In a separate bowl, mix the 0.5 cup Light Brown Sugar, 1 tbsp Ground Cinnamon, and 0.5 cup Chopped Nuts until the cinnamon is fully distributed. The sugar should feel like wet sand when pinched—this texture ensures it melts beautifully.
Melt the 2 tbsp Unsalted Butter and stir in the 1 tsp Vanilla Extract. Pour this over the sugar mixture and fold gently until everything is coated. The butter helps bind the filling while adding richness.
Step 3: Assemble and Shape the Pancakes
Turn the dough onto a lightly floured surface and divide it into 4 equal portions. Roll each into a ball, then flatten into a ¼-inch thick circle with your palms. The dough should spring back slightly when pressed—this indicates the baking powder is active.
Place 2 tbsp of the filling in the center of each dough circle. Fold the edges up and over the filling, pinching to seal completely. Flatten gently into a disc about ½-inch thick. If any filling leaks, patch the dough with a bit of extra flour.
Step 4: Fry to Crispy Perfection
Heat a non-stick skillet over medium heat and add just enough vegetable oil to coat the bottom. When the oil shimmers, add the pancakes, leaving space between them. Cook for 3-4 minutes per side until deep golden brown and crisp.
Press down lightly with a spatula during cooking to ensure even browning. The sugar will caramelize and bubble slightly—that’s how you know it’s working. Transfer to a paper towel-lined plate to drain any excess oil before serving.
Pro Tips For Making Hotteok Recipe Without Yeast
- Warm the Milk: Use milk at room temperature or slightly warm—cold milk can make the dough tough and slow the baking powder’s reaction.
- Don’t Overmix: Stir the batter just until the flour is incorporated; overmixing develops gluten, which turns hotteok dense instead of tender.
- Preheat the Pan: Heat your pan over medium-low before adding oil, then test with a drop of batter—it should sizzle gently but not burn immediately.
- Use Fresh Baking Powder: I learned this the hard way—old baking powder loses its lift, so check the expiration date or your hotteok will stay flat and gummy.
Troubleshooting This Dish
Dough Too Sticky
If your dough clings to your hands, add 1-2 tbsp All-Purpose Flour at a time until manageable. Don’t overdo it—too much flour makes pancakes dense. I dust my surface with King Arthur flour for reliable results.
Filling Leaking Out
Seal edges tightly when shaping—press firmly with your fingers. If leaks happen mid-cook, sprinkle extra flour over the hole. Cooking at medium heat prevents sugar from escaping too quickly.
Not Crispy Enough
Ensure your oil is hot enough before adding pancakes—it should shimmer. Press down gently with a spatula during frying for even contact. 3-4 minutes per side guarantees that golden crunch. 🔥
Dense Pancakes
Overmixing the dough develops gluten, making pancakes tough. Stir just until combined, then stop. Also, check your baking powder freshness—old leaveners lose potency quickly.
Burnt Exterior
If outsides brown too fast, lower heat slightly and extend cooking time. The sugar in the filling caramelizes quickly, so medium heat is ideal. I use a non-stick skillet for even heat distribution.
Filling Too Dry
If your brown sugar is hard, microwave it for 10 seconds to soften before mixing. Adding 1 extra tsp melted butter helps bind the filling if it crumbles. Fresh light brown sugar works best.
Nutrition Facts
Frequently Asked Questions
Can I make these ahead of time?
Shape and fill the pancakes, then refrigerate for up to 2 hours before cooking. For best results, fry just before serving to maintain crispness.
Why did my filling harden?
This happens if the sugar mixture dries out. Use packed brown sugar and add 1 extra tsp melted butter to keep it soft and gooey.
What oil works best for frying?
Neutral oils like vegetable or canola are ideal. Heat to medium for even cooking without burning the exterior.
Can I bake these instead of frying?
Baking won’t achieve the same crisp texture. Frying at medium heat for 3-4 minutes per side ensures the perfect crunch.

- 6 Egg Cake Recipe with Oil: Light as Air With Buttery Moisture - October 4, 2026
- 4 Bean Casserole Recipe: One-Pan Heartiness With Smoky Paprika Depth - October 4, 2026
- 3-Ingredient Keto Mug Cake Recipe: Microwave Magic in 2 Minutes - October 4, 2026