
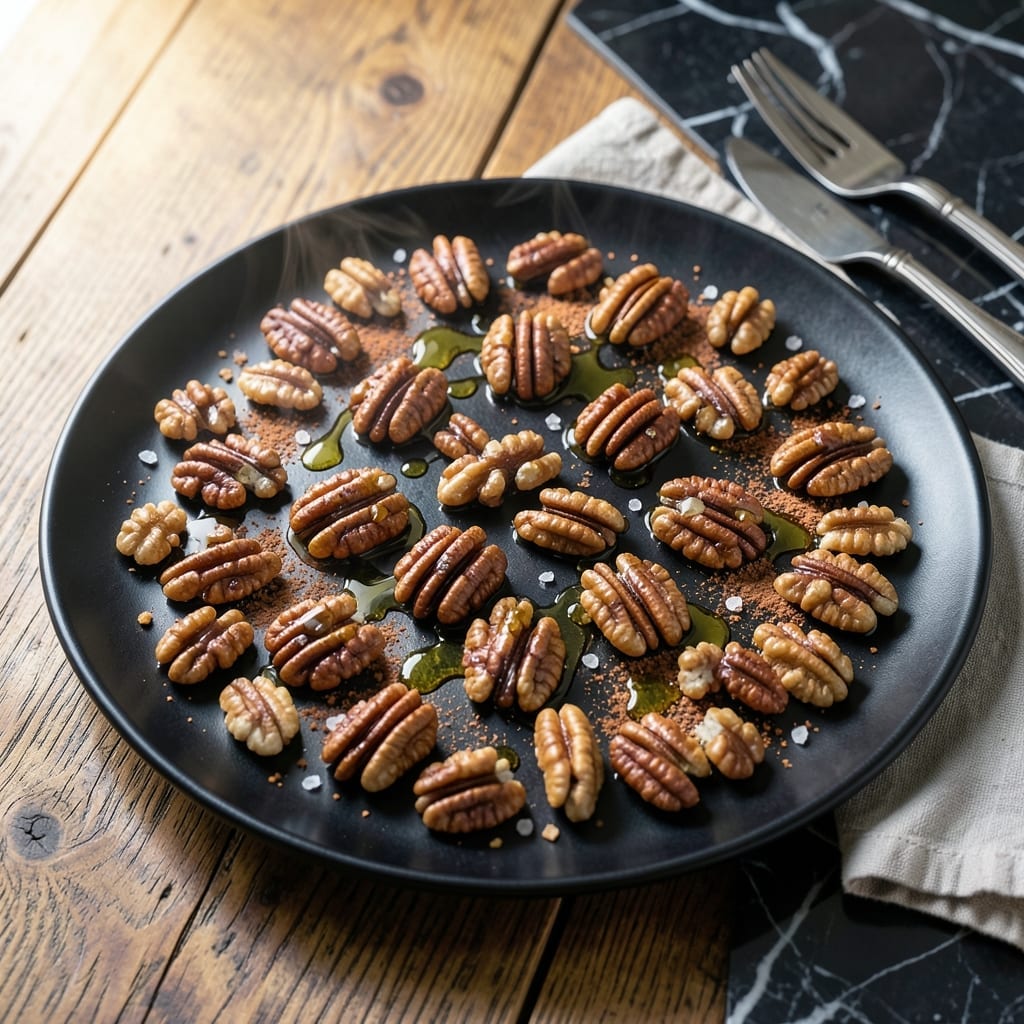
There’s a simple art to transforming raw walnuts into golden, fragrant perfection with minimal effort. This method highlights their natural richness by enhancing texture and depth through controlled heat.
The key is patience—low, steady heat ensures even toasting without burning. A single layer on a baking sheet allows each nut to crisp uniformly, while a light seasoning amplifies flavor without overpowering.
You’ll end up with crunchy, deeply caramelized walnuts that elevate salads, desserts, or snacks. Their warm, nutty aroma fills the kitchen, signaling they’re ready just as they turn a rich amber.
Store in an airtight container for freshness that lasts up to two weeks.
Ingredients for Recipe for Toasted Walnuts
A handful of simple ingredients transforms raw walnuts into golden, aromatic perfection with ease.
| Ingredient | Amount | Notes |
|---|---|---|
| Raw Walnut Halves 🌰 | 4 cups | Fresh, high-quality recommended |
| Extra-Virgin Olive Oil 🫒 | 1 tbsp | Light coating for even toasting |
| Pure Maple Syrup 🍁 | 1 tbsp | Optional for light caramelization |
| Sea Salt 🧂 | ½ tsp | Fine grain for even distribution |
| Ground Cinnamon 🌿 | ¼ tsp | Optional for warm spice notes |
| Smoked Paprika 🌶️ | ¼ tsp | Optional for depth of flavor |
| Pure Vanilla Extract 🌿 | ½ tsp | Optional for aromatic enhancement |
| Light Brown Sugar 🍚 | 1 tbsp | Optional for extra caramelization |
The walnuts are the foundation here. Splurge on fresh, high-quality raw walnut halves—stale nuts won’t crisp properly. I source mine from Whole Foods or local farmers markets when available. Avoid pre-chopped walnuts (they burn easily) and opt for whole or halves. The olive oil should be high-quality extra-virgin for clean flavor, but any neutral oil works too.
Skip the maple syrup if you prefer savory nuts, but it adds beautiful caramelization. Agave or date syrup work as substitutes. No cinnamon? Cardamom or nutmeg at half the amount deliver similar warmth. For a spiced twist, swap smoked paprika for cayenne or chili powder. The vanilla is subtle but worth it—almond extract works too if that’s your preference.
Toasted walnuts keep beautifully in an airtight container at room temperature for up to 2 weeks. For longer storage, freeze in a sealed bag for 6 months—just thaw before using. Let them cool completely before storing to preserve crispness and prevent condensation from making them soggy.
Why You’ll Love This Recipe
- 5-Minute Magic: I toss these in the oven while my coffee brews—literally hands-off after the initial stir.
- Sweet-Savory Crunch: That maple syrup caramelizes into a glossy coat, while the cinnamon and salt make every bite irresistibly complex.
- Snack or Topping: I sprinkle them on oatmeal, salads, or just eat them straight from the pan (no judgment).
- Pantry Staple: A big batch costs pennies and keeps for weeks, so I always have a crunchy upgrade ready.
Step-by-Step Instructions for Toasted Walnuts
Master the technique for perfectly crisp nuts with rich, layered seasoning and deep caramelization.
Step 1: Prepare the Walnuts and Flavor Base
Preheat your oven to 350°F and position a rack in the center. Spread the 4 cups raw walnut halves on a rimmed baking sheet in a single layer, ensuring no pieces overlap. Overcrowding prevents even toasting and leads to steaming rather than crisping.
In a small bowl, whisk together the 1 tbsp extra-virgin olive oil, 1 tbsp pure maple syrup, 0.5 tsp sea salt, 0.25 tsp ground cinnamon, 0.25 tsp smoked paprika, 0.5 tsp pure vanilla extract, and 1 tbsp light brown sugar until fully combined. The sugar should dissolve into the liquid, creating a glossy, fragrant mixture.
Step 2: Coat the Nuts Evenly
Pour the seasoning mixture over the walnuts on the baking sheet. Using a silicone spatula, fold the nuts gently to ensure every piece is evenly coated. The mixture should cling to the walnuts without pooling at the bottom of the sheet.
If the coating seems too thick in spots, drizzle a teaspoon of warm water over the nuts and toss again. This helps distribute the seasoning more uniformly. The walnuts should glisten slightly but not appear soggy—excess moisture is the enemy of crispiness.
Step 3: Toast to Golden Perfection
Place the baking sheet in the preheated oven and toast for 10 minutes. At this point, carefully flip the walnuts with the spatula to expose the undersides to direct heat. Return the sheet to the oven and toast for an additional 8-12 minutes.
Watch closely after the 15-minute mark—the nuts are done when they turn a deep golden brown and the coating appears slightly caramelized. The edges of the walnuts should look crisp, and the kitchen will fill with a rich, nutty aroma. Avoid over-toasting; the nuts continue to cook slightly as they cool.
Step 4: Cool and Crisp
Remove the baking sheet from the oven and transfer the walnuts to a wire rack or parchment paper in a single layer. Do not leave them on the hot baking sheet, as residual heat can overcook the nuts and make them bitter.
Let the walnuts cool completely, which takes about 20-30 minutes. As they cool, the coating will harden, creating a glossy, slightly sticky exterior with a satisfying crunch. Test a piece once cooled—it should snap cleanly between your teeth with a rich, toasty flavor and subtle sweetness from the maple and sugar.
Pro Tips For Making Recipe For Toasted Walnuts
- Low and Slow: Toast walnuts on medium-low heat—any higher and they’ll burn before the inside warms through. I learned this the hard way after scorching three batches.
- Dry the Nuts: Pat walnut halves dry before toasting; even a little moisture makes them steam instead of crisp. Sounds tedious, but it actually changes the outcome.
- Skip the Crowding: Spread walnuts in a single layer with space between each piece. Crowding traps heat and leads to uneven browning—your future self will thank you.
- Warm the Syrup: Heat the maple syrup for 10 seconds in the microwave before drizzling. It coats the nuts more evenly and saves you from sticky clumps.
Make-Ahead Tips for recipe for toasted walnuts
Batch Prep Advantage
I always toast 8-10 cups of walnuts at once since the oven is already hot. Double the seasoning mixture and spread across two baking sheets, rotating racks halfway. This gives you enough for salads, desserts, and snacks for the week. 💡
Storage Containers
Use glass mason jars or airtight plastic containers with tight-fitting lids. I prefer Ball quart jars as they’re easy to grab from the pantry. Avoid thin plastic bags—they won’t keep moisture out.
Freezing for Longevity
For storage beyond 2 weeks, freeze cooled walnuts in a single layer on a tray first, then transfer to freezer bags. They’ll keep for 6 months without losing crispness. Thaw at room temperature before using.
Re-Crisping Trick
If walnuts soften, revive them in a 300°F oven for 5-7 minutes. Spread on a baking sheet and watch closely to prevent burning. This works for both refrigerated and freezer-stored nuts.
Gift Ready
Package cooled walnuts in cellophane bags tied with ribbon for homemade gifts. Add a sprinkle of flaky salt on top for presentation. They’ll stay fresh for 1 week at room temperature in the bag.
Nutrition Facts
Frequently Asked Questions
What oven temperature works best?
Set your oven to 350°F for even toasting without burning. This temperature allows the nuts to crisp slowly while developing rich, caramelized flavor.
How do I know when they’re done?
They’re ready when golden brown with a deep, nutty aroma after 18-22 minutes. The edges will look crisp, and the coating should appear slightly glossy. Over-toasting can make them bitter.
Can I toast them on the stovetop?
Yes! Use a dry skillet over medium-low heat, stirring constantly for 8-10 minutes. Watch closely to prevent uneven browning or burning.
Why did my walnuts turn out soft?
Likely they weren’t fully cooled before storing, or the oven wasn’t hot enough. Always spread them in a single layer to cool completely, which takes 20-30 minutes.

- 6 Egg Cake Recipe with Oil: Light as Air With Buttery Moisture - October 4, 2026
- 4 Bean Casserole Recipe: One-Pan Heartiness With Smoky Paprika Depth - October 4, 2026
- 3-Ingredient Keto Mug Cake Recipe: Microwave Magic in 2 Minutes - October 4, 2026