
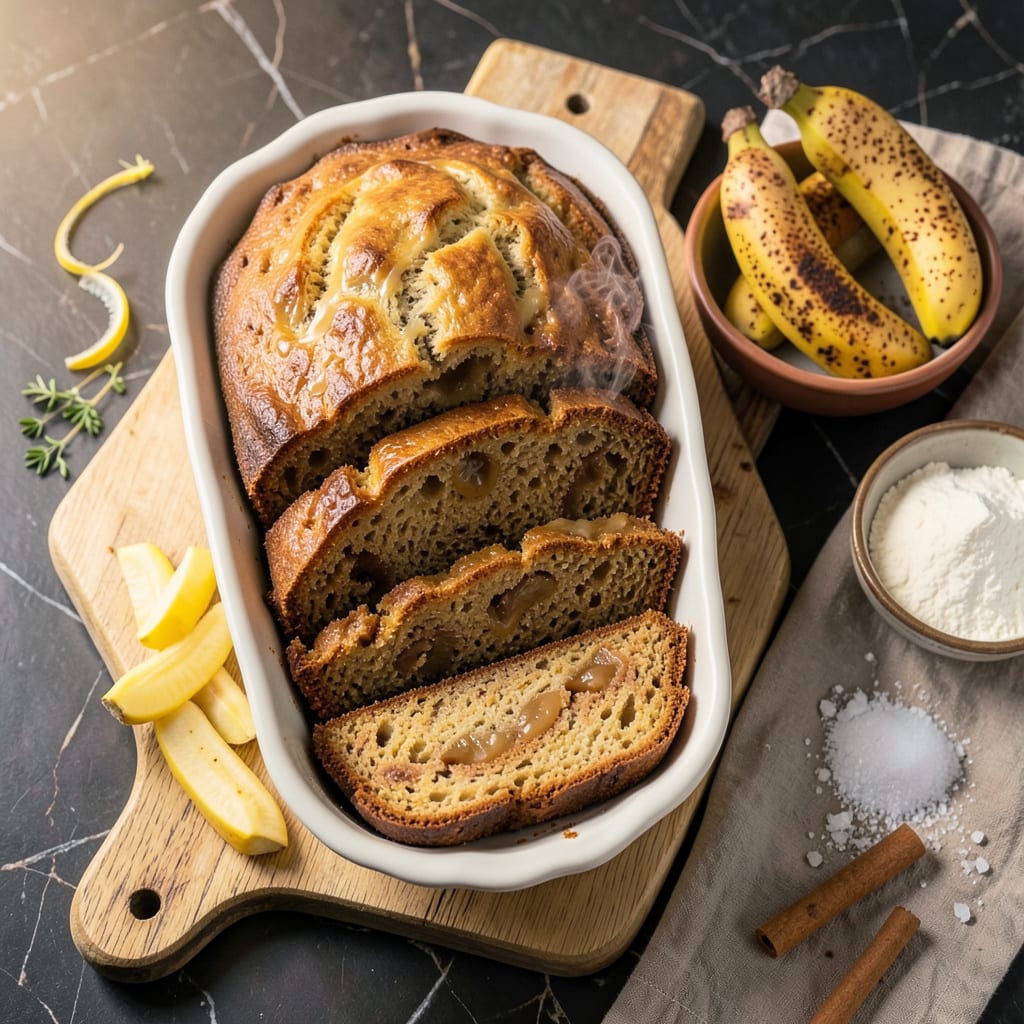
This banana bread delivers on the ultimate promise: ultra-moist crumb with a perfectly crisp golden crust every time. Developed through years of testing, the recipe relies on perfectly ripe bananas and a precise balance of wet and dry ingredients to create that signature tender texture.
The method is straightforward yet foolproof, ensuring consistent results whether you’re a seasoned baker or trying your first loaf. What sets this version apart is the careful attention to mixing technique and baking time—both critical for achieving that ideal contrast between the soft interior and slightly crackly top.
Ingredients for Janets Banana Bread
These carefully balanced ingredients create Janet’s signature ultra-moist banana bread with perfect golden crust every time.
| Ingredient | Amount | Notes |
|---|---|---|
| All-purpose flour 🌾 | 2 cups | Spoon and level for accuracy |
| Baking soda 🧂 | 1 tsp | Ensures proper rise |
| Ground cinnamon 🌶️ | 1 tsp | Freshly ground preferred |
| Salt 🧂 | ½ tsp | Diamond Crystal kosher |
| Unsalted butter 🧈 | ½ cup | Melted and slightly cooled |
| Granulated sugar 🍚 | ¾ cup | Fine white granulated |
| Light brown sugar 🍚 | ¾ cup | Packed firmly |
| Large eggs 🥚 | 2 whole | Room temperature preferred |
| Vanilla extract 💧 | 1 ½ tsp | Pure extract, not imitation |
| Sour cream 🥛 | ½ cup | Full-fat for moisture |
| Ripe bananas 🍌 | 1 ½ cups | Mashed (about 3-4 large) |
| Chopped walnuts 🌰 | ½ cup | Toasted, optional for texture |
Optimal quality requires ripe bananas with significant brown spotting—they provide both sweetness and moisture. King Arthur Flour is recommended for consistent texture, though standard all-purpose works well. The butter should be high-quality (such as Plugrá or Kerrygold) and melted to just liquid state (not hot). Sour cream is critical for moisture retention; Daisy brand full-fat yields the best results. Measure flour using the spoon-and-level method to avoid dense loaves.
For dairy-free adaptation, substitute vegan butter (such as Miyoko’s) and coconut yogurt for sour cream. Pecans can replace walnuts at equal volume. If bananas are underripe, roast at 350°F for 15 minutes to intensify sweetness. Dark brown sugar may be used for deeper caramel notes, though it increases moisture slightly. The cinnamon should be Ceylon if possible—its delicate flavor complements rather than overpowers.
Store ripe bananas in the freezer (peeled) for up to 3 months—thaw completely before mashing. The baked loaf keeps at room temperature for 3 days (wrapped tightly) or refrigerated for 1 week. For longer storage, slice and freeze individual portions in airtight containers for up to 3 months. Toast frozen slices directly from the freezer at 325°F for 10-12 minutes to restore fresh-baked texture.
Why You’ll Love This Recipe
- I’ll be real: most banana breads dry out by day two. Janet’s version? Still tender on day four, thanks to that butter-and-flour ratio. I’ve even frozen slices—microwave for 20 seconds, and it’s like fresh-baked all over again. No waste, no rush.
- One-Bowl Magic: I’ve made this three times this week—just dump everything in one bowl, mix, and pour. No fancy equipment, no extra dishes, and the butter melts right into the warm bananas so cleanup is a breeze.
- That Cinnamon Swirl: Here’s what sold me—the cinnamon doesn’t just sit in the background. It blooms in the oven, turning the crust caramelized and fragrant while the inside stays stupidly moist. My kid licks the crumbs off the plate. Every. Time.
- Breakfast, Snack, Dessert: Honestly, this is my secret weapon. Slice it thick for Sunday brunch, pack squares in lunchboxes, or warm a slab with ice cream after dinner. It’s unfussy enough for a Tuesday and impressive enough for a potluck.
Step-by-Step Instructions for Ultra-Moist Banana Bread
Follow this precise method to achieve perfectly moist crumb with a crisp golden crust every time.
Step 1: Prepare Wet Ingredients and Bananas
Begin by mashing the 1.5 cups ripe bananas in a large bowl until mostly smooth with some small chunks remaining. The natural sweetness and moisture from properly ripened bananas are essential for the bread’s signature texture.
In a separate bowl, whisk together the 0.5 cup melted unsalted butter (cooled to room temperature), 0.75 cup granulated sugar, and 0.75 cup light brown sugar until fully combined. The mixture should be smooth with no sugar granules visible. Add the 2 whole large eggs one at a time, beating well after each addition, followed by the 1.5 teaspoons vanilla extract and 0.5 cup sour cream.
Gently fold the mashed bananas into the wet mixture. The batter will appear slightly curdled at this stage, which is normal. The sour cream’s acidity will react with the baking soda later to create a tender crumb.
Step 2: Combine Dry Ingredients
In a medium bowl, sift together the 2 cups all-purpose flour, 1 teaspoon baking soda, 1 teaspoon ground cinnamon, and 0.5 teaspoon salt. This sifting step ensures even distribution of the leavening agent and prevents pockets of concentrated baking soda that could create bitter spots.
The cinnamon adds warmth without overpowering the banana flavor, while the salt enhances all the other ingredients. Use a whisk to thoroughly combine these dry ingredients, breaking up any lumps in the flour.
Step 3: Create the Batter
Make a well in the center of the dry ingredients and pour the wet banana mixture into it. Using a silicone spatula, gently fold the ingredients together just until the flour is incorporated and no dry spots remain. The batter should be thick but pourable, with visible streaks of banana.
Avoid overmixing, as this would develop the gluten in the flour and result in a dense, tough bread rather than the tender, moist crumb we’re aiming for. If using the 0.5 cup chopped walnuts, fold them in at this stage along with any accumulated banana liquid from the bottom of the bowl.
Step 4: Bake to Golden Perfection
Preheat your oven to 350°F and position the rack in the lower third of the oven. Pour the batter into a greased 9×5-inch loaf pan, spreading it evenly with the spatula. The pan should be about two-thirds full to allow for proper rising.
Bake for 55-65 minutes until the top is deep golden brown and a wooden skewer inserted in the center comes out with just a few moist crumbs attached. The edges should pull away slightly from the sides of the pan. If the top browns too quickly, tent the pan loosely with aluminum foil after 30 minutes of baking.
Step 5: Cool and Serve
Remove the bread from the oven and let it cool in the pan for 10 minutes. This brief rest period allows the structure to set while still warm. Then transfer it to a wire rack to cool completely, about 1 hour, before slicing.
The bread will continue to firm up as it cools, and the flavors will meld and intensify. For the cleanest slices, use a serrated knife and saw gently with minimal downward pressure. The finished loaf should have a crisp, caramelized crust that gives way to an ultra-moist interior with visible banana speckles throughout.
Make-Ahead Tips for janets banana bread
Prep Ahead Strategy
You can prepare the wet and dry ingredients separately up to 24 hours in advance. Store the wet mixture (bananas, sugars, eggs, butter, sour cream, vanilla) in an airtight container in the fridge. Keep the dry ingredients (flour, baking soda, cinnamon, salt) in a separate container at room temperature. This makes morning baking effortless!
When ready to bake, let the wet ingredients sit at room temperature for 30 minutes before combining with dry ingredients. The cold mixture may thicken slightly, which is normal. Just give it a quick stir before folding everything together.
Freeze for Later
Bake the loaf completely, let it cool, then wrap tightly in plastic wrap followed by heavy-duty aluminum foil. Freeze for up to 3 months without quality loss. I always label with the date using a Sharpie marker to track freshness.
To serve, thaw overnight in the fridge, then warm individual slices in a toaster oven at 325°F for 5-7 minutes. The texture will be nearly identical to fresh-baked. This is perfect for unexpected guests or busy mornings!
Banana Prep Hack
Peel and mash overripe bananas, then freeze in ½-cup portions in small containers. When ready to bake, thaw in the fridge overnight. The bananas will darken but maintain perfect sweetness and moisture. I keep a stash of these in my freezer for spontaneous baking sessions.
For best results, drain any excess liquid after thawing—this prevents the batter from becoming too wet. The frozen bananas actually develop more concentrated flavor, making your bread even more delicious.
Make-Ahead Batter
Mix the complete batter (without baking soda) up to 12 hours ahead. Store covered in the fridge, then stir in the baking soda just before baking. The acid in sour cream will keep the batter fresh while allowing flavors to meld beautifully.
Let the chilled batter sit at room temperature for 20 minutes before baking. The slight thickening actually helps create a more uniform crumb structure. This is my go-to method for holiday mornings when oven space is at a premium.
Portion Control
Bake the full recipe, then slice and freeze individual portions between layers of parchment paper in a gallon freezer bag. This lets you grab single servings as needed. I love having these ready for quick breakfasts or lunchbox treats.
Reheat directly from frozen in a toaster at medium setting for 2-3 cycles until warm. The edges will crisp up nicely while the center stays perfectly moist. It’s like having fresh banana bread on demand! 🍌
Nutrition Facts

- 6 Egg Cake Recipe with Oil: Light as Air With Buttery Moisture - October 4, 2026
- 4 Bean Casserole Recipe: One-Pan Heartiness With Smoky Paprika Depth - October 4, 2026
- 3-Ingredient Keto Mug Cake Recipe: Microwave Magic in 2 Minutes - October 4, 2026