
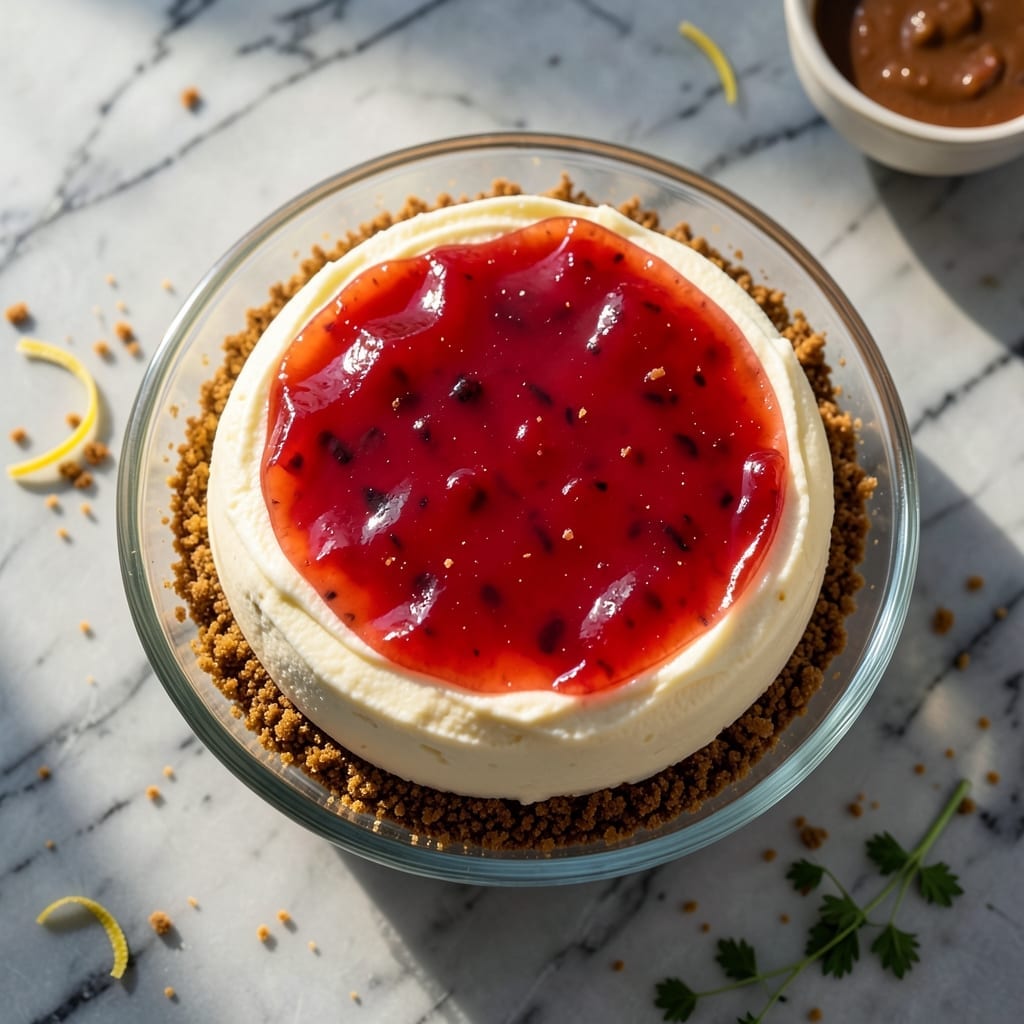
This no-bake cheesecake redefines easy desserts with its creamy texture and vibrant jello layer.
I developed this method after years of testing, focusing on the perfect balance between tangy cream cheese and fruity jello. The graham cracker crust adds a buttery crunch that contrasts beautifully with the smooth filling.
You’ll achieve restaurant-quality results without turning on your oven. The chilling process transforms simple ingredients into a decadent treat that sets perfectly every time.
Serve chilled for the best texture, with fresh berries or a drizzle of caramel for extra flair.
Ingredients for Jello No Bake Cheesecake Recipe Ideas
Simple ingredients transform into this creamy, fruity, no-bake delight. You likely have most already.
| Ingredient | Amount | Notes |
|---|---|---|
| Graham Cracker Crumbs 🍪 | 1 ½ cups | Fine crumbs, about 10 full sheets |
| Unsalted Butter 🧈 | ½ cup | Melted for crust binding |
| Granulated Sugar 🍚 | ¼ cup | For crust sweetness |
| Cream Cheese 🧀 | 16 oz | Full-fat, room temperature |
| Powdered Sugar 🍚 | 1 cup | Sifted for smooth texture |
| Vanilla Extract 🌿 | 1 tsp | Pure extract preferred |
| Heavy Whipping Cream 🥛 | 1 cup | Cold, for whipping |
| Flavored Gelatin 🍧 | 1 package | 3 oz size, any flavor |
| Boiling Water 💧 | 1 cup | For dissolving gelatin |
| Cold Water 💧 | ½ cup | For gelatin mixture |
| Fresh Lemon Juice 🍋 | 1 tbsp | For brightness in filling |
| Salt 🧂 | ¼ tsp | Fine grain for balance |
The cream cheese is non-negotiable here. Philadelphia brand gives that ultra-smooth texture we’re after—store brands can be grainy. Make sure it’s full-fat (the reduced-fat versions don’t set right). For the graham crust, Honey Maid is my go-to, but any generic brand works. The butter? Plugra or Kerrygold if you’re feeling fancy (or whatever’s on sale).
No graham crackers? Digestive biscuits or vanilla wafers crush up nicely. Out of gelatin? Agar-agar works but sets differently—follow package ratios. Want a different flavor? Any 3 oz gelatin package works (strawberry, lime, raspberry). The heavy cream can be swapped for coconut cream (canned, not carton) if you need a dairy-free version.
This needs at least 4 hours to set properly—overnight is even better. Keeps 5 days in the fridge (if it lasts that long). Freezing isn’t ideal—the texture gets weird. But you can prep the crust a day ahead if you’re organizing.
Why You’ll Love This Recipe
- No Oven Needed: I just mix, chill, and serve—no baking, no fuss, and the graham cracker crust sets perfectly every time.
- Creamy Dreamy Bite: That velvety cream cheese layer with the sweet tang of jello? Ridiculously good, and the powdered sugar makes it just sweet enough.
- Potluck Hero: I bring this to summer picnics and it disappears first—light, refreshing, and the jello adds a fun pop of color.
- Budget Friendly: A box of jello and cream cheese stretch further than you’d think. I make two for the price of one store-bought cheesecake.
Step-by-Step Instructions for Jello No Bake Cheesecake
This no-fuss method guarantees a luscious, velvety texture with minimal effort and maximum flavor impact.
Step 1: Create the Graham Cracker Crust
Combine the 1.5 cups Graham Cracker Crumbs, 0.25 cup Granulated Sugar, and 0.5 cup Unsalted Butter in a bowl. The melted butter should coat the crumbs completely, creating a mixture that resembles wet sand.
Press the mixture firmly into the bottom of a 9-inch springform pan using the back of a spoon or a measuring cup. I always press it up the sides slightly for a more professional presentation. Chill this crust in the refrigerator while preparing the filling—this prevents it from crumbling when you add the cheesecake layer.
Step 2: Prepare the Flavored Gelatin Base
Dissolve the 1 package Flavored Gelatin in the 1 cup Boiling Water, stirring until completely smooth with no visible granules. Then stir in the 0.5 cup Cold Water to cool it slightly. This temperature drop is crucial—too hot and it’ll cook the cream cheese, too cold and it won’t set properly.
Set this gelatin mixture aside to cool to room temperature. It should be the consistency of thin syrup but not warm to the touch. This is the moment that matters: if you add it to the cream cheese while still hot, you risk curdling the mixture and ruining the creamy texture we’re after.
Step 3: Whip the Cream Cheese Filling
In a large mixing bowl, beat the 16 oz Cream Cheese until completely smooth and free of lumps. This is easier if your cream cheese is truly at room temperature—right out of the fridge won’t whip properly. Add the 1 cup Powdered Sugar, 1 tsp Vanilla Extract, 1 tbsp Fresh Lemon Juice, and 0.25 tsp Salt, beating until fully incorporated.
With the mixer running on low, slowly pour in the cooled gelatin mixture. Increase the speed to medium and beat for 2-3 minutes until the mixture is silky smooth. Scrape down the sides of the bowl as needed to ensure even mixing.
Step 4: Fold in Whipped Cream and Assemble
In a separate bowl, whip the 1 cup Heavy Whipping Cream until stiff peaks form—this means when you lift the beaters, the cream holds its shape without collapsing. Here’s the thing—over-whipping turns it into butter, so stop as soon as you hit stiff peaks.
Gently fold the whipped cream into the cream cheese mixture using a silicone spatula. Use a light hand to maintain as much air as possible—this is what gives the finished product its ethereal, creamy quality. Pour the filling over the chilled crust and smooth the top with the spatula.
Step 5: Chill and Set Completely
Refrigerate the cheesecake for at least 6 hours, but overnight is ideal. The gelatin needs this time to fully set, and the flavors need time to meld together. I know it’s hard to wait, but rushing this step results in a runny, unsatisfying dessert.
When ready to serve, run a warm knife around the edge of the pan before releasing the springform. The top should be glossy and slightly jiggly but hold its shape when sliced. Serve immediately for the perfect creamy consistency.
Pro Tips For Making Jello No Bake Cheesecake Recipe Ideas
- Soften the Cream Cheese: Pull your cream cheese out 2-3 hours before starting—room temperature blends smooth without lumps. I learned this the hard way after my first three cheesecakes came out grainy.
- Press the Crust Hard: Use the bottom of a glass to compact the graham cracker crumb and butter mixture into the pan. A loose crust falls apart when you slice it.
- Chill Between Layers: Give each layer at least 30 minutes in the fridge before adding the next. After skipping this once, I ended up with a soupy mess instead of clean slices.
- Dust with Powdered Sugar: A light sprinkle of powdered sugar on top just before serving adds a bakery-style finish. Sounds simple, but it actually changes the outcome—makes it look as good as it tastes.
Essential Equipment for This Recipe
Springform Pan
A 9-inch springform pan is non-negotiable for this recipe. The removable sides make it easy to release your cheesecake without damaging the delicate gelatin layer. I use Wilton’s non-stick version—it’s budget-friendly and lasts forever. 💡
Electric Mixer
You’ll need a reliable mixer to achieve that silky smooth texture. A stand mixer like KitchenAid is ideal, but a hand mixer works too. Beat the cream cheese for at least 2 minutes to eliminate lumps completely.
Mixing Bowls
Have at least two large bowls ready—one for the cream cheese mixture and another for whipping the cream. I prefer stainless steel because they chill quickly and are easy to clean. A third bowl for the gelatin mixture keeps your workflow organized.
Whipping Cream Tools
For perfect whipped cream, chill your bowl and beaters for 15 minutes beforehand. I use Cuisinart’s chilled metal bowl attachment. Watch closely—it takes about 3-4 minutes on medium-high to reach stiff peaks.
Measuring Cups
Accurate measurements matter, especially for the gelatin layer. Use liquid measuring cups for water and dry measuring cups for powders. I keep a set of OXO Good Grips in my kitchen—they’re durable and easy to read.
Silicone Spatula
A good spatula helps you fold in the whipped cream without deflating it. I love Ateco’s flexible silicone spatula—it scrapes every last bit from the bowl. The flat edge is perfect for smoothing the top of your cheesecake before chilling. ✨
Nutrition Facts
Frequently Asked Questions
Can I use a different pan if I don’t have a springform?
You can use a 9-inch pie dish or line a regular cake pan with parchment paper. The springform makes removal easier, but these alternatives work in a pinch. Just be extra careful when slicing.
Why did my cheesecake not set properly?
This usually happens if the gelatin wasn’t fully dissolved or the mixture wasn’t chilled long enough. Ensure the gelatin is smooth before mixing and refrigerate for at least 6 hours. Overnight is best.
Can I add fresh fruit to the recipe?
Add a layer of sliced strawberries or raspberries between the crust and filling. For best results, lightly toss the fruit in a bit of sugar to macerate for 15 minutes first.
How far in advance can I make this?
This dessert keeps well in the fridge for up to 5 days. It’s actually better made a day ahead, as the flavors meld overnight. Just cover it tightly with plastic wrap.

- 6 Egg Cake Recipe with Oil: Light as Air With Buttery Moisture - October 4, 2026
- 4 Bean Casserole Recipe: One-Pan Heartiness With Smoky Paprika Depth - October 4, 2026
- 3-Ingredient Keto Mug Cake Recipe: Microwave Magic in 2 Minutes - October 4, 2026