
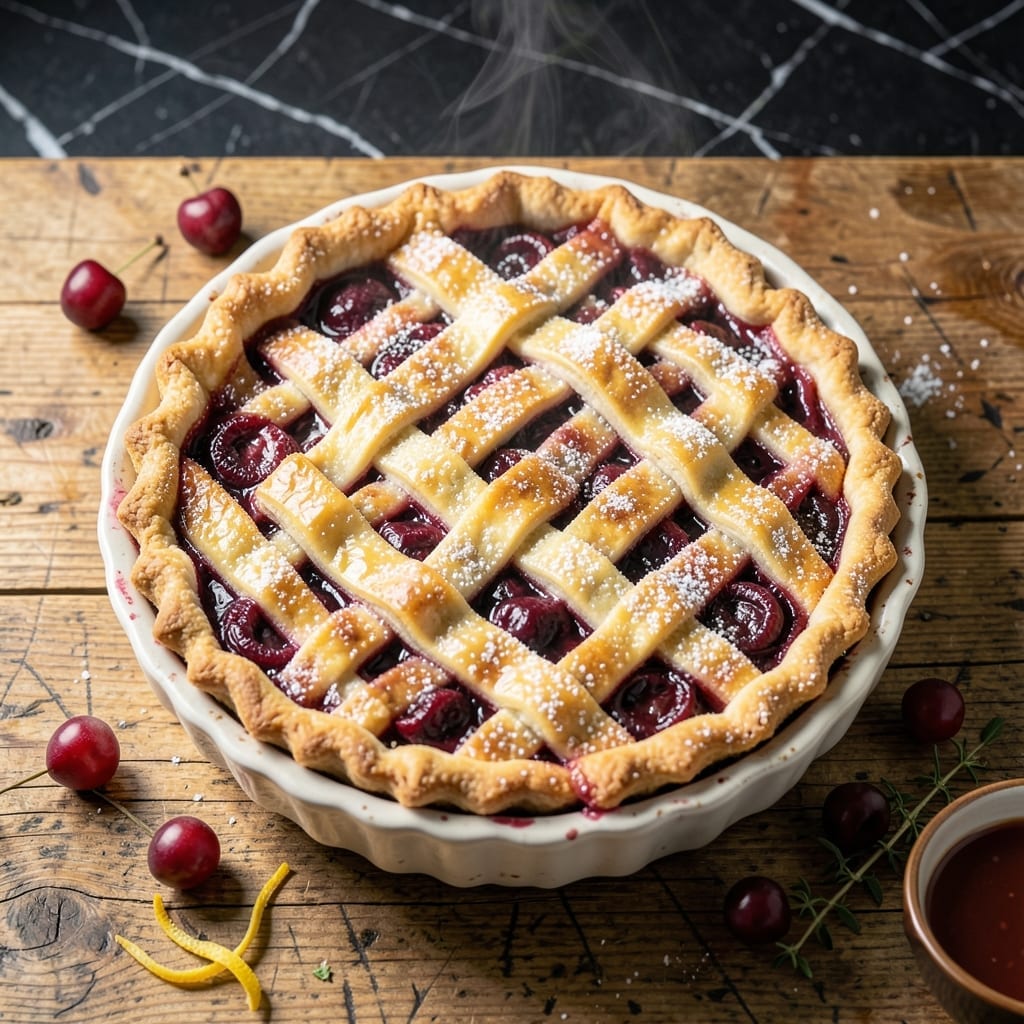
There’s nothing like a flaky pie crust encasing a vibrant, tart-sweet sour cherry filling—even when using frozen cherries. This recipe delivers that classic bakery-style result with a few smart techniques.
Frozen cherries work beautifully when thawed and drained properly, preventing a soggy bottom crust. The filling comes together with just a handful of ingredients, balancing the cherries’ natural tang with the right amount of sugar.
You’ll achieve a golden, buttery crust and a thick, bubbling filling that holds its shape when sliced. The aroma alone makes the effort worthwhile, and the taste is pure nostalgia.
Serve slightly warm with vanilla ice cream for the ultimate dessert experience. Here’s how to make it right.
Ingredients for Sour Cherry Pie Recipe Using Frozen Cherries
A flaky, buttery crust meets tart-sweet filling with frozen cherries as the star.
| Ingredient | Amount | Notes |
|---|---|---|
| All-Purpose Flour 🌾 | 2 ½ cups | Plus extra for dusting work surface |
| Granulated Sugar 🍚 | 1 cup | Divided between crust and filling |
| Unsalted Butter 🧈 | 1 cup | Cold, cut into small cubes |
| Ice Water 💧 | ½ cup | Plus 1 tbsp as needed |
| Fine Sea Salt 🧂 | 1 tsp | Divided between crust and filling |
| Frozen Sour Cherries 🍒 | 4 cups | Pitted, thawed and drained thoroughly |
| Cornstarch 🌽 | ¼ cup | For thickening filling |
| Lemon Juice 🍋 | 1 tbsp | Freshly squeezed for brightness |
| Almond Extract 🌰 | ½ tsp | Enhances cherry flavor |
| Vanilla Extract 🌿 | 1 tsp | Pure extract recommended |
| Large Egg 🥚 | 1 whole | For egg wash on crust |
The cherries are the heart of this dish. Trader Joe’s carries excellent frozen sour cherries, but any high-quality brand will work—just ensure they’re fully thawed and drained to avoid a soggy crust. The butter must be cold (straight from the fridge) for that perfect flakiness. I always use Plugrá or Kerrygold for the richest flavor in the crust.
No sour cherries? Fresh or frozen tart cherries work, but adjust sugar to taste since they may be sweeter. For the crust, vegetable shortening can replace half the butter for extra flakiness. If you’re out of cornstarch, instant tapioca at the same amount thickens just as well. The almond extract is optional but adds depth—skip it if you prefer a purer cherry flavor.
The pie keeps beautifully at room temperature for 2 days—cover loosely with foil. For longer storage, refrigerate for up to 5 days, though the crust softens. Freeze unbaked pie for up to 3 months; bake straight from frozen, adding 10-15 minutes to the bake time.
Why You’ll Love This Recipe
- No Thaw Needed: I just dump the frozen cherries straight into the filling—no waiting, no mess.
- Tart Meets Sweet: That sharp sour cherry bite balanced with the buttery crust is my idea of perfection.
- Potluck MVP: I bring this to summer picnics and it disappears before the paper plates do.
- Second Slice Guaranteed: Honestly, it tastes even better the next day if you can wait that long.
Step-by-Step Instructions for Sour Cherry Pie Using Frozen Cherries
Master the art of a flaky crust and perfectly balanced filling with this professional method.
Step 1: Prepare the Pie Crust
In a large bowl, combine the 2.5 cups All-Purpose Flour with ½ tsp Fine Sea Salt. Cut in the 1 cup Unsalted Butter (cold and cubed) using a pastry cutter until the mixture resembles coarse crumbs with pea-sized butter pieces visible.
Gradually add the ½ cup Ice Water, 1 tablespoon at a time, mixing gently with a fork until the dough just begins to come together. It should hold when pressed but not be sticky. Divide the dough into two equal portions, flatten into discs, wrap in plastic, and refrigerate for 1 hour.
This resting period allows the gluten to relax, ensuring a tender, flaky crust that won’t shrink during baking. The cold butter creates steam pockets during baking, which produces those desirable flaky layers.
Step 2: Make the Cherry Filling
In a large saucepan, combine the 4 cups Frozen Sour Cherries (thawed and drained) with ¾ cup Granulated Sugar, ¼ cup Cornstarch, 1 tbsp Lemon Juice, ½ tsp Almond Extract, and 1 tsp Vanilla Extract. Stir well to evenly distribute the cornstarch.
Cook over medium heat for 8-10 minutes, stirring constantly, until the mixture thickens and becomes glossy. The filling should coat the back of a spoon and hold its shape briefly when tested. Remove from heat and let cool completely before assembling the pie.
This cooking process activates the cornstarch, ensuring your filling sets properly during baking without becoming runny. The almond extract enhances the natural tartness of the sour cherries.
Step 3: Assemble the Pie
On a lightly floured surface, roll out one disc of dough to a 12-inch circle and transfer it to a 9-inch pie dish. Trim the edges, leaving a ½-inch overhang. Spoon the cooled cherry filling into the crust, spreading it evenly.
Roll out the second disc of dough and place it over the filling. Trim the edges, leaving a ½-inch overhang, then crimp the edges together with your fingers or a fork. Cut 4-5 slits in the top crust to allow steam to escape during baking.
Brush the top crust with a light coating of the 1 whole Large Egg beaten with 1 tablespoon water. Sprinkle with the remaining ¼ cup Granulated Sugar for added texture and shine.
Step 4: Bake to Perfection
Preheat your oven to 375°F. Place the pie on a baking sheet lined with parchment paper to catch any drips. Bake for 50-60 minutes, or until the crust is deep golden brown and the filling is bubbling through the vents.
If the edges begin to brown too quickly, cover them with aluminum foil or a pie shield. The pie is done when the crust is uniformly golden and the filling bubbling actively—this visual cue indicates the cornstarch has fully set.
Remove from the oven and let the pie cool on a wire rack for at least 2 hours before slicing. This cooling period allows the filling to set completely, ensuring clean slices with a perfect balance of tart and sweet in every bite.
Pro Tips For Making Sour Cherry Pie Recipe Using Frozen Cherries
- Thaw and Drain: Let the frozen cherries thaw in a colander for 30-45 minutes, then give them a gentle squeeze to remove excess liquid—I learned this the hard way after my first pie had a soggy bottom.
- Chill the Dough: After mixing your flour, butter, and ice water, let the dough rest in the fridge for at least 1 hour. My grandmother swore by this, and she was right: it prevents shrinking and makes rolling easier.
- Vent the Top: Cut 4-5 small slits in the top crust before baking. After burning three batches, I finally figured out this lets steam escape without cracking the crust.
- Use Cornstarch: Toss the thawed cherries with 2 tablespoons of cornstarch before filling—sounds weird, but it works to thicken the juices and keep the pie from getting runny.
Regional Styles of sour cherry pie recipe using frozen cherries
Michigan Tradition
In the Great Lakes region, sour cherry pie is a summer staple, especially in Traverse City, the cherry capital of the world. Locals often use Montmorency cherries, which are naturally tart and perfect for baking. The filling is typically less sweet to let the cherries’ natural flavor shine. 🗺️
Midwest Farmhouse Style
Midwestern bakers often add a lattice top crust instead of a full cover, allowing the vibrant filling to peek through. The crust is usually made with lard or shortening for extra flakiness, and a pinch of cinnamon or nutmeg is sometimes mixed into the sugar topping.
Amish Country Approach
The Amish communities in Pennsylvania and Ohio prefer a streusel topping over traditional pie crust. They combine ½ cup flour, ¼ cup sugar, and ¼ cup cold butter for a crumbly finish. This method saves time while delivering rustic charm.
Southern Variation
In the South, bakers often add 1 tbsp bourbon or 1 tsp apple cider vinegar to the filling for depth. The crust might include a touch of cornmeal for texture, and the pie is frequently served with whipped cream instead of ice cream. 💛
Pacific Northwest Twist
West Coast bakers sometimes incorporate 1 tbsp honey or maple syrup into the filling for a natural sweetness. They also use whole wheat pastry flour in the crust for a nuttier flavor, reflecting the region’s preference for whole grains.
Nutrition Facts
Frequently Asked Questions
Do I need to thaw the cherries first?
Thaw the cherries completely and drain them well to prevent excess liquid in your filling. Pat them dry with a paper towel for best results.
Why does the filling bubble during baking?
The cornstarch thickens as it heats, creating steam that escapes through the crust vents. Bubbling means your filling is setting properly.
How do I prevent a soggy bottom crust?
Sprinkle 1 tablespoon of breadcrumbs or crushed cookies in the bottom crust before adding filling. This creates a barrier against moisture.
Can I make this ahead of time?
Yes! Assemble the pie and refrigerate up to 24 hours before baking. Or bake completely and store at room temperature for 2 days.

- 6 Egg Cake Recipe with Oil: Light as Air With Buttery Moisture - October 4, 2026
- 4 Bean Casserole Recipe: One-Pan Heartiness With Smoky Paprika Depth - October 4, 2026
- 3-Ingredient Keto Mug Cake Recipe: Microwave Magic in 2 Minutes - October 4, 2026