
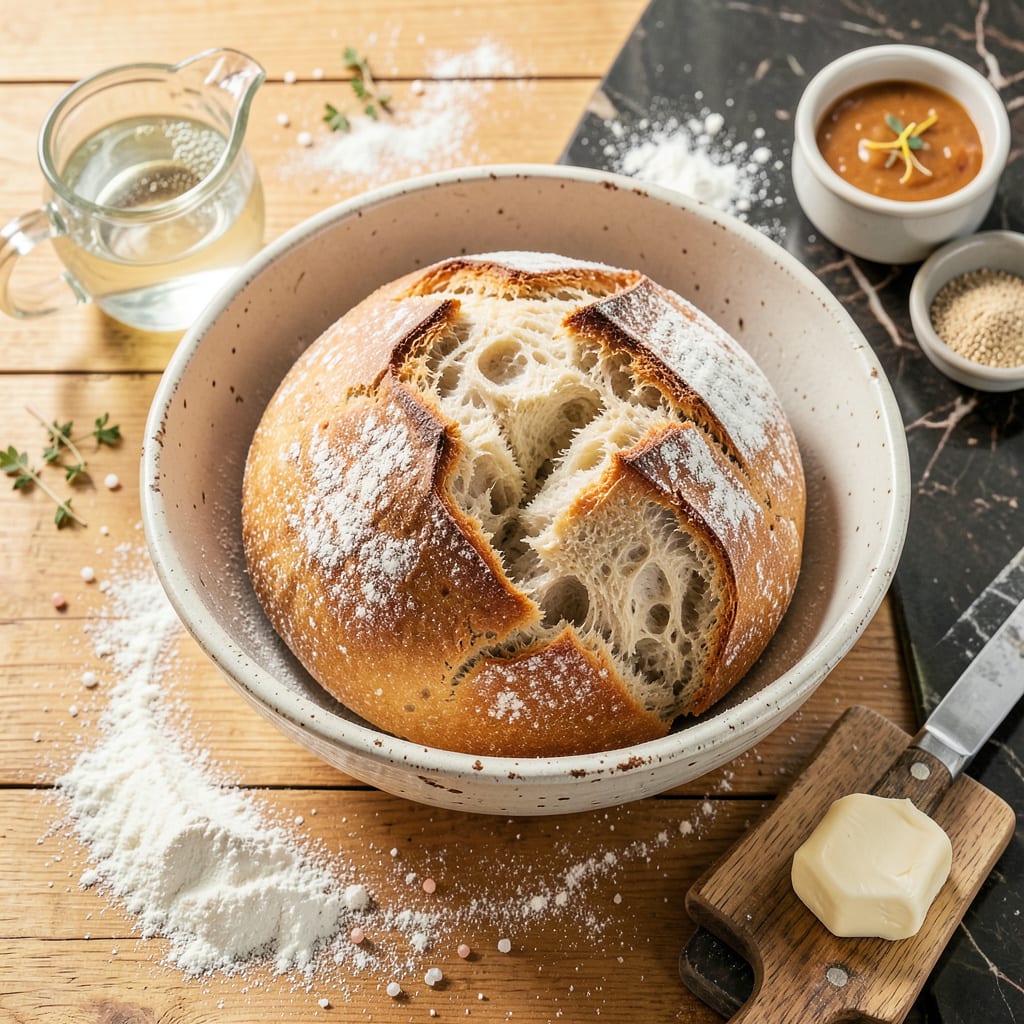
There’s something deeply satisfying about pulling a golden, crusty loaf of bread from your own oven—especially when it rivals what you’d find at a bakery. This recipe delivers that exact experience, with a rustic texture and rich flavor that make it worth every minute of hands-on time.
The process is straightforward but precise, ensuring a homemade loaf with a shatteringly crisp crust and soft, airy interior. No fancy equipment required, just patience and attention to detail. Whether you’re new to baking or a seasoned pro, this method yields consistent, professional-quality results.
Ingredients for Joanna Gaines Bread
Simple ingredients, extraordinary results—this is what transforms flour and water into bakery-quality bread.
| Ingredient | Amount | Notes |
|---|---|---|
| Bread Flour 🌾 | 4 ½ cups | King Arthur preferred for consistency |
| Instant Yeast 🍞 | 2 ¼ tsp | Or active dry yeast, proofed first |
| Granulated Sugar 🍚 | 2 tbsp | Feeds yeast for proper rise |
| Kosher Salt 🧂 | 2 tsp | Diamond Crystal preferred |
| Lukewarm Water 💧 | 1 ¾ cups | 105-110°F for yeast activation |
| Unsalted Butter 🧈 | 3 tbsp | Melted and cooled slightly |
| Large Egg 🥚 | 1 whole | Room temperature, beaten |
| Honey 🍯 | 2 tbsp | Adds sweetness and golden color |
| Olive Oil 🫒 | 1 tbsp | For bowl coating and crust |
| Cornmeal 🌽 | ¼ cup | For dusting baking surface |
| All-Purpose Flour 🌾 | ½ cup | For kneading surface only |
The flour makes all the difference here. King Arthur Bread Flour gives that perfect chew and structure—worth the extra dollar. I buy mine in 10-pound bags from Costco when I’m serious about baking. The yeast should be fresh (check the expiration date!), and instant yeast is my go-to for reliability. For the butter, Kerrygold or Plugrá add that rich flavor you taste in artisanal loaves. Don’t skip the cornmeal—it’s what gives that professional bakery bottom crust (the stuff that makes that satisfying crunch when you slice).
No bread flour? All-purpose works in a pinch, but add 2 extra tbsp per cup to compensate. Out of honey? Maple syrup or agave at equal amounts. The egg wash is what gives that golden shine—if you’re vegan, olive oil or plant milk brushed on works too (just less glossy). Yeast too old? Test it first: if it doesn’t foam in warm water with sugar within 5 minutes, toss it. And if your kitchen’s cold, warm the bowl with hot water before mixing—yeast needs that cozy environment to wake up properly.
Dough rises best in a slightly warm, draft-free spot—my oven with the light on works perfectly. Once baked, cool completely on a wire rack (at least 2 hours) before slicing—this keeps the crumb from gumming up. Store wrapped in a tea towel for 2 days at room temp, or slice and freeze for 3 months. Pro tip: reheat frozen slices in a 350°F oven for 5 minutes to revive that fresh-baked texture.
Why You’ll Love This Recipe
- No-Knead Magic: Honestly, this might be the easiest yeast bread I’ve ever made. Just mix bread flour, instant yeast, sugar, salt, and lukewarm water—no stand mixer, no kneading, no stress. Walk away, let it rise, and the dough practically does the work for you.
- That Golden Crust: Here’s what sold me—the sugar caramelizes just enough to give the crust this subtle sweetness and perfect crisp, while the inside stays soft and pillowy. It’s the kind of bread that disappears fast, still warm from the oven with butter melting into every bite.
- Weeknight to Weekend: I’ve served this with Tuesday spaghetti, slathered with jam for weekend brunch, and even turned leftovers into killer garlic bread for movie night. It’s unfussy enough for a school-night side but impressive enough that guests ask for the recipe.
- Budget-Friendly Staple: Five ingredients—most of which I already keep stocked—and it makes two loaves. I freeze one for busy weeks, and it toasts up like fresh. Between us, it costs less than a fancy bakery loaf and tastes ten times better.
Step-by-Step Instructions for Homemade Bread With Bakery-Style Crust
Here’s the method I swear by for that perfect golden crust and soft interior every time.
Step 1: Activate the Yeast and Mix the Dough
In a large mixing bowl, whisk together the 4.5 cups Bread Flour, 2.25 tsp Instant Yeast, 2 tbsp Granulated Sugar, and 2 tsp Kosher Salt. I like to make a well in the center before adding the wet ingredients—this helps prevent flour from flying everywhere when you start mixing.
Pour in the 1.75 cups Lukewarm Water (it should feel like warm bath water, about 105-110°F), 3 tbsp Unsalted Butter, 1 whole Large Egg, and 2 tbsp Honey. Using a wooden spoon, stir everything together until you see no dry flour remaining. The dough will be shaggy and sticky at this stage—that’s exactly what you want.
Step 2: Knead Until Smooth and Elastic
Turn the dough out onto a lightly floured surface (I use the 0.5 cup All-Purpose Flour for this). Here’s the thing—don’t be tempted to add more flour than necessary. The dough should stick slightly to your hands and the counter as you knead.
Knead for about 8-10 minutes by pushing the dough away with the heel of your hand, then folding it back over itself. You’ll notice the texture changing as you work—it starts out sticky and gradually becomes smooth and elastic. To test if it’s ready, poke the dough with your finger; if it springs back slowly, you’re there.
Step 3: First Rise for Maximum Flavor Development
Lightly coat a clean bowl with the 1 tbsp Olive Oil and place your dough in it, turning to coat all sides. This prevents the dough from drying out as it rises. Cover the bowl with a damp kitchen towel or plastic wrap.
Let it rise in a warm, draft-free place for 1-2 hours, or until it’s doubled in size. I like to preheat my oven to 200°F for 2 minutes, then turn it off and place the bowl inside—this creates the perfect warm environment. The dough is ready when it springs back slowly when gently pressed with two fingers.
Step 4: Shape and Second Rise for Perfect Structure
Punch down the risen dough to release air bubbles, then turn it out onto a lightly floured surface. Shape it into a loaf by flattening it into a rectangle, then rolling it up tightly from the short end. Pinch the seam and tuck it under.
Dust a baking sheet with the 0.25 cup Cornmeal—this gives that bakery-style crunch to the bottom crust. Place your shaped loaf on the prepared sheet, cover loosely, and let it rise again for 30-45 minutes. It should look puffy and spring back slowly when pressed gently.
Step 5: Bake to Golden Perfection
Preheat your oven to 375°F while the dough does its final rise. Just before baking, make a ½-inch deep slash down the center of the loaf with a sharp knife or razor blade. This allows the bread to expand properly in the oven.
Bake for 30-35 minutes until the crust is deep golden brown and the internal temperature reaches 190°F. You’ll know it’s done when the loaf sounds hollow when tapped on the bottom. Let it cool on a wire rack for at least 1 hour before slicing—this prevents a gummy texture. The crust should be crisp, and the interior soft with an even crumb.
Storing and Reheating This Recipe
Room Temperature Storage
Once completely cooled, wrap your loaf in a clean linen tea towel or place it in a bread box at room temperature. This method keeps the crust crisp while preventing the interior from drying out. I find it stays fresh for up to 3 days this way—just make sure it’s fully cooled first to avoid condensation. 🍞
Refrigerator Storage
For slightly longer storage, you can refrigerate the bread in a paper bag inside a ziplock plastic bag. The paper absorbs excess moisture while the plastic prevents drying. It’ll keep for about 5 days, though the crust may soften slightly. I recommend warming slices in a 350°F toaster oven for 2-3 minutes to revive the texture.
Freezing for Long-Term
To freeze, slice the loaf and wrap individual pieces in plastic wrap, then place in a freezer-safe bag. This prevents freezer burn and lets you grab just what you need. The bread keeps well for up to 3 months. My trick: Write the date on the bag—you’ll forget when you put it in!
Reheating from Frozen
For best results, reheat frozen slices directly from the freezer in a 375°F oven for 5-7 minutes. No need to thaw first! The crust will crisp up beautifully. I sometimes brush the top with a little melted butter before reheating for extra richness. ⚡
Reviving Day-Old Bread
If your loaf has lost its freshness, wrap it in aluminum foil and warm in a 300°F oven for 10-15 minutes. The steam created inside the foil restores moisture. For extra crispiness, unwrap and bake for 2 more minutes after steaming.
Storage Pro Tips
Avoid storing bread in plastic bags at room temperature—it creates a gummy crust. If you don’t have a bread box, a ceramic bowl with a plate on top works surprisingly well. And here’s my secret: Keep a terracotta bread keeper in your kitchen—they’re worth every penny for serious bakers!
Nutrition Facts
Frequently Asked Questions
Why does my bread turn out dense instead of light?
Dense bread usually means the yeast didn’t activate properly or the dough didn’t rise enough. Check your water temperature—it should be 105-110°F. Also, ensure you’re kneading long enough (at least 8-10 minutes) to develop gluten structure.
Can I make this without a stand mixer?
This recipe is designed for hand-kneading. The key is patience—knead until the dough passes the “windowpane test” (stretch a small piece thin enough to see light through). It might take 12-15 minutes by hand, but the results are worth it.
What’s the best way to get that golden crust?
For that signature bakery-style crust, brush the loaf with beaten egg mixed with 1 tsp water before baking. The slash down the center also helps—make it ½-inch deep so the bread can expand properly. Bake until the internal temperature reaches 190°F.
How do I know when the dough has risen enough?
Use the “poke test”: Gently press two fingers about ½-inch into the dough. If it springs back slowly but leaves a slight indentation, it’s ready. If it springs back quickly, let it rise longer. For cold kitchens, extend rise time to 2 hours.

- 6 Egg Cake Recipe with Oil: Light as Air With Buttery Moisture - October 4, 2026
- 4 Bean Casserole Recipe: One-Pan Heartiness With Smoky Paprika Depth - October 4, 2026
- 3-Ingredient Keto Mug Cake Recipe: Microwave Magic in 2 Minutes - October 4, 2026