
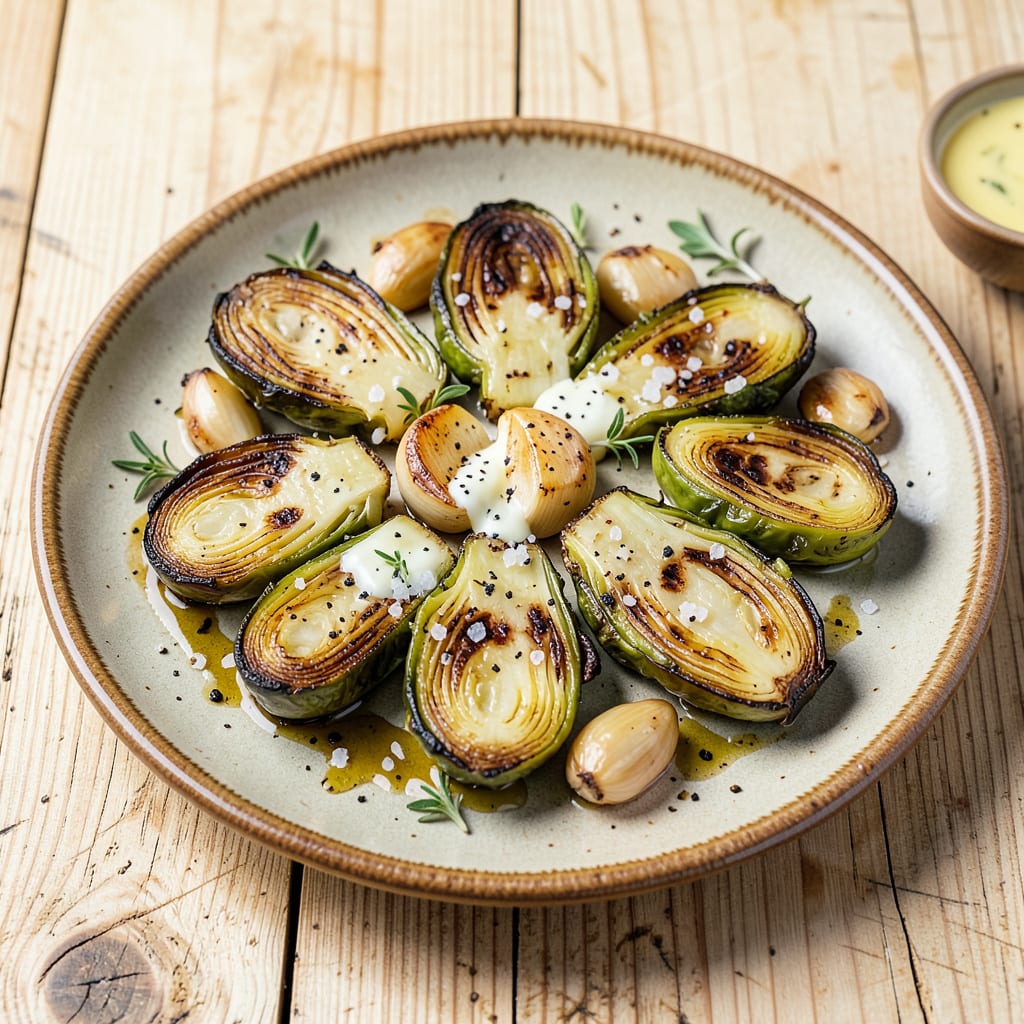
Recreating Saltgrass Steakhouse’s signature Brussels sprouts at home delivers that same irresistible combination of crispy edges, buttery richness, and garlicky depth. This recipe captures the restaurant-quality flavor through precise caramelization and a simple yet effective seasoning approach that transforms ordinary sprouts into something extraordinary.
The method relies on high-heat roasting to achieve perfect texture—golden, crispy exteriors with tender centers—while a finishing toss in garlic-infused butter replicates Saltgrass’s signature flavor profile. With just 30 minutes and 5 ingredients, you’ll achieve a side dish that rivals the steakhouse original, complete with that addictive balance of savory and slightly sweet notes.
Ingredients for Saltgrass Brussel Sprouts
Five essential ingredients deliver Saltgrass Steakhouse’s signature crispy, buttery, garlicky Brussels sprouts with restaurant-quality precision.
| Ingredient | Amount | Notes |
|---|---|---|
| Brussels sprouts 🥬 | 1 ½ lb | Trimmed and halved lengthwise |
| Extra-virgin olive oil 🫒 | 3 tbsp | Divided for roasting and finishing |
| Kosher salt 🧂 | 1 tsp | Diamond Crystal preferred for texture |
| Freshly ground black pepper 🌶️ | ½ tsp | Coarse grind for optimal flavor |
| Unsalted butter 🧈 | 4 tbsp | European-style for richer flavor |
| Garlic cloves 🧄 | 4 cloves | Minced for even distribution |
| Fresh lemon juice 🍋 | 1 tbsp | For brightening the final dish |
The Brussels sprouts are the foundation—select firm, bright green heads with tightly packed leaves. Whole Foods or local farmers markets typically offer superior quality compared to pre-packaged options. For the butter, European-style unsalted butter (such as Plugrá or Kerrygold) provides the necessary fat content and flavor depth that replicates Saltgrass’s signature richness. The olive oil should be high-quality extra-virgin (look for California Olive Ranch or Colavita) to withstand high-heat roasting without burning.
Substitutions must maintain the dish’s integrity. Avocado oil can replace olive oil if preferred, though it lacks the fruity undertones. For a dairy-free adaptation, vegan butter (such as Miyoko’s) performs best, but clarify it first to remove excess water. Garlic powder (1 tsp) may substitute for fresh in a pinch, though fresh delivers superior aromatic quality. The lemon juice is non-negotiable—it cuts through the richness—but white wine vinegar (½ tsp) can work if absolutely necessary.
Store trimmed Brussels sprouts in a sealed container with a paper towel for up to 5 days—they’ll oxidize quickly without proper ventilation. The garlic-infused butter mixture can be prepared 24 hours ahead and refrigerated; reheat gently before tossing. For optimal texture, serve immediately after finishing—crispness degrades within 30 minutes of leaving the oven.
Why You’ll Love This Recipe
- One Pan Magic: I toss the halved Brussels with olive oil, salt, and pepper, roast them until crispy, then finish with a swirl of melted butter. One sheet pan, one spatula, and zero fuss—cleanup takes 60 seconds flat.
- That Butter Finish: Here’s what sold me—the way the nutty browned butter clings to the caramelized edges of the sprouts. It’s not just salty and crispy; it’s rich and almost buttery-popcorn good.
- Weeknight MVP: Between us, this is my “I forgot to plan dinner” lifesaver. Pairs just as well with grilled steak as it does tossed into meal prep bowls or served solo with crusty bread.
- Budget-Friendly Crowd Pleaser: A pound of Brussels costs less than a fancy salad, but roasted like this? They disappear faster. Leftovers (if there are any) reheat surprisingly well—still crispy, still buttery.
Step-by-Step Instructions for Saltgrass Brussels Sprouts
Master the restaurant technique with these precise steps for achieving caramelized, buttery perfection.
Step 1: Prepare the Brussels Sprouts for Even Cooking
Begin by trimming the stem ends of the 1.5 lb Brussels sprouts and removing any discolored outer leaves. Cut each sprout in half lengthwise through the core—this exposes more surface area for caramelization and ensures even cooking. For particularly large sprouts, quarter them instead to maintain consistent sizing.
Rinse the halved sprouts under cold water and pat them completely dry with paper towels. I emphasize this step because residual moisture will steam the sprouts instead of allowing them to develop that coveted crispy exterior. Transfer the prepared sprouts to a large mixing bowl.
Step 2: Season and Roast for Initial Caramelization
Drizzle the dried Brussels sprouts with 2 tbsp of the extra-virgin olive oil, reserving the remaining 1 tbsp for finishing. Add the 1 tsp kosher salt and 0.5 tsp freshly ground black pepper, then toss thoroughly to coat every surface. The salt will draw out moisture initially but then create that perfect crispy crust during roasting.
Spread the sprouts in a single layer on a rimmed baking sheet, cut sides down. Roast in a preheated 425°F oven for 15-18 minutes until the cut sides develop a deep golden-brown color and the edges begin to crisp. This initial high-heat roast builds the flavor foundation before adding the butter and garlic.
Step 3: Create the Garlic Butter Glaze
While the sprouts roast, mince the 4 cloves garlic cloves into fine, even pieces. In a small saucepan over medium-low heat, melt the 4 tbsp unsalted butter until it begins to foam. Add the minced garlic and cook for 1-2 minutes, stirring constantly, until fragrant but not browned. Overcooked garlic becomes bitter, so watch this step carefully.
Remove the saucepan from heat immediately when the garlic is just golden. The residual heat will continue cooking the garlic slightly, so this timing is crucial. Stir in the 1 tbsp fresh lemon juice—this brightens the rich butter and cuts through the Brussels sprouts’ natural bitterness.
Step 4: Finish with Butter Basting and Broiling
Transfer the roasted sprouts to a large skillet over medium heat. Pour the garlic butter mixture over the sprouts and toss gently to coat. Cook for 2-3 minutes, stirring occasionally, allowing the sprouts to absorb the buttery garlic flavor. The edges should become deeply caramelized while maintaining some crispness.
For the final touch, transfer the skillet to the broiler for 1-2 minutes until the butter begins to bubble and the sprouts develop a glossy sheen. Watch closely to prevent burning. Drizzle with the remaining 1 tbsp extra-virgin olive oil and toss one final time before serving immediately while the butter is still glistening.
Essential Equipment for Perfect Results
Oven and Baking Sheet
Your oven is the workhorse here, so make sure it’s properly preheated to 425°F before the sprouts go in. I use a convection oven when possible for more even heat distribution, but conventional works perfectly fine. The key is maintaining consistent temperature throughout the roasting process.
A heavy-duty half-sheet pan (like the Nordic Ware Naturals) is essential for even browning. Avoid nonstick pans—they can’t handle the high heat needed for proper caramelization. The dark metal helps develop that signature crispy exterior we’re after. 🔥
Mixing Bowls
You’ll need a large mixing bowl (at least 3-quart capacity) to properly toss the sprouts with oil and seasonings. I prefer stainless steel bowls because they’re durable and easy to clean. The OXO Good Grips line offers great options with non-slip bases.
Make sure your bowl is completely dry before adding the sprouts—any residual water will prevent proper oil adhesion. This small detail makes a big difference in achieving that perfect crispy texture we’re aiming for.
Skillet for Finishing
A 12-inch cast iron skillet is my go-to for the final butter tossing stage. The Lodge Chef Collection provides excellent heat retention and even cooking. The wide surface area allows you to spread the sprouts in a single layer for optimal butter distribution.
If you don’t have cast iron, a stainless steel skillet works well too. Just make sure it’s oven-safe if you plan to broil at the end. Avoid nonstick skillets as they can’t handle the high heat needed for proper caramelization.
Knives and Cutting Board
A sharp 8-inch chef’s knife makes quick work of trimming and halving the sprouts. I recommend the Wüsthof Classic for its durability and precision. Pair it with a large wooden cutting board (at least 12×18 inches) to give yourself plenty of workspace.
The cutting board should have a juice groove to catch any rolling sprouts. I keep a damp paper towel under my board to prevent slipping while working. This simple trick saves me from chasing runaway sprouts across my counter! 💡
Garlic Press and Zester
While you can mince garlic with a knife, a garlic press (like the OXO Good Grips) gives you perfectly uniform pieces every time. For the lemon juice, a fine microplane zester helps you get the most juice with minimal seeds.
These small tools make a big difference in prep efficiency. The garlic press ensures even distribution of flavor throughout the dish, while the zester lets you get every last drop of that bright lemon juice that balances the richness.
Thermometer and Timer
An oven thermometer (like the CDN ProAccurate) ensures your oven is actually at 425°F—many home ovens run hot or cold. Pair it with a digital timer to track both the initial roasting and final broiling stages precisely.
Timing is everything with this dish. The 15-18 minute initial roast develops the foundation, while the 1-2 minute broil at the end creates that restaurant-quality finish. Don’t guess—measure for perfect results every time. ⏰
Nutrition Facts
Frequently Asked Questions
Why do my Brussels sprouts turn out soggy instead of crispy?
Residual moisture is the most common culprit! Pat them completely dry after washing, and avoid overcrowding on the baking sheet. Roast at 425°F with cut sides down for maximum crispiness.
Can I make these ahead for a party?
Roast the sprouts up to 4 hours ahead and reheat in a 400°F oven for 5-7 minutes. Skip the final butter toss until just before serving to maintain texture. The garlic butter can be prepped 24 hours in advance.
What’s the best way to adjust the garlic flavor?
For milder garlic, add it during the last 2 minutes of roasting. For bolder flavor, double the garlic and infuse it in the butter for 5 minutes off heat. Garlic powder (½ tsp) works in a pinch.
Can I use frozen Brussels sprouts?
Fresh is ideal, but if using frozen, thaw and pat extremely dry first. Roast at 450°F for 20-25 minutes to compensate for extra moisture. Texture won’t be as crispy.

- 6 Egg Cake Recipe with Oil: Light as Air With Buttery Moisture - October 4, 2026
- 4 Bean Casserole Recipe: One-Pan Heartiness With Smoky Paprika Depth - October 4, 2026
- 3-Ingredient Keto Mug Cake Recipe: Microwave Magic in 2 Minutes - October 4, 2026