
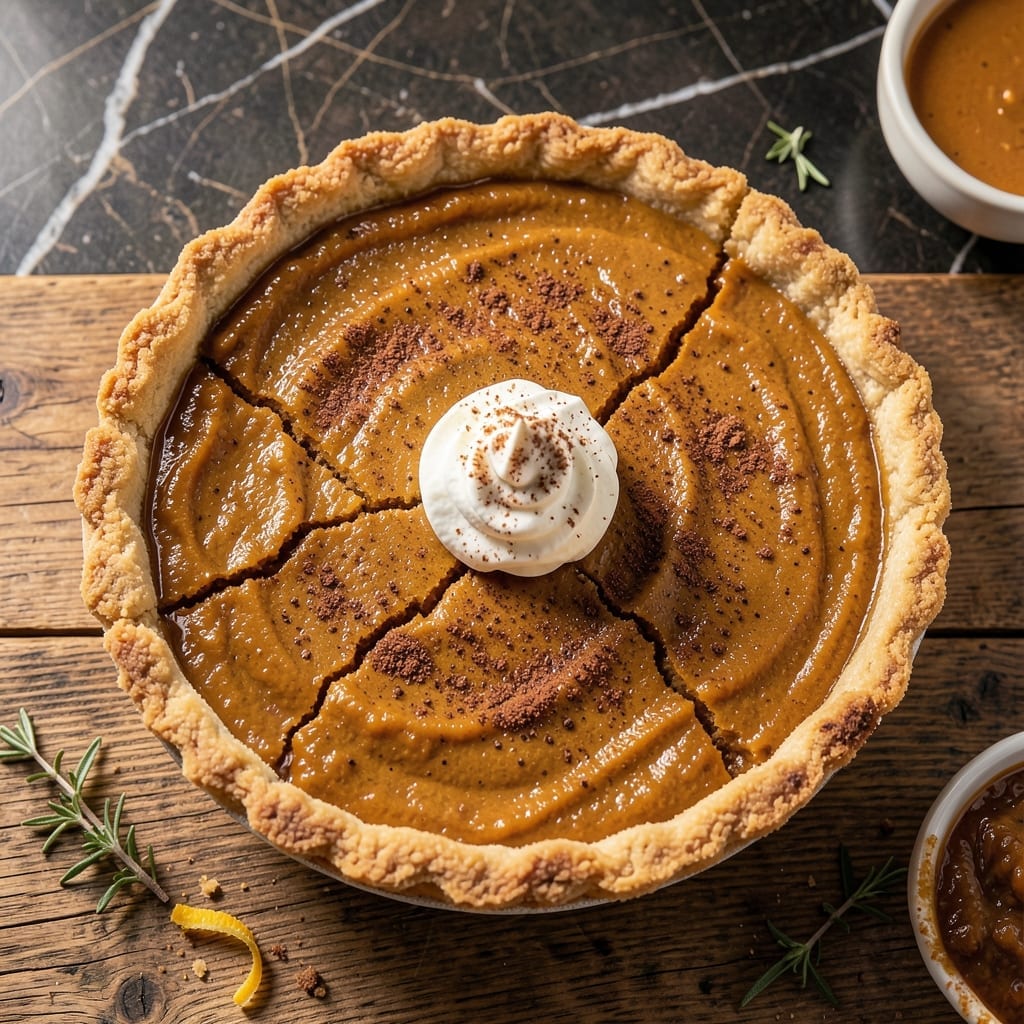
This classic pumpkin pie delivers a flaky crust and perfectly spiced custard filling every time. I’ve refined this method to ensure the crust stays crisp while the filling sets to creamy perfection.
The secret lies in pre-baking the crust and using a balanced blend of warm spices. This prevents a soggy bottom and guarantees a smooth, rich texture that’s neither too dense nor too runny.
You’ll end up with a pie that’s golden on top, with a velvety filling that holds its shape when sliced. The spices shine through without overpowering the natural sweetness of the pumpkin.
Serve it chilled or at room temperature for the best experience. Here’s how to make it.
Ingredients for Keebler Pumpkin Pie
A pre-made crust plus pantry spices create this timeless holiday dessert with ease.
| Ingredient | Amount | Notes |
|---|---|---|
| Keebler Ready Crust Graham Cracker Pie Crust 🥧 | 1 whole | 9-inch pre-made graham crust |
| Canned Pumpkin Puree 🎃 | 15 oz | Not pumpkin pie filling |
| Sweetened Condensed Milk 🥛 | 14 oz | 1 can, full-fat |
| Large Eggs 🥚 | 2 whole | Room temperature, beaten |
| Granulated Sugar 🧂 | ¾ cup | White granulated preferred |
| Ground Cinnamon 🌿 | 1 tsp | Freshly opened for best aroma |
| Ground Ginger 🌿 | ½ tsp | For warm spice depth |
| Ground Nutmeg 🌰 | ¼ tsp | Freshly grated if possible |
| Ground Cloves 🌿 | ¼ tsp | Use sparingly for boldness |
| Salt 🧂 | ½ tsp | Table salt or fine sea salt |
| Vanilla Extract 💧 | 1 tsp | Pure vanilla, not imitation |
| Unsalted Butter 🧈 | 2 tbsp | Melted for brushing crust |
The crust is what sets this apart. Keebler Ready Crust gives consistent flakiness without the fuss—find it in the baking aisle at any Walmart or Kroger. The pumpkin puree must be plain, not the pre-spiced filling. Libby’s is the gold standard here (available at Target or most supermarkets). Always check the can label to avoid accidental pie filling purchase.
No condensed milk? Evaporated milk plus 1 cup sugar works in a pinch. Out of a spice? Pumpkin pie spice blend at one-third the amount covers cinnamon, ginger, nutmeg, and cloves. Fresh pumpkin puree can replace canned (just strain excess liquid). The eggs are essential for structure—no vegan swaps here since this is a classic custard pie.
Bake and cool completely before slicing—this prevents a runny filling. Store leftovers covered in the fridge for up to 4 days. The pie freezes beautifully for 2 months if wrapped tightly in plastic and foil. Serve chilled or at room temperature for the best texture.
Why You’ll Love This Recipe
- No-Fuss Crust: I love that the Keebler graham crust means zero rolling, zero chilling—just pour and bake.
- Sweet & Spiced: That rich pumpkin mixed with sweetened condensed milk gives it a velvety, caramel-like depth.
- Holiday Shortcut: Between us, this is my secret for stress-free Thanksgiving dessert every single year.
- Leftovers? Yes Please: Honestly, it tastes even better the next day—if it lasts that long.
Step-by-Step Instructions for Spiced Pumpkin Custard Pie
Here’s the method for achieving a smooth, perfectly spiced custard in your pre-made crust.
Step 1: Preheat Oven and Prepare the Crust
Preheat your oven to 425°F. While it heats, melt the 2 tbsp Unsalted Butter and use a pastry brush to coat the inside of the Keebler Ready Crust Graham Cracker Pie Crust evenly. This creates a moisture barrier that helps maintain its flaky texture.
Place the crust on a baking sheet to catch any potential spills during baking. I like to dock the bottom with a fork a few times to prevent air bubbles from forming. Return it to the oven for 5 minutes to begin the pre-baking process while you prepare the filling.
Step 2: Mix the Wet Ingredients
In a large mixing bowl, whisk together the 15 oz Canned Pumpkin Puree, 14 oz Sweetened Condensed Milk, and 2 whole Large Eggs until completely smooth. The condensed milk adds sweetness and creates that signature creamy texture.
Add the 1 tsp Vanilla Extract and continue whisking for another 30 seconds to ensure full incorporation. You’ll notice the mixture becomes slightly lighter in color as air is incorporated—this helps create a silky filling.
Step 3: Combine Dry Ingredients and Spices
In a separate bowl, combine the 0.75 cup Granulated Sugar, 1 tsp Ground Cinnamon, 0.5 tsp Ground Ginger, 0.25 tsp Ground Nutmeg, 0.25 tsp Ground Cloves, and 0.5 tsp Salt. The combination of these warm spices creates that classic pumpkin pie flavor profile.
Gradually add this dry mixture to the wet ingredients while whisking constantly. This prevents lumps from forming and ensures even distribution of spices throughout the custard. The batter should be smooth and pourable, with no visible streaks of spice.
Step 4: Bake Until Set
Pour the filling into the partially baked crust. You’ll notice it fills the crust almost to the top—that’s perfect. Carefully transfer the pie (on its baking sheet) to the preheated oven.
Bake at 425°F for 15 minutes, then reduce the temperature to 350°F and continue baking for 35-40 minutes longer. The pie is done when the center is set but still has a slight jiggle when gently shaken. The edges should be puffed and golden brown.
Step 5: Cool Completely Before Serving
Remove the pie from the oven and let it cool on a wire rack for 1 hour at room temperature. This initial cooling period allows the custard to begin setting without cracking.
Then transfer it to the refrigerator to chill for at least 4 hours (overnight is ideal). The filling will firm up completely during this time, making it easy to slice. Serve chilled with whipped cream if desired, but the spiced custard is rich and flavorful enough to enjoy on its own.
Pro Tips For Making Keebler Pumpkin Pie
- Blind Bake First: Pop the Keebler crust in a 375°F oven for 8-10 minutes before adding the filling—this prevents the soggy bottom I used to get every time.
- Use Room Temp Eggs: Take the eggs out 30 minutes before mixing; they blend smoother into the pumpkin and condensed milk, and I learned this the hard way after seeing lumps in my first few pies.
- Skip the Overmixing: Stir just until the filling is combined—overworking it adds air bubbles that can crack the surface during baking.
- Cool Completely: Let the pie set for at least 2 hours on the counter before slicing, even if it smells irresistible—cutting too soon makes a gooey mess.
Essential Equipment for Great keebler pumpkin pie
Pie Dish Essentials
Since we’re using a Keebler Ready Crust Graham Cracker Pie Crust, you don’t need a traditional pie dish. However, a sturdy 9-inch pie pan works perfectly if making a homemade crust. I prefer Pyrex glass for even heat distribution. 🥧
Mixing Bowls
A large mixing bowl (at least 3-quart capacity) is essential for combining all filling ingredients without spills. I use a stainless steel set from Cuisinox—they’re durable and nest for easy storage.
Whisk and Tools
A balloon whisk ensures smooth custard without lumps. For the crust, a pastry brush applies melted butter evenly. Don’t forget a fork for docking the crust bottom to prevent air bubbles during pre-baking.
Baking Equipment
A rimmed baking sheet catches any potential spills when transferring the pie in and out of the oven. I line mine with parchment paper for easy cleanup. A wire cooling rack allows air circulation for even cooling.
Measuring and Prep
Accurate measuring cups and spoons ensure consistent results. I love OXO’s angled measuring cups for easy reading. A microplane grates fresh nutmeg if you’re using whole spices instead of pre-ground.
Temperature Control
An oven thermometer verifies your oven’s accuracy—many run hot or cold. I check mine with a Taylor Precision model. This ensures the 425°F pre-bake and 350°F finish are spot-on for perfect results. 🌡️
Nutrition Facts
Frequently Asked Questions
Can I use a different crust instead of graham cracker?
Yes! A traditional pie crust or ginger snap crust works well. Just pre-bake at 425°F for 5-7 minutes before adding the filling.
Why does my pie crack on top?
Overmixing or baking at too high a temperature can cause cracks. Ensure the oven is at 350°F after the initial 15 minutes and avoid overbeating the filling.
How do I know when it’s fully baked?
The center should jiggle slightly but not be liquid. The edges will be puffed and golden brown. A toothpick inserted near the center should come out clean.
Can I make this ahead of time?
Bake, cool completely, then refrigerate for up to 4 days. You can also freeze for 2 months if tightly wrapped.

- 6 Egg Cake Recipe with Oil: Light as Air With Buttery Moisture - October 4, 2026
- 4 Bean Casserole Recipe: One-Pan Heartiness With Smoky Paprika Depth - October 4, 2026
- 3-Ingredient Keto Mug Cake Recipe: Microwave Magic in 2 Minutes - October 4, 2026