
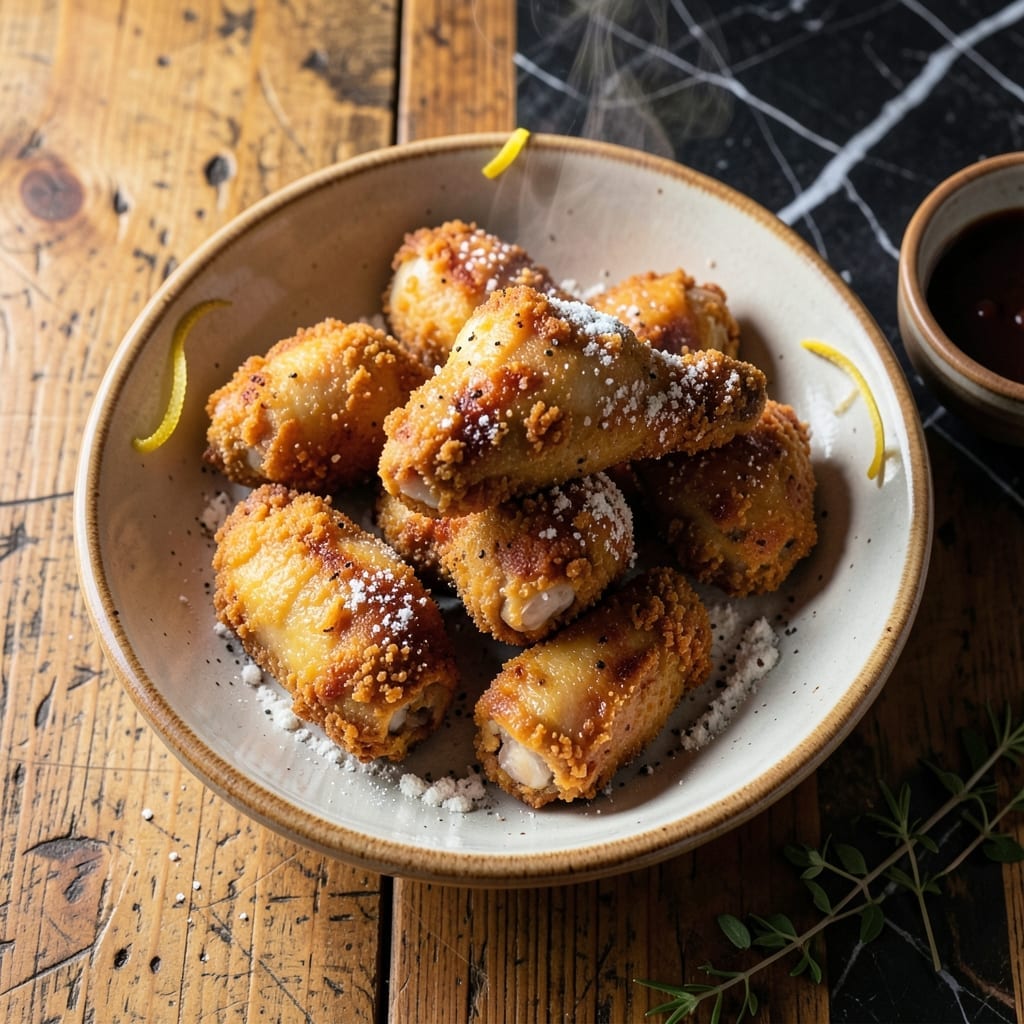
I’ve spent years perfecting this method to recreate KFC’s signature crispy chicken at home. The key lies in a precise spice blend and a two-step frying process that delivers restaurant-quality results.
This copycat version uses simple pantry staples and a technique that ensures every piece emerges golden and shatteringly crispy. The secret is in the batter’s resting time and maintaining the oil at exactly 350°F.
What sets this apart is the balance of eleven herbs and spices that create that familiar, addictive flavor. The chicken stays juicy inside while developing a perfectly seasoned crust outside.
The method is streamlined for home kitchens but never sacrifices authenticity. You’ll achieve that signature crunch without commercial deep fryers or special equipment.
Ingredients for Kfc Copycat
Eleven spices and simple pantry staples bring this iconic crispy chicken to your kitchen. Nothing exotic, just precise measurements.
| Ingredient | Amount | Notes |
|---|---|---|
| Chicken Thighs and Drumsticks 🍗 | 3 lb | Bone-in, skin-on for crispiness |
| All-Purpose Flour 🌾 | 2 cups | For dredging and batter |
| Buttermilk 🥛 | 1 ½ cups | Full-fat for tenderness |
| Large Eggs 🥚 | 2 whole | For binding the batter |
| Salt 🧂 | 1 tbsp | Diamond Crystal kosher preferred |
| Ground Black Pepper 🌶️ | 1 tsp | Freshly ground for best flavor |
| Paprika 🌶️ | 1 tbsp | Sweet or smoked variety |
| Garlic Powder 🧄 | 1 tbsp | Not garlic salt |
| Onion Powder 🧅 | 1 tbsp | Fresh ground preferred |
| Dried Thyme 🌿 | 1 tsp | Crushed between fingers |
| Dried Basil 🍃 | 1 tsp | Rubbed to release oils |
| Dried Oregano 🍃 | 1 tsp | Mediterranean variety |
| Celery Salt 🌿 | 1 tsp | Essential for authentic flavor |
| Ground Ginger 🌿 | ½ tsp | Balances the spices |
| White Pepper 🌶️ | ½ tsp | Milder than black pepper |
| Vegetable Oil 🫒 | 4 cups | For frying, high smoke point |
The chicken is everything here. Bone-in, skin-on thighs and drumsticks deliver the juiciest, crispiest results—boneless dries out. Most supermarkets carry them pre-cut, but Costco offers the best value for larger batches. The buttermilk is non-negotiable for that signature tenderness; full-fat makes a noticeable difference. For the flour, all-purpose is standard, but a 50/50 mix with cake flour can yield an even lighter crust.
No buttermilk? Whole milk with a tablespoon of vinegar works in a pinch. Swap celery salt for equal parts salt and celery seed if needed. The paprika can be smoked for depth, but sweet keeps it classic. Penzeys is my go-to for spices—fresher than grocery store jars. The vegetable oil can be peanut or canola (higher smoke points), but avoid olive oil—it burns at frying temps.
The spice blend keeps for 6 months in an airtight container. Prep it ahead to save time. Fried chicken is best eaten fresh but reheats surprisingly well in a 375°F oven for 10-15 minutes to restore crispiness. Leftovers? They won’t last long.
Why You’ll Love This Recipe
- Dip and Fry: That buttermilk and egg wash clings to every curve of the chicken, making the flour crust stick perfectly with zero fuss.
- Crispy Perfection: First bite cracks through the seasoned flour shell to juicy meat—exactly like the real deal, only fresher.
- Budget Winner: A bag of thighs and drumsticks costs less than a bucket, and I get double the portions.
Step-by-Step Instructions for Crispy Fried Chicken
Master the technique that delivers shatteringly crisp, juicy results every time.
Step 1: Season and Marinate the Chicken
Pat the 3 lb Chicken Thighs and Drumsticks dry with paper towels to ensure maximum crispiness. In a large bowl, whisk together the 1.5 cups Buttermilk with the 2 whole Large Eggs until fully combined. This buttermilk mixture acts as both a tenderizer and adhesive for the coating.
Add the chicken pieces to the buttermilk mixture, ensuring they are fully submerged. Cover and refrigerate for at least 4 hours (overnight is ideal). This extended marinating time allows the buttermilk to penetrate deeply, resulting in exceptionally tender meat with a well-seasoned crust.
Step 2: Prepare the Spiced Flour Coating
In a large, shallow dish, combine the 2 cups All-Purpose Flour with all the spices: 1 tbsp Salt, 1 tsp Ground Black Pepper, 1 tbsp Paprika, 1 tbsp Garlic Powder, 1 tbsp Onion Powder, 1 tsp Dried Thyme, 1 tsp Dried Basil, 1 tsp Dried Oregano, 1 tsp Celery Salt, 0.5 tsp Ground Ginger, and 0.5 tsp White Pepper.
Whisk thoroughly until the mixture is uniform and free of lumps. I crush the dried herbs between my fingers as I add them to release their essential oils, which intensifies the flavor. This blend replicates the signature seasoning profile that defines the classic taste you’re aiming for.
Step 3: Dredge and Coat for Maximum Crisp
Remove the chicken from the buttermilk mixture, allowing excess to drip off. Dredge each piece in the spiced flour, pressing firmly to adhere the coating to all surfaces. For extra crispiness, I use a double-dredge method: after the first coating, dip the piece back into the buttermilk, then dredge in the flour mixture a second time.
Place the coated chicken on a wire rack set over a baking sheet. This allows air circulation underneath, preventing the coating from becoming soggy before frying. Let the chicken rest for 15-20 minutes—this helps the coating set and adhere better during frying.
Step 4: Fry to Golden Perfection
Heat the 4 cups Vegetable Oil in a deep, heavy-bottomed pot or Dutch oven over medium-high heat to 350°F. Use a deep-fry thermometer for accuracy; maintaining the correct temperature is crucial for even cooking and crispiness. The oil should be deep enough to submerge the chicken pieces halfway to two-thirds of the way up.
Fry the chicken in batches to avoid overcrowding, which would lower the oil temperature. Cook the dark meat for 14-16 minutes and the drumsticks for 12-14 minutes, turning occasionally, until the coating is deep golden brown and the internal temperature reaches 165°F. Drain on a wire rack to maintain crispiness—paper towels can create steam that makes the coating soggy.
Serve immediately while hot and crispy. The exterior should have a satisfying crunch that gives way to juicy, well-seasoned meat with every bite.
Pro Tips For Making Kfc Copycat
- Double-Dredge the Chicken: Dip each piece in flour, then buttermilk, then back in flour—this builds that signature extra-crispy crust. I learned this the hard way after my first batch came out sad and thin.
- Rest the Coated Chicken: Let the dredged pieces sit for 10 minutes before frying. This gives the coating time to adhere properly—my grandmother swore by this, and she was right.
- Use a Thermometer: Fry at 350°F and check the oil temp between batches. After burning three batches, I finally figured out that guessing just doesn’t work.
- Pat the Chicken Dry: Dry the chicken thoroughly with paper towels before dredging. Sounds weird, but it works—wet skin steams the coating instead of frying it crisp.
Dietary Considerations for This kfc copycat
Gluten-Free Adaptation
Swap the 2 cups All-Purpose Flour for a 1:1 gluten-free flour blend. I recommend King Arthur Measure for Measure for best texture. Add 1 tsp xanthan gum to help the coating adhere better during frying.
Dairy-Free Version
Replace 1.5 cups Buttermilk with 1.5 cups unsweetened almond milk plus 1 tbsp apple cider vinegar. Let sit for 5 minutes to curdle. This mimics the acidity needed for tenderizing.
Lower Sodium Option
Reduce 1 tbsp Salt to 1 tsp and replace 1 tsp Celery Salt with ½ tsp celery seed. Boost flavor with 1 extra tsp Garlic Powder and Onion Powder. Taste the spice blend before coating. 💡
Air Fryer Method
Spray coated chicken lightly with oil and air fry at 375°F for 12-15 minutes, flipping halfway. For crispier results, spritz with oil again before the final 5 minutes of cooking.
Nut-Free Considerations
Ensure all spices are processed in nut-free facilities. McCormick and Badia brands label clearly for allergens. Use sunflower or soybean oil instead of vegetable oil blends that may contain nut oils.
Egg-Free Binding
Replace 2 Large Eggs with ¼ cup aquafaba (chickpea brine) whisked until frothy. This works surprisingly well as a binder and keeps the coating crispy. The buttermilk still provides the tang.
Nutrition Facts
Frequently Asked Questions
Can I use chicken breast instead of thighs?
Yes, but it dries out faster. Use bone-in, skin-on breasts and reduce frying time to 12-13 minutes. For extra juiciness, brine them in saltwater for 1 hour first.
Why does my coating fall off during frying?
This usually means the oil wasn’t hot enough or the chicken wasn’t rested after coating. Maintain 350°F oil and let coated pieces rest for 15-20 minutes before frying. The double-dredge method also helps.
How do I keep it crispy if serving later?
Place fried chicken on a wire rack in a 200°F oven for up to 30 minutes. Avoid stacking pieces. For longer holding, reheat in a 375°F oven for 10 minutes to restore crunch.
Can I bake this instead of frying?
Bake at 400°F for 25-30 minutes on a wire rack. Spray lightly with oil first. It won’t be as crispy but still delicious. For better texture, finish under the broiler for 2-3 minutes.

- 6 Egg Cake Recipe with Oil: Light as Air With Buttery Moisture - October 4, 2026
- 4 Bean Casserole Recipe: One-Pan Heartiness With Smoky Paprika Depth - October 4, 2026
- 3-Ingredient Keto Mug Cake Recipe: Microwave Magic in 2 Minutes - October 4, 2026