
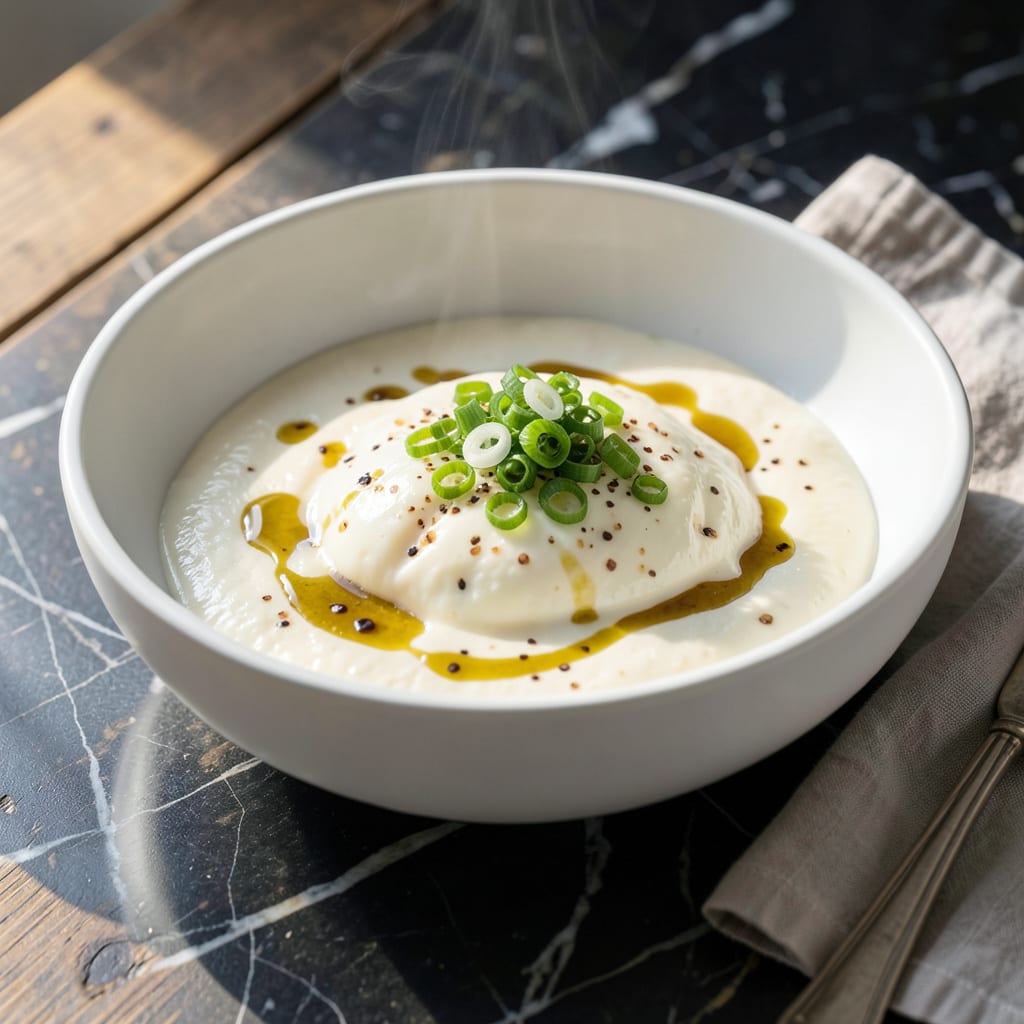
This Korean steamed egg dish delivers a silk-smooth custard texture that’s both delicate and deeply flavorful. A staple in Korean cuisine, it transforms simple eggs into something extraordinary.
Beaten eggs steamed with scallions create a light, savory dish that’s perfect for breakfast or as a side. The gentle cooking process ensures a tender, melt-in-your-mouth result every time.
Ingredients for Korean Steamed Egg
Simple ingredients, extraordinary texture. That’s the magic here.
| Ingredient | Amount | Notes |
|---|---|---|
| Large Eggs 🥚 | 8 whole | Room temperature preferred |
| Scallions 🧅 | 4 whole | Thinly sliced, white and green parts |
| Water 💧 | 1 ½ cups | For egg mixture |
| Sea Salt 🧂 | ¾ tsp | Fine grain preferred |
| Ground Black Pepper 🌶️ | ¼ tsp | Freshly ground preferred |
| Sesame Oil 🫒 | 1 tbsp | Toasted for depth |
| Soy Sauce 🥫 | 1 tbsp | Low-sodium preferred |
| Garlic Cloves 🧄 | 2 cloves | Minced finely |
| Vegetable Oil 🫒 | 1 tsp | For greasing dish |
| Toasted Sesame Seeds 🌰 | 1 tbsp | For garnish |
| Red Pepper Flakes 🌶️ | ¼ tsp | Optional for heat |
| Fish Sauce 🐟 | ½ tsp | Optional for umami |
The eggs are everything—fresh, high-quality eggs make the silkiest custard. I grab mine from Whole Foods or the farmers market when I can (the yolks are always that perfect deep orange). Room temperature eggs beat up fluffier, so pull them out 30 minutes before cooking. The scallions add that fresh, oniony bite—don’t skip them, and use both the white and green parts for the best flavor.
No fish sauce? Soy sauce alone works fine, but a dash of Worcestershire sauce (if you’re not strict vegetarian) adds similar depth. Short on sesame oil? Toasted sesame seeds steeped in hot oil for a minute makes a quick substitute. The water amount can be eyeballed—just make sure the egg mixture is thin enough to pour but not watery. Garlic powder works in a pinch, but fresh garlic is worth the extra minute.
This keeps 3-4 days in the fridge—reheat gently in the microwave with a damp paper towel on top. Actually tastes better the next day once flavors meld. Freezes beautifully for up to 2 months if you want to make a big batch. I always double it for lazy breakfasts.
Why You’ll Love This Recipe
- One-Bowl Wonder: I just whisk eggs, water, and a pinch of salt, then steam—no fancy tools, no mess.
- Silky Goodness: The texture is like custard, and the scallions add that fresh, oniony bite I crave.
- Breakfast or Dinner: Honestly, I serve it with rice for dinner or straight from the fridge for a quick breakfast.
- Pennywise Comfort: Five eggs and a handful of scallions feed my family for under three bucks.
Step-by-Step Instructions for Korean Steamed Egg
This method guarantees that silky texture with minimal effort and maximum flavor.
Step 1: Prepare the Aromatic Base
Thinly slice all 4 whole Scallions, keeping white and green parts separate. Mince the 2 cloves Garlic Cloves finely—this ensures even distribution throughout the custard. The white parts of the scallions will infuse the egg mixture, while the green tops serve as garnish later.
In a heatproof dish that fits inside your steamer, combine the sliced scallion whites and minced garlic. This aromatic base will steep in the egg mixture, creating layers of flavor that define this dish.
Step 2: Create the Silky Egg Custard
Crack all 8 whole Large Eggs into a large bowl and add the 1.5 cups Water. Whisk vigorously for 2-3 minutes until the mixture is completely homogeneous with no streaks of egg white or yolk visible. The water is key—it dilutes the proteins just enough to create that signature jiggly texture.
Season with 0.75 tsp Sea Salt and 0.25 tsp Ground Black Pepper. For extra depth, add the 1 tbsp Soy Sauce, 1 tbsp Sesame Oil, 0.5 tsp Fish Sauce, and 0.25 tsp Red Pepper Flakes. Whisk again briefly to incorporate. Strain the mixture through a fine-mesh sieve into the dish with the aromatics—this removes any stubborn egg bits for ultra-smooth results.
Step 3: Steam to Perfection
Grease your steamer basket or insert with 1 tsp Vegetable Oil to prevent sticking. Bring 2-3 inches of water to a rolling boil in the base of your steamer, then reduce to maintain a gentle simmer. The water level should never touch the egg mixture.
Place the dish in the steamer, cover tightly with a lid, and steam for 12-15 minutes. You’ll know it’s done when the custard is set but still jiggles slightly in the center when shaken gently, like firm jelly. Avoid overcooking—this is custard, not scrambled eggs.
Step 4: Garnish and Serve Immediately
Carefully remove the dish from the steamer. The custard should be pale, glossy, and trembling. Drizzle a little more Sesame Oil over the top for shine, then sprinkle with the reserved scallion greens and all 1 tbsp Toasted Sesame Seeds.
Let it rest for 2-3 minutes to firm up slightly before serving. The texture should be spoonable but still silky. Serve hot with steamed rice for the ultimate comfort meal—the contrast of the warm, wobbly custard against the rice is what makes this dish so addictive.
Pro Tips For Making Korean Steamed Egg
- Beat Vigorous and Long: Whisk the eggs and water for at least 3-4 minutes until frothy—I learned this the hard way after ending up with dense, custard-like eggs instead of the airy, cloud-like texture we want.
- Strain the Mixture: After whisking, strain the egg mixture through a fine-mesh sieve to remove any lumps. Sounds tedious, but it guarantees that silky-smooth finish that makes Korean steamed eggs so special.
- Skip Boiling Water: Always use room temperature or slightly warm water when mixing with eggs—hot water will start cooking the eggs prematurely, leading to uneven texture.
- Low and Slow Heat: Steam on the lowest heat setting and resist the urge to peek for at least 10 minutes. I used to lift the lid too soon and ended up with a sad, deflated mess instead of a fluffy, jiggly masterpiece.
Storing and Reheating This korean steamed egg
Refrigerator Storage
Let your custard cool completely at room temperature for no more than 2 hours before transferring to an airtight container. I use glass containers with locking lids to prevent any fridge odors from seeping in. Store at 40°F or below for up to 3-4 days. ❄️
Freezer Storage
This dish freezes beautifully for up to 2 months without losing its silky texture. Portion into individual servings in freezer-safe containers, leaving ½ inch headspace for expansion. I recommend using silicone muffin molds for easy single-serving portions.
Microwave Reheating
Place a portion in a microwave-safe dish and cover with a damp paper towel. Heat on 50% power for 1-2 minutes, checking every 30 seconds to avoid overcooking. The damp towel adds moisture to prevent drying out.
Steamer Reheating
For the best texture, reheat in your steamer for 5-7 minutes over simmering water. This gentle method preserves the custard’s delicate consistency better than any other. I always add a splash of water to the dish before reheating to maintain moisture. 💡
Serving After Storage
After reheating, let it rest for 1-2 minutes before serving. The custard may look slightly separated after storage but will come back together with gentle heat. Fresh scallions and sesame seeds as garnish bring back that just-made appeal.
Nutrition Facts
Frequently Asked Questions
Why add water to the eggs?
The 1.5 cups water creates a lighter, custard-like texture. It dilutes proteins for that signature jiggle. Skip it and you’ll get dense scrambled eggs instead.
Can I use a microwave steamer?
Yes! Use a microwave-safe dish with a tight lid. Cook at 50% power for 4-5 minutes, checking every 1 minute after the first 3 minutes. The texture may be slightly less smooth.
How do I fix lumpy custard?
Strain the mixture through a fine-mesh sieve before steaming. This removes stubborn egg bits. If already cooked, blend briefly for a smoother finish.

- 6 Egg Cake Recipe with Oil: Light as Air With Buttery Moisture - October 4, 2026
- 4 Bean Casserole Recipe: One-Pan Heartiness With Smoky Paprika Depth - October 4, 2026
- 3-Ingredient Keto Mug Cake Recipe: Microwave Magic in 2 Minutes - October 4, 2026