
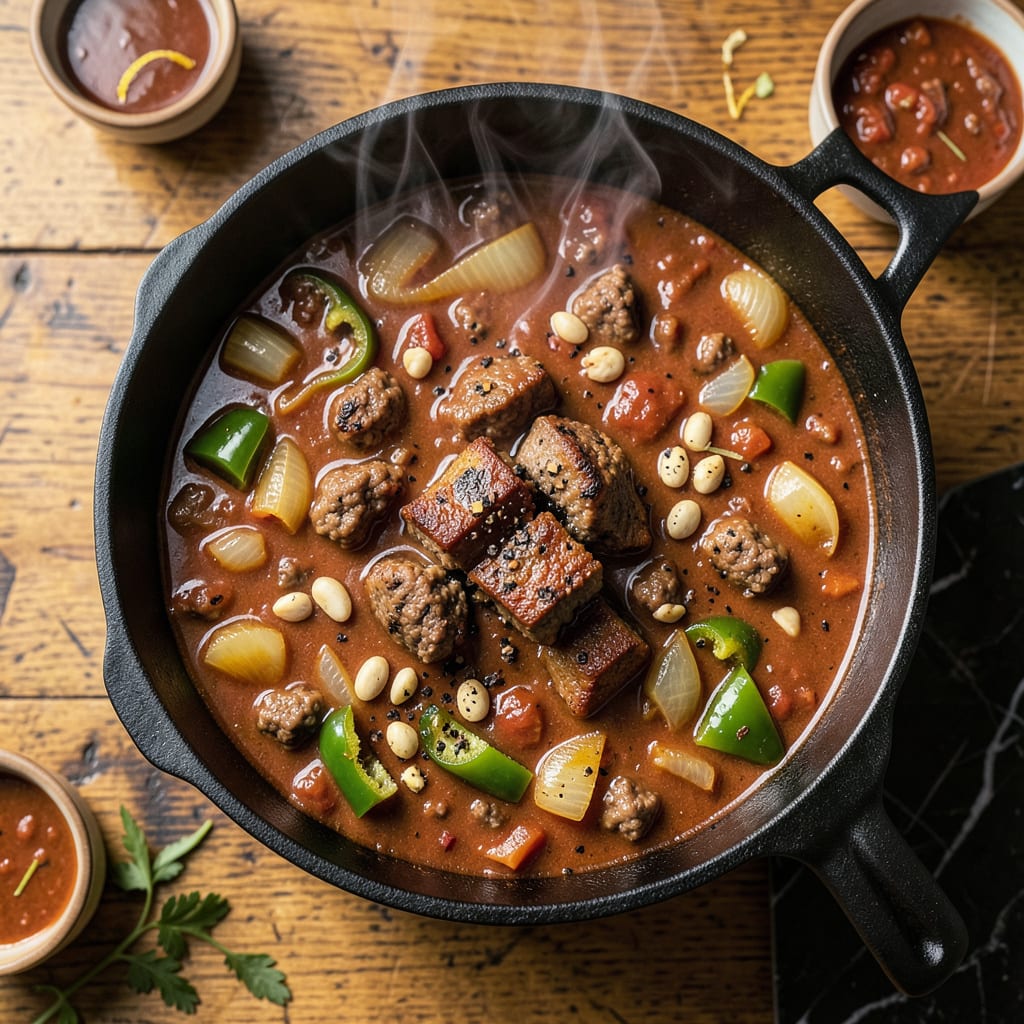
Kroll’s chili stands apart in the world of comfort food with its signature meat-forward approach and deeply layered flavors. This isn’t your average bean-heavy chili—it’s a robust, hearty bowl where ground beef takes center stage, supported by a carefully balanced blend of spices that deliver warmth without overwhelming heat.
The secret lies in the slow simmering process that allows flavors to meld completely, creating a rich, velvety texture that clings perfectly to every spoonful. What emerges is a chili that satisfies completely—substantial enough to stand as a meal, yet balanced enough to leave you craving just one more bite. The comfort starts with the first aroma and lingers through the last mouthful.
Ingredients for Kroll’s Chili
This meat-packed chili starts with quality ground beef and builds layers of warmth through carefully balanced spices.
| Ingredient | Amount | Notes |
|---|---|---|
| Ground Beef 🥩 | 3 lb | 80/20 fat ratio preferred |
| Yellow Onion 🧅 | 1 whole | Medium, finely diced |
| Green Bell Pepper 🌶️ | 1 whole | Seeds removed, diced |
| Garlic Cloves 🧄 | 6 cloves | Minced for depth of flavor |
| Tomato Sauce 🍅 | 2 cups | Plain, no added seasonings |
| Beef Broth 💧 | 2 cups | Low-sodium preferred |
| Kidney Beans 🫘 | 1 can | 15 oz, drained and rinsed |
| Chili Powder 🌶️ | 3 tbsp | Medium heat blend |
| Ground Cumin 🌿 | 1 tbsp | Freshly toasted if possible |
| Smoked Paprika 🌶️ | 1 tbsp | For that signature depth |
| Dried Oregano 🌿 | 1 tsp | Mexican variety preferred |
| Brown Sugar 🍚 | 1 tbsp | Balances the acidity |
| Salt 🧂 | 2 tsp | Adjust to taste later |
| Black Pepper 🌶️ | 1 tsp | Freshly ground preferred |
| Olive Oil 🫒 | 2 tbsp | For sautéing aromatics |
The beef is the foundation here—80/20 ground chuck gives you that perfect balance of flavor and richness. I always grab mine from Costco when I’m making a big batch, but any good butcher will have quality ground beef. The spices are where the magic happens: smoked paprika adds that signature depth, while the cumin and chili powder create the backbone. Don’t skimp on quality here—Penzeys or a well-stocked bulk section will have fresher spices than those dusty supermarket jars.
No smoked paprika? Regular paprika plus a dash of liquid smoke gets you close. Out of kidney beans? Black beans or pinto beans work just fine (though they’ll change the texture slightly). If you’re watching sodium, no-salt-added tomato sauce and homemade broth are easy swaps. The brown sugar isn’t just for sweetness—it helps balance the acidity from the tomatoes, but honey or maple syrup can stand in if that’s what you’ve got.
This chili actually improves overnight—2-3 days in the fridge lets all those flavors meld together. It freezes beautifully for up to 3 months too. I like to portion it into meal-sized containers so I can pull out exactly what I need. The spices might settle during storage, so just give it a good stir when reheating (a splash of broth helps if it’s too thick).
Why You’ll Love This Recipe
- One-Pot Magic: I love that this recipe lets me brown the beef, sauté the onions and peppers, then simmer everything together in the same pot. No extra bowls, no messy countertops—just a single Dutch oven and a wooden spoon.
- That Garlic Kick: Here’s what sold me—the way the garlic cloves caramelize with the ground beef before the tomato sauce goes in. It’s not just flavor; it’s this deep, savory base that makes every bite taste like it simmered all day (when really, it’s ready in an hour).
- Freezer’s Best Friend: Honestly, I double the batch every time because this chili freezes like a dream. The flavors get even better after thawing, and having a container ready means I’m 10 minutes away from dinner on those “I can’t even” nights.
- Budget Stretcher: Between us, this feeds my family of four for two meals with just a pound of ground beef. The onions, peppers, and tomato sauce bulk it up without skimp on taste—my wallet (and my teenagers) thank me.
Step-by-Step Instructions for Kroll’s Chili
This hearty chili comes together with simple techniques that build incredible flavor in every bite.
Step 1: Brown the Ground Beef for Maximum Flavor
Heat a large Dutch oven or heavy pot over medium-high heat. Add the 3 lb Ground Beef and break it up with a wooden spoon. Let it cook undisturbed for 2-3 minutes until you see a nice brown crust forming on the bottom—this is where the deep meaty flavor develops.
Continue cooking, stirring occasionally, for 8-10 minutes total until the beef is fully browned and no pink remains. I like to let some pieces get slightly crispy for texture contrast. Drain off about half the fat (leaving some behind for flavor) before moving to the next step.
Step 2: Build the Aromatic Base
Reduce heat to medium and add the 2 tbsp Olive Oil to the pot. Stir in the finely diced Yellow Onion and diced Green Bell Pepper. Cook for 5-6 minutes, stirring occasionally, until the vegetables soften and the onions turn translucent.
Add the 6 minced Garlic Cloves and cook for 1 minute until fragrant—don’t let it brown or it will turn bitter. This aromatic trio forms the flavor foundation of your chili. You’ll know it’s ready when your kitchen smells rich and savory.
Step 3: Add Liquids and Seasonings
Pour in the 2 cups Tomato Sauce and 2 cups Beef Broth, scraping up any browned bits from the bottom of the pot. These flavorful bits (called fond) will dissolve into the liquid, adding incredible depth. Stir in the 3 tbsp Chili Powder, 1 tbsp Ground Cumin, 1 tbsp Smoked Paprika, 1 tsp Dried Oregano, 1 tbsp Brown Sugar, 2 tsp Salt, and 1 tsp Black Pepper.
Bring the mixture to a gentle boil, then reduce heat to low. Let it simmer uncovered for 20 minutes, stirring occasionally. This gives the spices time to bloom and meld with the liquids. You’ll notice the color deepen and the aroma become more complex.
Step 4: Finish with Beans and Final Simmer
Add the drained and rinsed Kidney Beans to the pot. Stir well to combine, then let the chili simmer for another 30-40 minutes on low heat. The beans will absorb some of the liquid and flavors while maintaining their shape.
Taste and adjust seasoning if needed—I often add another pinch of salt or chili powder at this stage. The chili is done when the liquid has reduced slightly and the flavors have married together. Look for a thick, hearty consistency that coats the back of a spoon.
Step 5: Rest and Serve for Best Results
Remove the pot from heat and let the chili rest for 10-15 minutes before serving. This resting period allows the flavors to settle and the liquid to thicken slightly. The ground beef will become even more tender during this time.
Ladle into bowls while still warm. The perfect serving should have a rich, deep red color with visible chunks of beef and beans throughout. Garnish with your favorite toppings and serve with crusty bread or cornbread for a complete comfort food experience.
Wine and Beer Pairings for This Dish
Bold Red Wines
A rich, meaty chili like this calls for equally bold red wines. I love pairing it with a Zinfandel from California—its jammy fruit flavors and peppery notes complement the smoky paprika beautifully. Look for bottles from Ridge Vineyards or Ravenswood for that perfect balance of fruit and spice. 🍷
Malbec Magic
Argentinian Malbec is another fantastic choice with its dark fruit flavors and velvety tannins. The wine’s natural acidity cuts through the richness of the beef while its plum and blackberry notes harmonize with the chili’s depth. My go-to is Catena Zapata—affordable and consistently delicious.
Craft Beer Classics
For beer lovers, a robust amber ale or brown ale works wonders. The caramel maltiness in New Belgium Fat Tire or Bell’s Amber Ale enhances the chili’s sweet and smoky elements. I always keep a six-pack of these on hand for chili nights—they’re crowd-pleasers that won’t overpower the dish. 🍺
Dark Lager Pairings
Dark lagers like Negra Modelo or Shiner Bock bring a toasty, slightly sweet profile that stands up to the chili’s bold flavors. The carbonation helps cleanse your palate between bites, making each spoonful taste as good as the first. These are my top picks when I want something refreshing yet flavorful.
Non-Alcoholic Options
Don’t forget about non-alcoholic pairings! A smoked black tea like Lapsang Souchong offers a bold, campfire-like flavor that mirrors the chili’s smokiness. For something sweeter, try spiced apple cider—the cinnamon and clove notes create a wonderful autumnal combination. ✨
Unexpected White Wine
If you prefer white wine, reach for a dry Riesling from Washington State or Germany. The wine’s crisp acidity and subtle sweetness balance the chili’s heat while its mineral notes complement the beef. Chateau Ste. Michelle makes an excellent, affordable option that always impresses my guests.
Nutrition Facts

- 6 Egg Cake Recipe with Oil: Light as Air With Buttery Moisture - October 4, 2026
- 4 Bean Casserole Recipe: One-Pan Heartiness With Smoky Paprika Depth - October 4, 2026
- 3-Ingredient Keto Mug Cake Recipe: Microwave Magic in 2 Minutes - October 4, 2026