
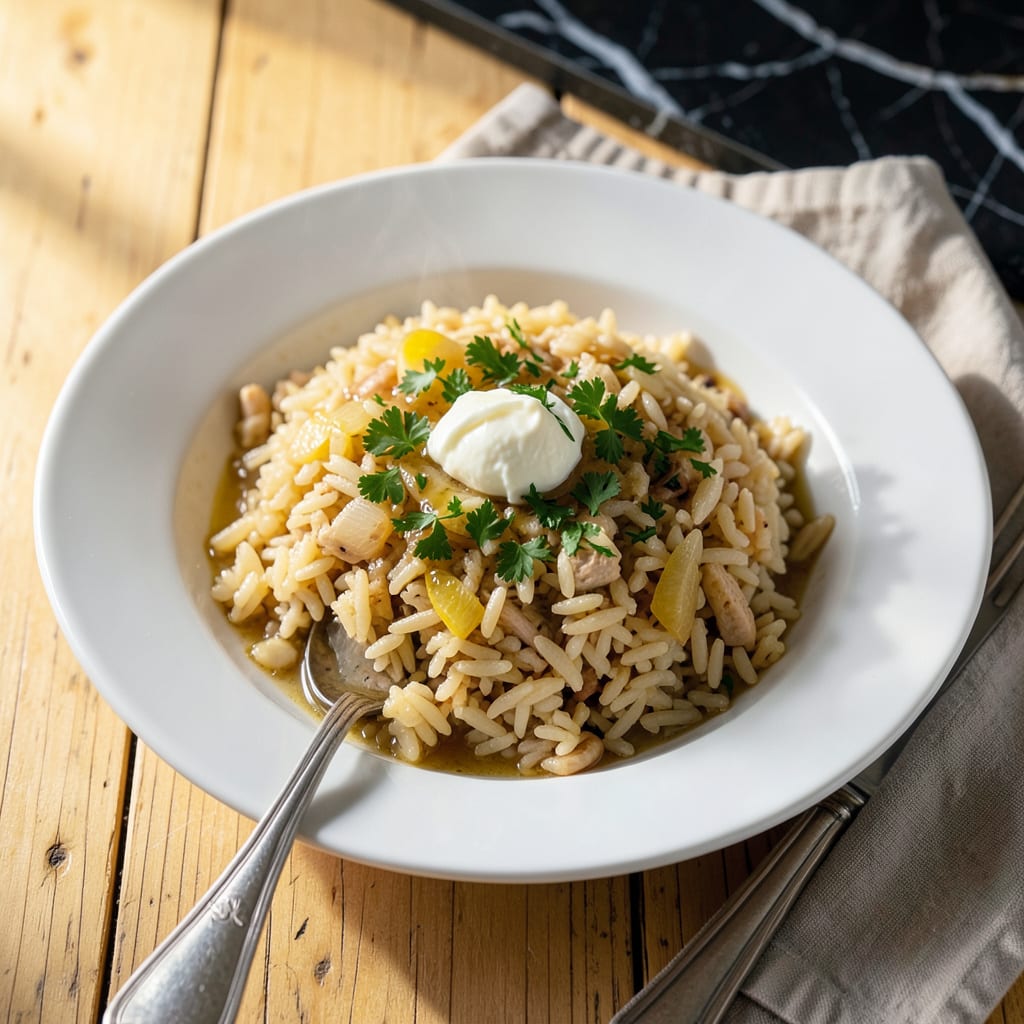
Perfectly cooked rice pilaf is simpler than you think—just 20 minutes and a few key techniques separate good rice from exceptional. This method delivers fluffy, separate grains every time, with minimal effort and maximum flavor. The secret lies in toasting the rice before adding liquid, which enhances its natural nuttiness and prevents mushiness.
With just a handful of pantry staples—onion, garlic, broth, and rice—you can create a versatile side dish that pairs beautifully with everything from grilled meats to roasted vegetables. No special equipment required, just precise timing and a watchful eye. The result is restaurant-quality pilaf that’s foolproof enough for weeknights but impressive enough for guests.
Ingredients for Rice Pilaf Recipe Easy
Pantry staples transform into restaurant-quality pilaf with these simple ingredients—no fancy tools required.
| Ingredient | Amount | Notes |
|---|---|---|
| Long-Grain White Rice 🍚 | 1 ½ cups | Basmati or jasmine preferred |
| Unsalted Butter 🧈 | 3 tbsp | Or substitute olive oil |
| Yellow Onion 🧅 | 1 whole | Finely diced for even cooking |
| Garlic Cloves 🧄 | 3 cloves | Minced for maximum flavor |
| Low-Sodium Chicken or Vegetable Broth 💧 | 3 cups | Warm for faster absorption |
| Dry White Wine 🍷 | ¼ cup | Sauvignon Blanc or Pinot Grigio |
| Bay Leaf 🌿 | 1 whole | Fresh or dried works |
| Kosher Salt 🧂 | 1 ¼ tsp | Diamond Crystal preferred |
| Freshly Ground Black Pepper 🌶️ | ½ tsp | Coarse grind for texture |
| Dried Thyme 🌿 | ½ tsp | Or 1.5 tsp fresh |
| Fresh Parsley 🌿 | ¼ cup | Chopped for garnish |
| Lemon Zest 🍋 | 1 tsp | From 1 medium lemon |
The rice is everything here. Basmati or jasmine gives you those separate, fluffy grains the intro promised. I grab mine from Indian or Middle Eastern markets—cheaper in bulk and fresher than grocery store brands. The broth matters too—low-sodium lets you control the salt. For vegetable broth, Better Than Bouillon is my go-to (the paste, not the cubes). And yes, the wine is worth it—any dry white you’d drink works (that half-empty bottle in your fridge is perfect).
No wine? Extra broth plus a splash of lemon juice gets you 90% there. Out of thyme? Oregano or rosemary at half the amount works. Butter can be olive oil or vegan butter—just don’t let it burn when toasting the rice. The bay leaf is optional but adds depth (fish it out before serving). For the lemon zest, bottled works in a pinch, but fresh is way brighter. And if you’re using table salt instead of kosher, cut the amount by half—it’s saltier.
Uncooked rice keeps in the pantry for 6-12 months (check the bag). Once cooked, pilaf holds well—4-5 days in the fridge, reheats beautifully with a splash of water. I make double batches since it freezes for 3 months. Pro tip: Spread leftovers on a tray to cool fast before storing. Prevents mush.
Why You’ll Love This Recipe
- One-Pot Magic: Honestly, I love that this comes together in a single pot—no colander, no extra bowls. Just sauté the onions and garlic in butter, add rice and broth, then walk away while it steams to perfection.
- Buttery Garlic Depth: That first bite where the buttery rice meets the caramelized onions and garlic? Ridiculously good. The broth soaks in just enough to make each grain tender but still distinct—no mushy mess here.
- Meal Prep MVP: I make a big batch Sunday night and it’s my lunch hero all week. Pairs with grilled chicken one day, roasted veggies the next, or even stands alone with a fried egg on top.
- Budget Stretch: A pound of rice costs pennies, and this transforms it into something special. Between us, I’ve served it at dinner parties and no one guessed it was this low-effort (or this cheap).
Step-by-Step Instructions for Rice Pilaf
This method guarantees perfectly fluffy rice every time with minimal effort and maximum flavor.
Step 1: Sauté the Aromatics for Deep Flavor
Melt the 3 tbsp unsalted butter in a medium saucepan over medium heat. When the butter stops foaming, add the finely diced yellow onion and cook for 5-6 minutes until translucent and soft. This slow cooking develops sweetness without browning.
Add the minced garlic cloves and cook for 30 seconds until fragrant. Be careful not to let the garlic brown – it should just release its aroma. Immediately add the 1.5 cups long-grain white rice and stir to coat each grain with the buttery mixture.
Toast the rice for 2 minutes, stirring constantly, until the grains become slightly opaque at the edges. This toasting step creates a nutty flavor and helps prevent mushy rice.
Step 2: Deglaze and Build the Liquid Base
Pour in the 0.25 cup dry white wine and stir to deglaze the pan, scraping up any browned bits from the bottom. Let it simmer for 1-2 minutes until the liquid reduces by half and the alcohol smell dissipates.
Add the 3 cups warm low-sodium chicken or vegetable broth, 1 whole bay leaf, 1.25 tsp kosher salt, 0.5 tsp freshly ground black pepper, and 0.5 tsp dried thyme. Stir well to combine all the flavors evenly throughout the liquid.
Bring the mixture to a gentle boil over medium-high heat. This is when you’ll see the rice start to absorb the liquid and the grains will begin to swell slightly at the edges.
Step 3: Simmer for Perfectly Fluffy Grains
Once boiling, immediately reduce the heat to low, cover the pot with a tight-fitting lid, and let it simmer undisturbed for 15 minutes. Don’t peek during this time – the steam trapped inside is what cooks the rice evenly.
After 15 minutes, remove the pot from heat but keep it covered. Let it rest for an additional 5 minutes. This resting period allows the rice to steam gently in its own moisture, ensuring every grain is perfectly cooked through.
You’ll know it’s done when the liquid is fully absorbed and the rice is tender but still has a slight bite. The grains should be separate and fluffy, not clumped together.
Step 4: Fluff and Finish with Bright Flavors
Remove the lid and discard the bay leaf. Gently fluff the rice with a fork, lifting from the bottom to separate any grains that might have stuck together. This fluffing step is crucial for achieving that light, airy texture.
Stir in the 1 tsp lemon zest and 0.25 cup chopped fresh parsley. The lemon zest adds a bright, citrusy note that cuts through the richness, while the parsley gives a fresh, herbal finish.
Taste and adjust seasoning if needed – you might want to add a pinch more kosher salt or black pepper depending on your preference. The rice should be fragrant with visible flecks of green parsley throughout.
Perfect Pairings for This Dish
Protein Pairings
This fluffy pilaf becomes a complete meal when paired with simple proteins. I love serving it with pan-seared chicken thighs—just season with salt, pepper, and paprika, then cook skin-side down in a hot skillet for 6-8 minutes per side. The crispy skin contrasts beautifully with the tender rice. 🍗
For seafood lovers, garlic butter shrimp takes this dish to restaurant level. Sauté 1 lb peeled shrimp in 2 tbsp butter with 4 minced garlic cloves until pink (about 3 minutes). The shrimp soak up the pilaf’s aromatic flavors perfectly.
Vegetable Companions
Roasted vegetables add color and texture. Toss 1 lb broccoli florets with 2 tbsp olive oil, ½ tsp salt, and ¼ tsp red pepper flakes, then roast at 425°F for 18-20 minutes. The caramelized edges complement the nutty rice. I often use frozen broccoli—just as good when roasted!
For something lighter, a simple cucumber-tomato salad works wonders. Combine 1 diced cucumber, 2 chopped tomatoes, ¼ cup crumbled feta, and 1 tbsp lemon juice. The freshness cuts through the richness of the buttery pilaf.
Sauce Enhancements
A dollop of garlic yogurt sauce transforms this dish. Mix 1 cup Greek yogurt with 1 minced garlic clove, 1 tbsp lemon juice, and ½ tsp salt. Drizzle over individual servings for a creamy, tangy contrast. I keep this sauce in my fridge—it lasts 5 days and works with everything. ✨
For heat lovers, chili crisp adds incredible depth. Stir 1-2 tbsp into the finished pilaf or serve on the side. The Lao Gan Ma brand is my favorite—its crunchy texture and spicy-sweet balance elevate every bite.
Nutrition Facts

- 6 Egg Cake Recipe with Oil: Light as Air With Buttery Moisture - October 4, 2026
- 4 Bean Casserole Recipe: One-Pan Heartiness With Smoky Paprika Depth - October 4, 2026
- 3-Ingredient Keto Mug Cake Recipe: Microwave Magic in 2 Minutes - October 4, 2026