
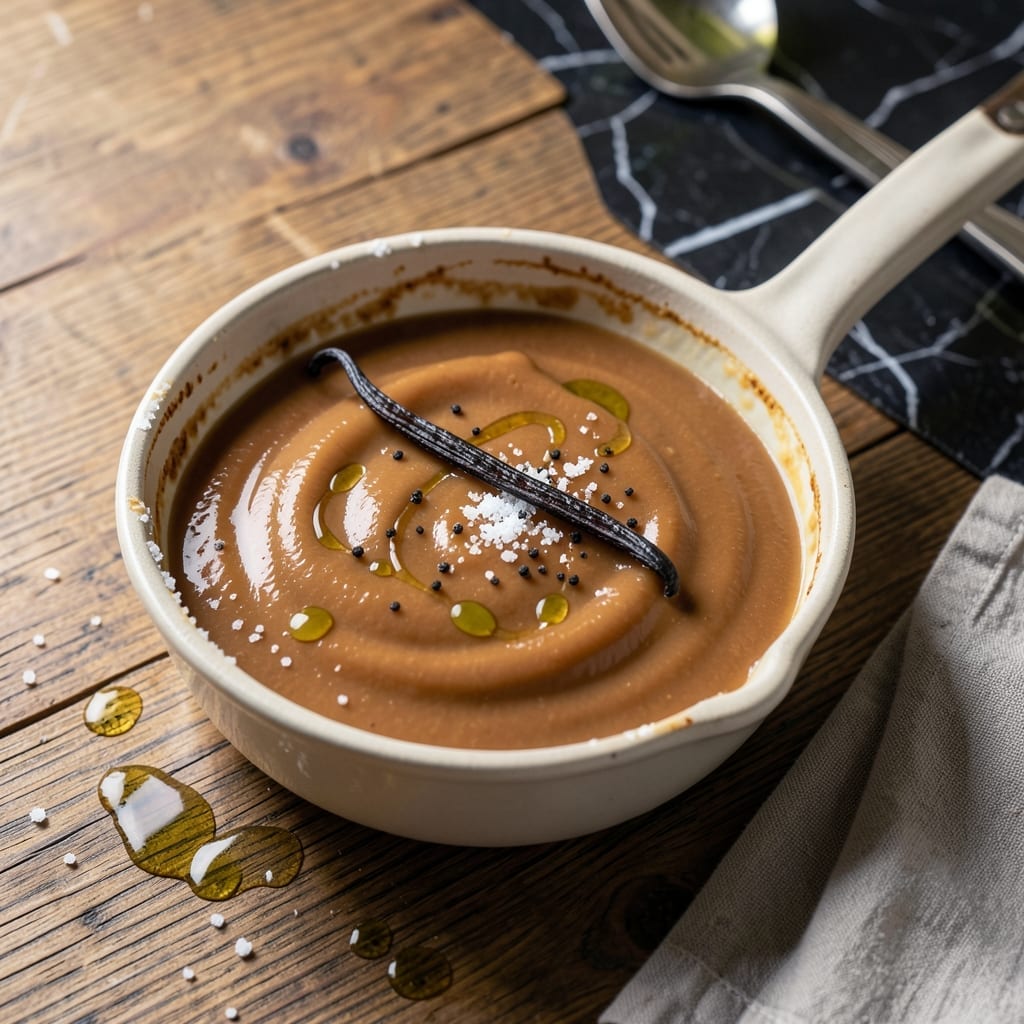
Creating a dairy-free alternative to traditional condensed milk opens up a world of possibilities for those avoiding lactose. This version delivers the same thick, sweet consistency using simple plant-based ingredients.
I developed this recipe after realizing how many classic desserts rely on condensed milk. The key is reducing coconut milk with sugar to achieve that signature richness without dairy. It takes patience but yields impressive results.
The process transforms basic ingredients into a velvety, caramel-colored syrup that behaves just like the original. It works perfectly in pies, fudge, or as a coffee cream substitute.
Store in an airtight container in the refrigerator for up to two weeks. This recipe makes about one cup, the equivalent of a standard can.
Ingredients for Lactose Free Condensed Milk
Six simple ingredients transform into a creamy, dairy-free condensed milk alternative.
| Ingredient | Amount | Notes |
|---|---|---|
| Full-Fat Coconut Milk 🥥 | 1 can | 13.5 oz, unsweetened, well-shaken |
| Granulated White Sugar 🍚 | ¾ cup | Organic preferred for clean flavor |
| Vanilla Extract 🌿 | 1 tsp | Pure vanilla for best flavor |
| Pinch of Sea Salt 🧂 | 1 pinch | Balances sweetness |
| Coconut Oil 🫒 | 1 tbsp | Optional, for richness |
| Vanilla Bean Paste 🌿 | ½ tsp | Alternative to extract |
The coconut milk is non-negotiable here. Full-fat canned (not light or carton) gives you that signature thickness. I always reach for Thai Kitchen or Native Forest—both have consistent fat content. Avoid brands with additives like guar gum, which can separate during reduction. The sugar quality matters less, but organic granulated dissolves cleanest without aftertaste. A pinch of salt might seem insignificant, but it amplifies the sweetness.
No coconut milk? Oat milk or cashew cream can work but won’t reduce as thickly. Swap white sugar for coconut sugar at a 1:1 ratio, though the flavor will be deeper. The vanilla is flexible—almond extract or maple syrup add interesting depth. For a neutral flavor, skip the vanilla entirely. The coconut oil boosts richness but can be omitted without disaster.
This keeps 2 weeks refrigerated in a sealed jar. The mixture thickens further as it cools—reheat gently with a splash of plant milk if needed. For longer storage, freeze in ice cube trays for up to 3 months.
Why You’ll Love This Recipe
- One Pot Wonder: I just dump everything in a saucepan and let it simmer—no fancy equipment, no fuss.
- Rich Vanilla Kiss: The coconut milk and vanilla create this deep, creamy sweetness that’s honestly better than the dairy version.
- Baking Starter Pack: I use this in pies, fudge, even my morning coffee. It’s my secret for dairy-free desserts that no one questions.
- Fridge Friendly: Makes a full jar and keeps for weeks, so I always have some ready for impromptu baking.
Step-by-Step Instructions for Lactose Free Condensed Milk
This method transforms simple ingredients into a rich, caramel-colored dairy-free condensed milk.
Step 1: Combine and Heat the Base Ingredients
In a medium heavy-bottomed saucepan, combine the 1 can Full-Fat Coconut Milk and 0.75 cup Granulated White Sugar. I always use a light-colored pan so I can monitor the color change as it reduces.
Place the saucepan over medium-low heat and stir constantly with a silicone spatula until the sugar fully dissolves. This prevents scorching at the bottom. You’ll notice the mixture begin to thin slightly as the sugar melts into the coconut milk.
Step 2: Simmer and Reduce the Mixture
Once the sugar dissolves, increase the heat to medium and bring the mixture to a gentle simmer. Reduce the heat to maintain a steady but controlled simmer—you want small bubbles breaking the surface, not a rolling boil.
Continue cooking, stirring frequently, for 40-50 minutes until the mixture reduces by about half and thickens to the consistency of heavy cream. The color will deepen to a light golden hue. Be patient; rushing this step with high heat will cause the sugar to caramelize too quickly.
Step 3: Add Flavorings and Finish
Remove the saucepan from heat and stir in the 1 tsp Vanilla Extract, 0.5 tsp Vanilla Bean Paste, 1 tbsp Coconut Oil, and 1 pinch Pinch of Sea Salt. The vanilla bean paste adds visible specks and intense flavor, while the coconut oil enhances richness.
Return the pan to low heat for 2-3 minutes, stirring constantly, until the coconut oil melts and the mixture is smooth. The final consistency should coat the back of a spoon thickly. Taste and adjust sweetness if needed, though the flavor will intensify as it cools.
Step 4: Cool and Store
Transfer the mixture to a heatproof jar or bowl and let it cool to room temperature, about 1 hour. As it cools, it will thicken further. Stir occasionally during the first 30 minutes to prevent a skin from forming on the surface.
Once completely cool, the condensed milk is ready to use. Store it in an airtight container in the refrigerator for up to 2 weeks. The mixture will continue to thicken in the fridge, so you may need to stir it before use. This yields about 1¼ cups of dairy-free condensed milk.
Pro Tips For Making Lactose Free Condensed Milk
- Simmer Low and Slow: Keep the heat at a gentle simmer—coconut milk burns easily if it boils too hard. I learned this the hard way after scorching a batch that smelled amazing until it didn’t.
- Use Full-Fat Only: Skip the light coconut milk; the fat content is non-negotiable for that thick, creamy texture. After trying both, the full-fat version actually changes the outcome.
- Stir Every Few Minutes: Sugar loves to stick to the bottom, so grab a spatula and scrape the pan regularly. Sounds tedious, but it prevents that bitter burnt taste.
- Add Vanilla Last: Stir in the vanilla extract once the mixture is off the heat—high temperatures can dull its flavor. My grandmother swore by this, and she was right.
Troubleshooting This Recipe
Mixture Too Thin
If your creation hasn’t thickened after 50 minutes, continue reducing over low heat while stirring constantly. I often need an extra 10-15 minutes when using brands with lower fat content. Check the back of a spoon—it should coat thickly without dripping. 💡
Sugar Crystallization
If you notice sugar crystals forming on the pan sides, dip a pastry brush in water and wash down the sides. This prevents grainy texture. Avoid stirring vigorously, which can cause sugar to crystallize. A heavy-bottomed pan helps prevent this issue entirely.
Over-Reduced Mixture
If it thickens too much, remove from heat immediately and stir in 1-2 tbsp of warm coconut milk. Return to very low heat, stirring constantly until smooth. The mixture will thin slightly as it cools, so don’t overcorrect.
Separated Mixture
If the coconut oil separates, don’t panic. Simply remove from heat and whisk vigorously until smooth. To prevent this, ensure the oil is fully melted before removing from heat. A silicone whisk works best for re-emulsifying.
Burnt Bottom
If you detect burning, immediately transfer to a clean pan to prevent bitter flavors. Lower your heat next time and stir more frequently. I learned this the hard way with my first batch—medium-low is your friend. ⚡
Grainy Texture
Graininess usually means the sugar didn’t fully dissolve initially. Strain through a fine-mesh sieve while warm, then return to heat to melt any remaining crystals. Using superfine sugar can prevent this issue.
Nutrition Facts
Frequently Asked Questions
Can I use light coconut milk instead?
No, full-fat coconut milk is essential for thickness. Light versions have less fat and won’t reduce properly, leaving you with a thin, watery result. Stick to canned, full-fat for best texture.
Why does my mixture look grainy?
This usually means the sugar didn’t fully dissolve. Strain it through a fine-mesh sieve while warm, then return to low heat. Using superfine sugar can prevent this. Stir constantly during cooking.
How can I adjust the sweetness?
Taste before cooling—it intensifies as it thickens. If needed, add more sugar 1 tbsp at a time and dissolve completely. For less sweetness, reduce sugar by 2 tbsp initially.
Can I make this without coconut?
Yes, but texture will differ. Try cashew cream or oat milk with added oil for fat. Note that these won’t reduce as thickly as coconut milk. Expect a lighter consistency.

- 6 Egg Cake Recipe with Oil: Light as Air With Buttery Moisture - October 4, 2026
- 4 Bean Casserole Recipe: One-Pan Heartiness With Smoky Paprika Depth - October 4, 2026
- 3-Ingredient Keto Mug Cake Recipe: Microwave Magic in 2 Minutes - October 4, 2026