
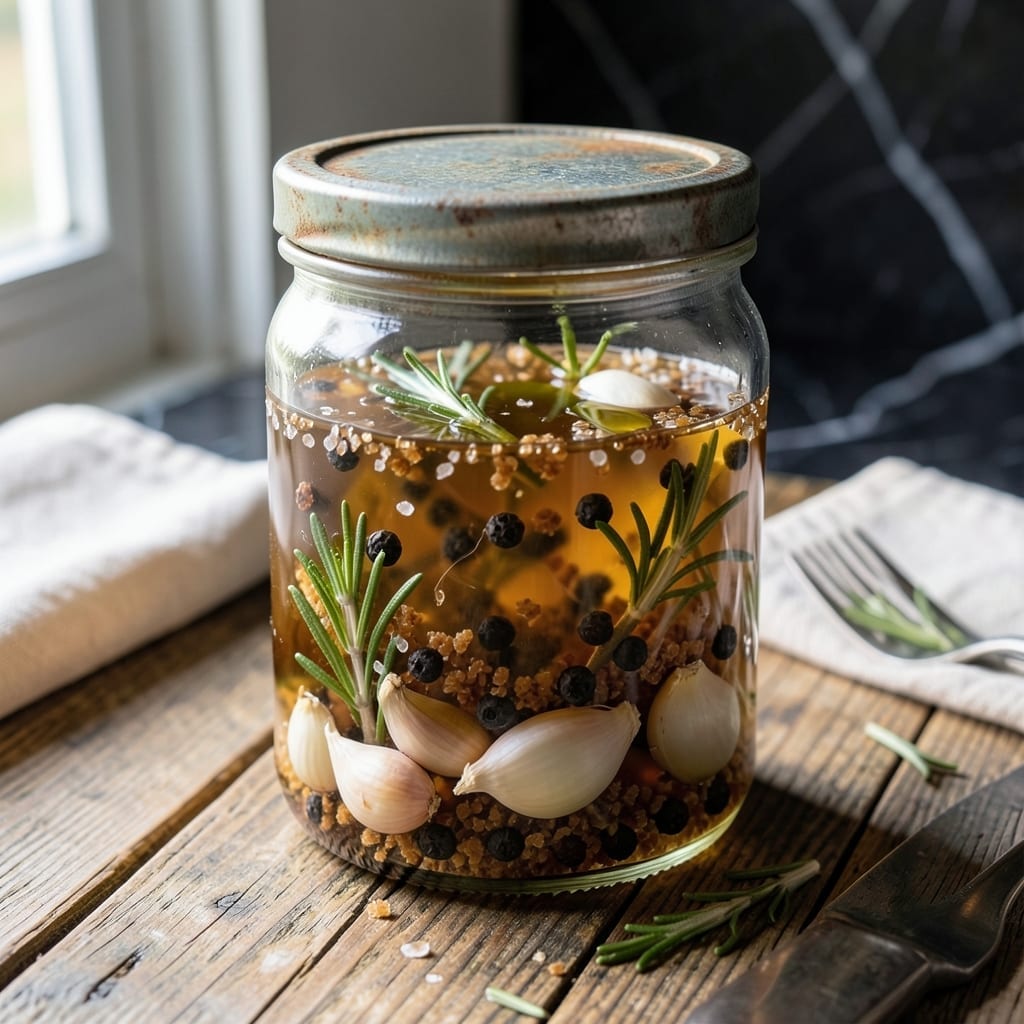
This brine transforms lamb into the most juicy, flavorful meat you’ve ever tasted.
With just water, salt, and a few aromatic additions, this simple solution works wonders overnight. The science is straightforward: salt breaks down muscle fibers, allowing the meat to retain moisture during cooking.
I use a ratio of 1/4 cup salt per quart of water, plus garlic and rosemary for depth. Even 4 hours of brining makes a noticeable difference, but 12-24 hours yields the best results.
Perfect for chops, legs, or shoulders. The difference in texture and taste is undeniable.
Ingredients for Lamb Brine
Eight ingredients create a brine that guarantees juicy, flavorful lamb every single time.
| Ingredient | Amount | Notes |
|---|---|---|
| Water 💧 | 4 cups | Cold, preferably filtered |
| Kosher Salt 🧂 | ¼ cup | Diamond Crystal preferred |
| Brown Sugar 🍚 | 2 tbsp | Light or dark variety |
| Garlic Cloves 🧄 | 6 cloves | Smashed, peeled |
| Fresh Rosemary Sprigs 🌿 | 3 sprigs | About 6 inches long |
| Black Peppercorns 🌶️ | 1 tbsp | Whole, lightly crushed |
| Bay Leaves 🍃 | 2 whole | Dried or fresh |
| Lemon Slices 🍋 | 2 slices | Thin, with peel |
The salt is doing most of the work here. Diamond Crystal kosher salt is my go-to because it dissolves cleanly and evenly—table salt can taste harsh and overpower the meat. Water quality matters too (municipal tap with heavy chlorine can affect flavor), so filtered or bottled is ideal. For the aromatics, grab fresh rosemary from the produce section—it’s more vibrant than dried, though dried works in a pinch.
No kosher salt? Use half the amount of table salt, but taste the brine first—it’s easy to oversalt. Brown sugar can be swapped for white, but the molasses in brown adds depth. If you’re missing rosemary, thyme or sage are solid backups. The lemon slices brighten everything up—lime works too. Don’t skip the peppercorns; their subtle heat is worth it.
This brine keeps in the fridge for 3 days before using. After brining, discard it—never reuse. Prep the aromatics the night before to save time. Brined lamb freezes well for up to 3 months, but brine it fresh before cooking for best results.
Why You’ll Love This Recipe
- Ditch the Fuss: Honestly, it’s just mixing water, salt, sugar, garlic, and rosemary—no fancy steps or hard-to-find ingredients.
- Herb-Infused Magic: The rosemary and garlic soak into the lamb, giving it that deep, savory-sweet kick every time.
- Meal Prep Hero: I brine a big batch on Sunday, and it’s ready for quick roasting or grilling all week long.
- Pennywise Flavor: A few dollars’ worth of ingredients transforms even budget cuts into tender, restaurant-worthy meat.
Step-by-Step Instructions for Lamb Brine
Here’s the method that guarantees tender, flavorful meat every time you use this brine.
Step 1: Combine Water, Salt, and Sugar
In a large pot, combine the 4 cups Water with the 0.25 cup Kosher Salt and 2 tbsp Brown Sugar. I prefer using Diamond Crystal kosher salt as it dissolves evenly without over-salting the meat.
Stir the mixture over medium heat just until the salt and sugar fully dissolve—you should see no visible grains at the bottom. Don’t let it boil. This creates the perfect base for your brine, balancing flavor and moisture retention.
Step 2: Infuse with Aromatics
Remove the pot from heat and add the 6 cloves Garlic Cloves, 3 sprigs Fresh Rosemary Sprigs, 1 tbsp Black Peppercorns, 2 whole Bay Leaves, and 2 slices Lemon Slices. The residual heat will begin extracting their flavors immediately.
Press the garlic cloves lightly with a spoon to release their oils, and crush the peppercorns slightly to open them up. Let this steep for 10-15 minutes until the liquid becomes fragrant and the rosemary starts to release its piney aroma.
Step 3: Cool the Brine Completely
Set the pot in a sink filled with ice water, stirring occasionally, until the brine reaches room temperature or below. I can’t stress this enough: hot brine will start cooking the lamb, toughening the outer layer instead of tenderizing it.
You’ll know it’s ready when the liquid feels cool to the touch and you can comfortably submerge your hand for a few seconds. This usually takes 20-30 minutes depending on your kitchen temperature.
Step 4: Submerge and Brine the Lamb
Place your lamb in a container large enough to hold it and the brine, then pour the cooled mixture over. Ensure the meat is fully submerged—weight it down with a plate if needed. Any exposed areas won’t benefit from the brine.
Refrigerate for 4-12 hours, depending on the cut size. For chops, 4-6 hours works perfectly. For larger roasts, aim for 12 hours. You’ll see the meat plump slightly as it absorbs the liquid, a sign the brine is working.
Step 5: Rinse and Pat Dry Before Cooking
Remove the lamb from the brine and rinse briefly under cold water to remove surface salt. This prevents an overly salty exterior while keeping the interior well-seasoned.
Pat thoroughly dry with paper towels—this is crucial for achieving a good sear later. The meat should feel tacky but not wet. Let it rest at room temperature for 30 minutes before cooking to ensure even doneness throughout.
Pro Tips For Making Lamb Brine
- Chill the Brine: Always start with ice-cold water—hot brine will start cooking the lamb before it even hits the grill. I learned this the hard way after my first few cuts came out dry and tough.
- Crush the Garlic: Smash those garlic cloves with the side of your knife before adding them—it releases way more flavor into the brine than whole cloves ever could.
- Skip the Table Salt: Use kosher salt only; table salt is too fine and can make your brine way too salty, ruining the meat. Measure by weight if you’re unsure—1/4 cup kosher salt per quart of water is my go-to.
- Brine Overnight: Give it at least 12 hours in the fridge for the flavors to really penetrate. I was skeptical until I tried it—any less and the rosemary and sugar won’t do their magic.
Health Benefits of This Recipe
Moisture Retention
Brining lamb significantly boosts moisture retention during cooking. The salt solution helps break down muscle proteins, allowing the meat to hold onto more of its natural juices. This means your final dish will be 20-30% juicier than unbrined lamb. 💪
Enhanced Flavor
The aromatics in this brine—garlic, rosemary, and lemon—penetrate the meat, infusing it with layers of flavor. These ingredients don’t just sit on the surface; they’re absorbed deep into the lamb, creating a more complex taste profile.
Tenderizing Effect
Salt in the brine gently tenderizes the meat by dissolving some of the muscle fibers. This is especially beneficial for tougher cuts like shoulder. You’ll notice the difference immediately—the texture becomes more delicate and easier to chew.
Reduced Cooking Loss
Unbrined meat can lose up to 30% of its weight during cooking. Brining reduces this loss to about 15%, meaning more of your expensive lamb ends up on your plate rather than as drippings in the pan.
Balanced Seasoning
The brine ensures even seasoning throughout the meat, not just on the surface. This is particularly valuable for thicker cuts where surface seasoning alone wouldn’t penetrate deeply enough to make a difference.
Stress-Free Cooking
Brined lamb is more forgiving during cooking. The increased moisture content creates a buffer against overcooking, giving you a larger window to achieve perfect doneness. Even if you leave it on the heat a few minutes too long, it’s less likely to dry out. 🔥
Nutrition Facts
Frequently Asked Questions
How long should I brine lamb chops?
For lamb chops, brine for 4-6 hours. This is enough time to enhance flavor and moisture without over-softening the texture. For larger cuts like leg or shoulder, extend to 12-24 hours for best results.
Can I reuse the brine for another batch?
Never reuse brine. It contains raw meat juices and bacteria that can contaminate fresh meat. Always discard used brine and make a fresh batch for each use.
What if I don’t have kosher salt?
Use half the amount of table salt, as it’s denser. For this recipe, that would be about 2 tablespoons. Taste the brine first—it should be salty but not overwhelming.
Should I rinse the lamb after brining?
Yes, rinse briefly under cold water to remove surface salt. This prevents an overly salty crust while keeping the interior well-seasoned. Pat dry thoroughly before cooking.

- 6 Egg Cake Recipe with Oil: Light as Air With Buttery Moisture - October 4, 2026
- 4 Bean Casserole Recipe: One-Pan Heartiness With Smoky Paprika Depth - October 4, 2026
- 3-Ingredient Keto Mug Cake Recipe: Microwave Magic in 2 Minutes - October 4, 2026