
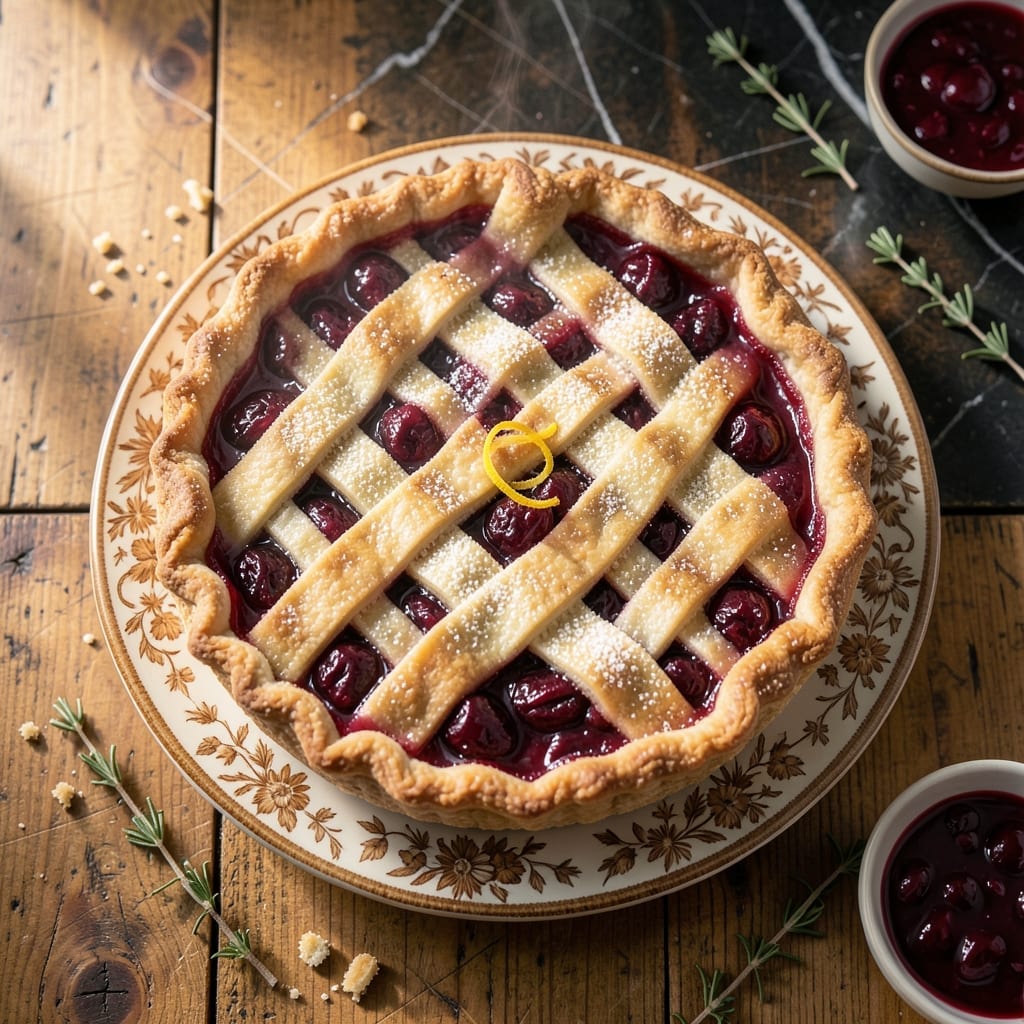
There’s an art to creating the perfect cherry pie with a crust that shatters at the touch and a filling that bursts with fruit flavor. This recipe delivers on both counts with a flaky golden crust and a rich cherry center that’s neither too sweet nor too tart.
The secret lies in using pre-made pie filling for convenience while focusing on technique for the crust. Cold butter and minimal handling create those coveted layers that separate into delicate sheets when baked. The result is a pastry that’s tender yet sturdy enough to hold the juicy filling.
Each slice reveals a beautiful contrast between the crisp, buttery crust and the glossy, deep red cherries beneath. The filling sets just enough to hold its shape when sliced but remains luscious and spoon-worthy. It’s the kind of pie that disappears quickly from any dessert table.
Perfect for holidays, potlucks, or a special weekend treat. This version proves that exceptional results don’t require complex methods.
Ingredients for Lucky Leaf Cherry Pie
A few pantry basics plus canned cherry filling create this impressive flaky pie.
| Ingredient | Amount | Notes |
|---|---|---|
| All-Purpose Flour 🌾 | 2 ½ cups | Plus extra for dusting |
| Granulated Sugar 🍚 | 1 tbsp | For crust sweetness |
| Salt 🧂 | 1 tsp | Fine table salt |
| Unsalted Butter 🧈 | 1 cup | Cold, cubed for flakiness |
| Ice Water 💧 | ½ cup | Plus 1 tbsp as needed |
| Lucky Leaf Cherry Pie Filling 🍒 | 2 cans | 21 oz cans, undrained |
| Granulated Sugar 🍚 | ¼ cup | For filling adjustment |
| Cornstarch 🌾 | 1 tbsp | To thicken filling |
| Lemon Juice 🍋 | 1 tbsp | Freshly squeezed |
| Vanilla Extract 🌿 | 1 tsp | Pure extract preferred |
| Butter 🧈 | 1 tbsp | For dotting filling |
| Heavy Cream 🥛 | 1 tbsp | For egg wash substitute |
| Coarse Sugar 🍚 | 1 tbsp | For crust topping |
The butter is everything here. Use a high-quality brand like Land O’Lakes or Plugrá—their fat content is consistent. Keep it ice cold (I freeze mine for 15 minutes before cubing). The flour should be all-purpose, unbleached—King Arthur or Gold Medal are reliable. For the cherry filling, Lucky Leaf has the right sweetness level, but any premium canned filling works.
No canned filling? Fresh or frozen cherries need extra sugar and cornstarch to compensate for tartness. Swap the coarse sugar for turbinado or demerara if that’s what you have. The vanilla extract can be imitation in a pinch, but pure has better depth. If you’re out of cornstarch, instant tapioca works at the same ratio.
The unbaked pie freezes beautifully for up to 2 months. Once baked, it keeps 3-4 days at room temperature under a cake dome. To reheat, warm slices in a 300°F oven for 10 minutes—this keeps the crust crisp.
Why You’ll Love This Recipe
- One Bowl Magic: I love that I can mix the crust with just flour, butter, and ice water—no fancy tools, no mess.
- Buttery Sweetness: That flaky crust with the tart cherry filling hits the spot every single time.
- Holiday or Tuesday: Here’s what sold me—it’s just as welcome at Fourth of July as it is for a random weeknight dessert.
- Dollar Smart: Honestly, a can of Lucky Leaf cherries and pantry staples keep my wallet happy and my family full.
Step-by-Step Instructions for Lucky Leaf Cherry Pie
Here’s the method. Straightforward, tested, works every time.
Step 1: Prepare the Pie Crust Dough
In a large bowl, combine the 2.5 cups All-Purpose Flour, 1 tbsp Granulated Sugar, and 1 tsp Salt. I whisk these dry ingredients together first to ensure even distribution of the salt and sugar throughout the crust.
Cut in the 1 cup Unsalted Butter (cold and cubed) using a pastry cutter or your fingers until the mixture resembles coarse crumbs with pea-sized butter pieces visible. Add the 0.5 cup Ice Water 1 tablespoon at a time, mixing gently with a fork until the dough just comes together. Overworking the dough develops gluten and makes the crust tough.
Step 2: Chill the Dough and Prepare the Filling
Divide the dough into two equal portions, flatten into discs, wrap in plastic, and refrigerate for 1 hour. This chilling step is crucial—it relaxes the gluten and keeps the butter cold so it creates those flaky layers we’re after.
While the dough chills, combine the 2 cans Lucky Leaf Cherry Pie Filling, 0.25 cup Granulated Sugar, 1 tbsp Cornstarch, 1 tbsp Lemon Juice, and 1 tsp Vanilla Extract in a bowl. Stir until the cornstarch is fully dissolved. This adjustment ensures the filling is perfectly thick and balanced in sweetness.
Step 3: Roll Out and Assemble the Pie
On a lightly floured surface, roll one dough disc into a 12-inch circle. Transfer it to a 9-inch pie dish, pressing gently into the bottom and sides. Trim the edges, leaving a ½-inch overhang. Pour in the prepared filling, then dot with the 1 tbsp Butter—this adds richness and helps thicken the filling as it bakes.
Roll out the second dough disc and place it over the filling. Crimp the edges to seal, then cut a few slits in the top crust to allow steam to escape. Brush the surface with the 1 tbsp Heavy Cream and sprinkle with the 1 tbsp Coarse Sugar for a professional finish.
Step 4: Bake to Golden Perfection
Preheat your oven to 375°F. Place the pie on a baking sheet to catch any drips and bake for 50-60 minutes. You’ll know it’s done when the crust is deep golden brown and the filling is bubbling through the steam vents.
If the edges start browning too quickly, cover them with a pie shield or foil. This prevents burning while allowing the rest of the pie to finish baking. Let the pie cool for at least 2 hours before slicing—this gives the filling time to set completely.
Pro Tips For Making Lucky Leaf Cherry Pie
- Chill the Dough: Let the pie crust rest in the fridge for at least 30 minutes—after burning my first few crusts, I learned this prevents shrinking and keeps the butter from melting too fast.
- Use Ice-Cold Water: Sounds obvious, but I was skeptical until I tried it: truly ice-cold water makes the flakiest crust, so keep a bowl of it in the freezer while prepping.
- Don’t Overwork Flour: Mix the flour and butter just until crumbly—overworking it makes the crust tough, and I learned this the hard way with a few dense pie bases.
- Pre-Bake the Crust: Blind-bake the bottom crust for 8-10 minutes at 375°F to avoid a soggy bottom—I skip this when I’m lazy, but the pie is noticeably better when I don’t.
Common Mistakes When Making lucky leaf cherry pie
Overworking the Dough
The biggest mistake is handling the crust too much. Overworking develops gluten, making your pie crust tough instead of flaky. I use a light touch and stop mixing as soon as the dough comes together.
Skipping the Chill
Rushing the process by skipping the 1-hour chill prevents the butter from staying cold. Cold butter creates those coveted flaky layers. I always refrigerate my dough discs wrapped in plastic.
Underbaking the Crust
A pale crust means it’s underbaked. Look for a deep golden brown color, which takes about 50-60 minutes at 375°F. I check the bottom crust by lifting the pie slightly with a spatula. 🔥
Overfilling the Pie
Using both cans of filling without adjusting can make your pie overflow. I stir in 1 tbsp cornstarch to thicken the filling and prevent a soggy bottom crust. This ensures the filling sets properly.
Cutting Too Soon
Slicing before the filling sets completely results in a runny mess. I let my pie cool for at least 2 hours on a wire rack. This gives the filling time to thicken and hold its shape.
Ignoring Edge Protection
If the crust edges brown too quickly, cover them with foil or a pie shield. I check at the 30-minute mark and cover if needed. This prevents burning while the center finishes baking.
Nutrition Facts
Frequently Asked Questions
Can I use a store-bought crust instead?
Yes, a pre-made crust works in a pinch, though the texture won’t be as flaky. For best results, choose an all-butter variety and blind-bake the bottom crust for 10 minutes before adding the filling to prevent sogginess.
How do I prevent the filling from bubbling over?
Place a baking sheet on the rack below to catch drips. Also, let the pie bake on the lower third of the oven. If it still bubbles, tent the top with foil for the last 15 minutes.
Can I make this pie ahead of time?
Assemble the pie and refrigerate it unbaked for up to 24 hours. Or bake it completely, then store at room temperature for 2 days. Reheat slices at 300°F for 10 minutes to crisp the crust.
Why did my crust turn out tough?
This usually happens from overworking the dough or using warm butter. Keep ingredients cold and handle the dough as little as possible. Chilling for the full 1 hour is key for flakiness.

- 6 Egg Cake Recipe with Oil: Light as Air With Buttery Moisture - October 4, 2026
- 4 Bean Casserole Recipe: One-Pan Heartiness With Smoky Paprika Depth - October 4, 2026
- 3-Ingredient Keto Mug Cake Recipe: Microwave Magic in 2 Minutes - October 4, 2026