
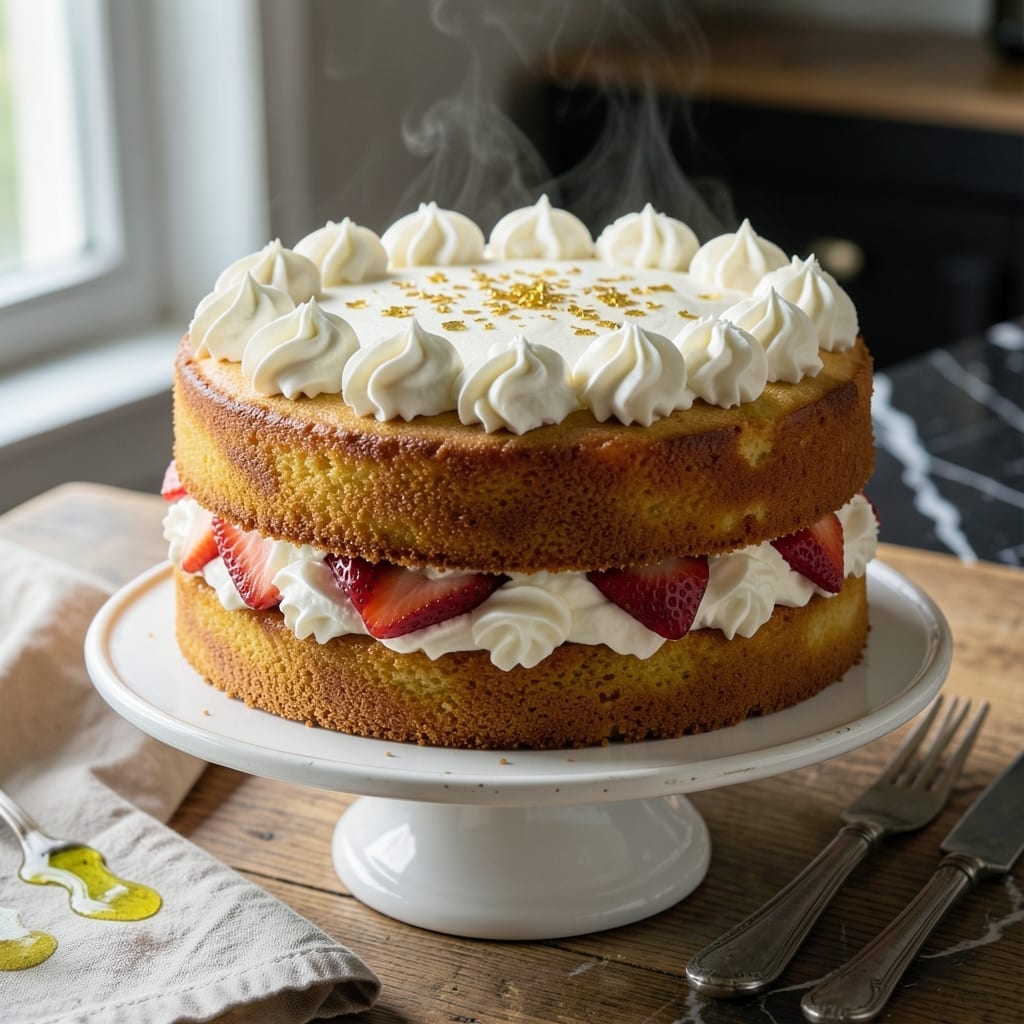
There’s a reason this Philly classic has stood the test of time—its moist layers and rich buttercream capture the essence of old-school diner desserts. I’ve perfected this version to deliver that nostalgic taste in every bite.
The secret lies in the balance: a tender crumb paired with a frosting so light it melts on your tongue. This isn’t just cake; it’s a slice of tradition, built layer by layer with care.
Expect a dessert that’s as impressive as it is delicious—perfect for celebrations or a weekend treat. The buttercream alone is worth the effort, silky and sweet without being cloying.
Follow the steps closely, and you’ll recreate that diner magic at home. Every detail matters, from the bake time to the frosting technique.
Ingredients for Melrose Diner Buttercream Cake
Classic diner cake with layers of moist crumb and silky buttercream ready to impress.
| Ingredient | Amount | Notes |
|---|---|---|
| All-Purpose Flour 🌾 | 3 cups | Sifted for lighter texture |
| Granulated Sugar 🍚 | 2 ½ cups | Fine grain for even mixing |
| Unsalted Butter 🧈 | 1 ½ cups | Room temperature, softened |
| Large Eggs 🥚 | 4 whole | Room temperature preferred |
| Whole Milk 🥛 | 1 ¼ cups | Full-fat for richness |
| Baking Powder 🧂 | 1 tbsp | Ensures proper rise |
| Baking Soda 🧂 | 1 tsp | Balances acidity in batter |
| Vanilla Extract 🌿 | 2 tsp | Pure vanilla for best flavor |
| Salt 🧂 | ½ tsp | Fine sea salt preferred |
| Powdered Sugar 🍚 | 6 cups | Sifted for smooth frosting |
| Heavy Cream 🥛 | ½ cup | Cold, for whipping stability |
| Pure Vanilla Bean 🌿 | 1 whole | Scraped seeds for buttercream |
The butter is non-negotiable here—Plugra or European-style gives you that rich, velvety texture that defines diner buttercream. I grab mine from Whole Foods when I’m making a special batch. For the flour, King Arthur is my go-to (consistent protein content, every time). Don’t even think about skipping the sifting—it’s what makes the crumb so tender (worth the extra minute).
Need to swap the milk? Buttermilk at the same amount adds a nice tang, but cut the baking soda to half. No vanilla bean? Double the extract—just make sure it’s the good stuff. For a lighter cake, replace one cup of all-purpose with cake flour. The heavy cream in the frosting can be half-and-half in a pinch, but your buttercream won’t hold peaks as well.
Layer cakes dry out fast. Wrap cooled layers in plastic, then foil—good for 2 days at room temp. The buttercream? 5 days in the fridge (bring to room temp and rewhip before using). Freeze unfrosted layers for 1 month—thaw overnight before assembling.
Why You’ll Love This Recipe
- One Bowl Wonder: I love that I can mix the flour, sugar, butter, and eggs in a single bowl—no fancy equipment needed.
- Buttery Bliss: The unsalted butter and whole milk create a rich, velvety texture that’s hard to resist.
- Celebration Ready: Between us, this cake works for birthdays, potlucks, or just because it’s Tuesday.
- Budget Friendly: Honestly, the ingredients are pantry staples, so I can bake this without a last-minute grocery run.
Step-by-Step Instructions for Melrose Diner Buttercream Cake
This is the method that delivers that nostalgic Philly diner taste in every bite.
Step 1: Prepare the Cake Batter
Preheat your oven to 350°F and grease three 8-inch round cake pans, lining the bottoms with parchment paper. I always use room temperature ingredients here—it makes a noticeable difference in the texture.
In a large bowl, cream together the 1.5 cups unsalted butter and 2.5 cups granulated sugar until light and fluffy, about 3-4 minutes. Add the 4 whole large eggs one at a time, beating well after each addition. Then mix in the 2 tsp vanilla extract.
In a separate bowl, whisk together the 3 cups all-purpose flour, 1 tbsp baking powder, 1 tsp baking soda, and 0.5 tsp salt. Alternately add the dry ingredients and the 1.25 cups whole milk to the butter mixture, beginning and ending with the flour. Mix until just combined—overmixing will make the cake tough.
Step 2: Bake the Cake Layers
Divide the batter evenly among the prepared pans, smoothing the tops with a spatula. Bake for 25-30 minutes, or until a toothpick inserted into the center comes out clean.
Check for doneness at the 25-minute mark—you’ll see the edges pulling away from the pan and the tops springing back when lightly touched. If the layers brown too quickly, tent the pans loosely with foil to prevent over-browning.
Once done, let the cakes cool in the pans for 10 minutes, then transfer them to a wire rack to cool completely. This step is crucial; if you try to frost warm cakes, the buttercream will melt and slide right off.
Step 3: Make the Vanilla Bean Buttercream
While the cakes cool, prepare the frosting. In a stand mixer, beat the remaining unsalted butter (if needed) until creamy. Gradually add the 6 cups powdered sugar, mixing on low to avoid a cloud of sugar dust.
Split the 1 whole pure vanilla bean lengthwise, scrape out the seeds, and add them to the mixer along with the 2 tsp vanilla extract. Pour in the 0.5 cup heavy cream and beat on high for 2-3 minutes until the frosting is light, fluffy, and holds its shape.
If the frosting seems too thick, add a splash more heavy cream, 1 tablespoon at a time. If it’s too thin, add a bit more powdered sugar. The goal is a smooth, spreadable consistency that holds its shape when piped.
Step 4: Assemble and Frost the Cake
Place the first cake layer on a serving plate or cake stand. Spread a generous layer of buttercream over the top, then repeat with the second and third layers. Use a thin layer of frosting to create a crumb coat—this seals in the crumbs so your final frosting looks pristine.
Chill the cake for 15-20 minutes to set the crumb coat. Then apply the final layer of buttercream, smoothing the sides and top with a bench scraper or offset spatula for that classic diner look.
For a traditional Melrose Diner finish, pipe simple swirls or rosettes around the edges and top. Let the cake sit at room temperature for at least 30 minutes before slicing to allow the frosting to soften slightly.
Pro Tips For Making Melrose Diner Buttercream Cake
- Room Temp Butter: Take your unsalted butter out 1-2 hours before baking—cold butter won’t cream properly with the sugar, and you’ll end up with a dense cake.
- Sift the Flour: I learned this the hard way—lumpy all-purpose flour means a lumpy batter, so sift it first for that smooth Melrose Diner texture.
- Don’t Overmix: Once you add the flour, mix just until combined. Overworking the batter develops gluten, and your cake will turn out tough instead of tender.
- Use a Scale: Sounds fussy, but weighing your flour (about 120g per cup) guarantees consistency—scooping with a measuring cup can pack in too much, throwing off the whole recipe.
Essential Equipment for melrose diner buttercream cake
Mixing Essentials
A stand mixer is non-negotiable for this recipe—I use my KitchenAid Artisan with the paddle attachment. It handles the thick batter and fluffy buttercream without straining. A hand mixer works in a pinch, but expect longer mixing times and less consistent results.
Precision Baking Tools
For perfect layers, invest in three 8-inch round cake pans with 2-inch sides. I swear by Fat Daddio’s anodized aluminum pans—they bake evenly and release cakes cleanly. Don’t forget parchment paper for the bottoms to prevent sticking.
Cooling Racks
A sturdy wire cooling rack is essential for letting your layers cool completely. I use a Wilton 3-tier rack to save space while cooling all three layers at once. Cooling properly prevents the buttercream from melting when you frost.
Frosting Must-Haves
For that classic diner look, a bench scraper and offset spatula are game-changers. I prefer Ateco’s stainless steel bench scraper for smooth sides and a Wilton offset spatula for precise frosting application. 💛
Measuring Accuracy
Accurate measurements matter in baking. I use OXO Good Grips measuring cups and spoons for dry ingredients and a Pyrex liquid measuring cup for the milk and cream. A kitchen scale ensures your flour is exactly 3 cups every time.
Optional Extras
A piping bag with a large star tip helps create those classic diner swirls. I like Wilton’s disposable piping bags for easy cleanup. A cake turntable makes frosting and decorating much easier, though it’s not strictly necessary. 💫
Nutrition Facts
Frequently Asked Questions
Can I bake this in two pans instead of three?
Yes, but adjust the baking time to 35-40 minutes. Two thicker layers may need extra time to cook through. Check with a toothpick at 35 minutes and watch for even browning.
Why did my buttercream turn out grainy?
This usually happens if the butter wasn’t fully softened or the powdered sugar wasn’t sifted. Beat the butter until creamy first, then gradually add sifted sugar. A splash of cream can help smooth it out.
How far ahead can I make the cake layers?
You can bake the layers 1-2 days in advance. Wrap them tightly in plastic wrap and store at room temperature. Frost just before serving for the best texture.
What’s the secret to extra-fluffy buttercream?
Whip the frosting on high for the full 2-3 minutes after adding all ingredients. The longer you beat it, the more air incorporates, creating that light, cloud-like texture.

- 6 Egg Cake Recipe with Oil: Light as Air With Buttery Moisture - October 4, 2026
- 4 Bean Casserole Recipe: One-Pan Heartiness With Smoky Paprika Depth - October 4, 2026
- 3-Ingredient Keto Mug Cake Recipe: Microwave Magic in 2 Minutes - October 4, 2026