
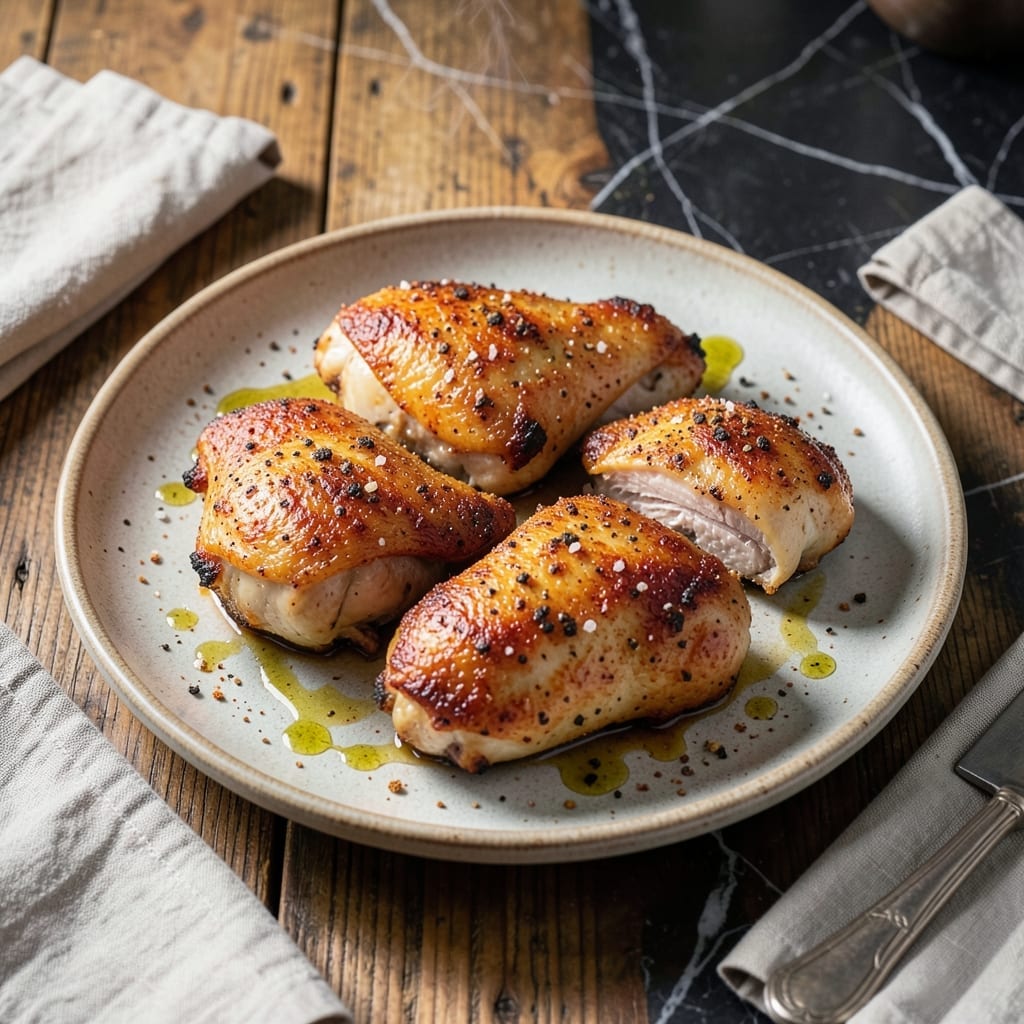
This traditional method brings back the lost art of pressed chicken, delivering a crispy golden crust with juicy meat every time. The technique involves weight during cooking to ensure even browning and maximum flavor penetration.
What sets this apart is the perfect balance between texture and moisture. A hot pan sears the exterior while the pressing method locks in natural juices, creating layers of flavor in each bite.
You’ll achieve restaurant-quality results at home with simple ingredients and a few key steps. The pressed chicken emerges with a shatteringly crispy skin that gives way to tender, juicy meat beneath.
Serve this classic dish with mashed potatoes and seasonal vegetables for a complete meal that satisfies every time.
Ingredients for Old Fashioned Pressed Chicken
Simple ingredients deliver that perfect crispy skin and juicy meat every time.
| Ingredient | Amount | Notes |
|---|---|---|
| Chicken Thighs 🍗 | 4 whole | Bone-in, skin-on for crispiness |
| Kosher Salt 🧂 | 1 ½ tsp | Diamond Crystal preferred |
| Black Pepper 🌶️ | 1 tsp | Freshly ground for best flavor |
| Garlic Powder 🧄 | 1 tsp | Not garlic salt |
| Onion Powder 🧅 | 1 tsp | Adds depth to seasoning |
| Paprika 🌶️ | 1 tsp | Sweet or smoked variety |
| All-Purpose Flour 🌾 | ½ cup | For light dusting |
| Neutral Oil 🫒 | ¼ cup | High smoke point required |
| Unsalted Butter 🧈 | 2 tbsp | For basting during cooking |
| Fresh Thyme Sprigs 🌿 | 4 whole | Optional but recommended |
| Fresh Rosemary Sprigs 🍃 | 2 whole | Optional but recommended |
| Lemon 🍋 | 1 whole | For bright finishing touch |
The chicken is the star here. Bone-in, skin-on thighs are non-negotiable for that shatteringly crisp exterior and moist interior. Source them from Whole Foods or a trusted butcher—look for uniform size (about 6-8 oz each) to ensure even cooking. The skin should be smooth and unblemished, with a good fat cap for rendering. If using breasts, brining is essential to prevent dryness (thighs don’t need it).
No fresh herbs? Dried thyme or rosemary at one-third the amount works in a pinch. Out of paprika? Cayenne pepper at half the quantity adds color and a touch of heat. The flour dusting can be swapped for cornstarch for a gluten-free option, though the crust won’t brown as deeply. For the oil, avocado or grapeseed oil are excellent high-smoke-point alternatives to neutral oil.
Pressed chicken is best served immediately, but leftovers keep 3-4 days in the fridge. Reheat in a 375°F oven for 10-12 minutes to revive the crispiness. The cooked chicken freezes for up to 3 months, though the skin may soften slightly upon thawing.
Why You’ll Love This Recipe
- One Pan Wonder: I just toss the thighs with salt, pepper, and those powders, press, and bake—no fancy steps.
- Crispy, Juicy Magic: The pressing gives that perfect crunch outside while the garlic and onion keep every bite packed with flavor.
- Weeknight Hero: Honestly, it’s my Tuesday lifesaver when I need something hearty and fast.
- Feeds and Keeps: Leftovers reheat beautifully, and chicken thighs are always easy on the wallet.
Step-by-Step Instructions for Old Fashioned Pressed Chicken
Master the technique that guarantees a perfect golden crust while keeping the meat tender and juicy.
Step 1: Season and Dredge the Chicken Thighs
Pat the 4 whole Chicken Thighs completely dry with paper towels to ensure maximum crispiness. In a shallow dish, combine the 1.5 tsp Kosher Salt, 1 tsp Black Pepper, 1 tsp Garlic Powder, 1 tsp Onion Powder, and 1 tsp Paprika. Rub this mixture evenly over all surfaces of the chicken.
Place the 0.5 cup All-Purpose Flour in a separate shallow dish. Lightly dredge each seasoned thigh in the flour, shaking off any excess. This thin coating creates the perfect crust without becoming gummy. Set the dredged thighs aside on a wire rack for 10 minutes to allow the coating to adhere.
Step 2: Sear the Chicken to Golden Perfection
Heat the 0.25 cup Neutral Oil in a large, heavy skillet (cast iron works best) over medium-high heat until shimmering. Carefully place the chicken thighs skin-side down in the hot oil. The oil should sizzle immediately upon contact.
Cook undisturbed for 8-10 minutes until the skin is deep golden brown and crisp. Resist the urge to move the pieces—this ensures even browning and a proper crust. The edges should appear lacy and the skin should release easily from the pan when properly crisped.
Step 3: Press and Baste for Even Cooking
Flip the chicken thighs and immediately add the 2 tbsp Unsalted Butter, 4 whole Fresh Thyme Sprigs, and 2 whole Fresh Rosemary Sprigs to the pan. As the butter melts, tilt the pan slightly and use a spoon to baste the chicken continuously with the hot butter and herbs.
Place a heavy plate or another pan on top of the chicken to press it down gently. This old-fashioned technique ensures even contact with the pan and promotes thorough crisping. Cook for another 6-8 minutes until the internal temperature reaches 165°F and the juices run clear.
Step 4: Rest and Finish with Citrus
Transfer the chicken to a wire rack set over a baking sheet. Let it rest for 5 minutes—this allows the juices to redistribute while keeping the skin crisp. Meanwhile, cut the 1 whole Lemon in half.
Squeeze fresh lemon juice over the rested chicken just before serving. The acidity brightens the rich flavors and cuts through the richness of the crispy skin. Garnish with additional herb sprigs if desired, and serve immediately while the crust is at its peak crispness.
Pro Tips For Making Old Fashioned Pressed Chicken
- Press Harder: Use a heavy pan or a weight to really flatten those thighs—this guarantees even cooking and that crispy edge everyone loves. I learned this the hard way after pulling underdone centers from puffy pieces.
- Salt Twice: Hit the thighs with kosher salt right after drying them, then again just before pressing. Sounds weird, but it works: the first draw out moisture, the second locks in flavor.
- Skip the Crowding: Resist the urge to cram the pan—give each thigh its own space or they’ll steam instead of sear. After burning three batches, I finally figured out patience is the only thing that gets that golden crust.
- Warm the Spices: Toast the garlic and onion powder in the hot pan for 10-15 seconds before adding the chicken. My grandmother swore by this, and she was right: it wakes up the flavor without overpowering the meat.
Make-Ahead Tips for Leftovers
Prep the Chicken
Season and dredge the chicken up to 12 hours ahead. Store uncovered in the fridge on a wire rack to keep the flour coating dry and help form a better crust when cooked. This also lets the salt penetrate deeper for more flavor. 💡
Pre-Cook Herbs
If using fresh herbs, wash and pat dry the 4 thyme sprigs and 2 rosemary sprigs the day before. Store them in a damp paper towel inside a sealed container. This keeps them fresh for basting during cooking.
Room Temperature Trick
Take the chicken out of the fridge 30-45 minutes before cooking to bring it to room temperature. This ensures even cooking and prevents the skin from steaming instead of crisping in the hot pan.
Press Weight Prep
Have your pressing weight ready—a heavy cast iron pan or a plate with cans works. I keep a 10-inch Lodge skillet nearby for this. The weight should be substantial but not so heavy it flattens the chicken too much.
Lemon and Garnish
Cut and juice the lemon just before serving for maximum freshness. The acidity brightens the dish beautifully. Keep extra herb sprigs on hand for garnish to add that restaurant-style finish. 🍋
Oven Preheating
If making a large batch, preheat your oven to 375°F to finish cooking if the pan gets too crowded. This helps maintain the crispy skin while ensuring the chicken cooks through evenly.
Nutrition Facts
Frequently Asked Questions
Why press the chicken during cooking?
Pressing ensures even contact with the pan, creating a uniform golden crust while keeping the meat juicy. It also helps render fat for extra crispiness.
Can I use boneless thighs instead?
Yes, but bone-in thighs stay juicier and crisp up better. If using boneless, reduce cooking time by 2-3 minutes per side.
What if my chicken sticks to the pan?
Make sure the oil is hot enough before adding chicken. If it sticks, don’t force it—let it release naturally after 8-10 minutes.
How do I keep the skin crispy after cooking?
Rest on a wire rack, not a plate, to prevent steam buildup. Serve immediately for maximum crispness.

- 6 Egg Cake Recipe with Oil: Light as Air With Buttery Moisture - October 4, 2026
- 4 Bean Casserole Recipe: One-Pan Heartiness With Smoky Paprika Depth - October 4, 2026
- 3-Ingredient Keto Mug Cake Recipe: Microwave Magic in 2 Minutes - October 4, 2026