
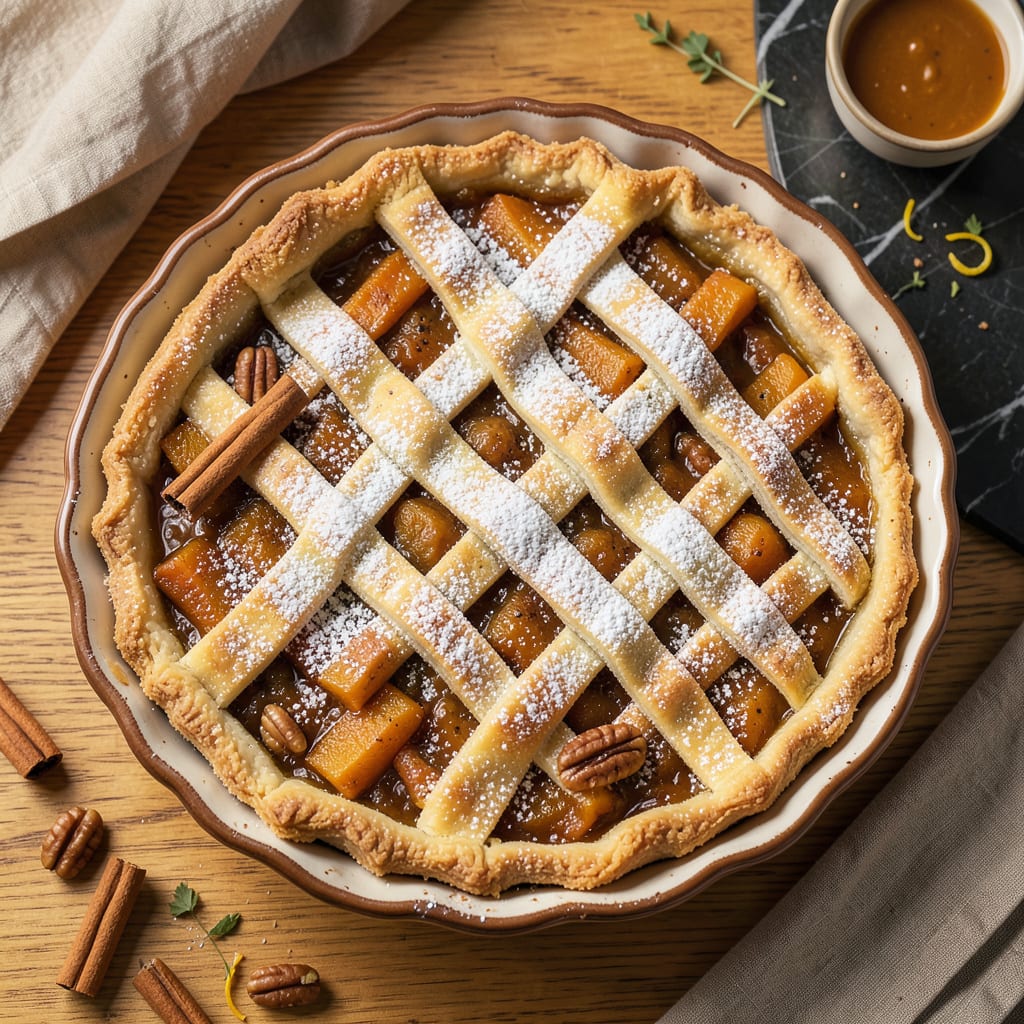
There’s something deeply satisfying about a perfectly balanced squash pie—where the creamy, spiced filling meets a flaky, golden crust in every bite. This recipe transforms humble winter squash into a dessert that rivals traditional pumpkin pie, with a smoother texture and richer, more complex flavor.
The secret lies in roasting the squash to concentrate its natural sweetness before blending it with warm spices, eggs, and cream. Paired with a buttery, homemade crust, this pie delivers the ideal balance of velvety filling and crisp pastry. Whether served with whipped cream or enjoyed plain, it’s a dessert worth making year-round.
Ingredients for One Pie Squash Pie
This pie transforms simple winter squash into a velvety, spiced dessert with a buttery crust—worth every bite.
| Ingredient | Amount | Notes |
|---|---|---|
| Winter Squash 🎃 | 3 lb | Butternut or kabocha preferred |
| All-Purpose Flour 🌾 | 1 ½ cups | Plus extra for dusting |
| Unsalted Butter 🧈 | ½ cup | Cold, cubed for crust |
| Granulated Sugar 🍬 | ¾ cup | For balanced sweetness |
| Brown Sugar 🍚 | ½ cup | Packed, for depth |
| Large Eggs 🥚 | 3 whole | Room temperature |
| Heavy Cream 🥛 | 1 cup | Full-fat for creaminess |
| Ground Cinnamon 🌿 | 1 ½ tsp | Freshly ground preferred |
| Ground Ginger 🌶️ | ½ tsp | For warmth and zing |
| Ground Nutmeg 🌰 | ¼ tsp | Freshly grated ideal |
| Salt 🧂 | ½ tsp | Divided for filling/crust |
| Vanilla Extract 🌱 | 1 tsp | Pure extract recommended |
| Ice Water 💧 | ¼ cup | For crust dough |
| Whipped Cream 🍦 | 1 cup | For serving (optional) |
The squash selection determines texture and flavor. Butternut or kabocha varieties offer the ideal balance of sweetness and creaminess. Roast until deeply caramelized—this concentrates flavors. For the crust, European-style butter (like Plugrá) yields superior flakiness due to higher fat content. Measure flour by weight if possible (195g for 1.5 cups) for consistent results. The spices should be fresh—check expiration dates.
No butternut squash? Sweet potato or pumpkin purée can substitute at a 1:1 ratio (use canned if fresh isn’t available). For a nutty depth, swap half the flour for almond flour. Dairy-free? Coconut cream replaces heavy cream perfectly. The vanilla extract can be homemade or store-bought (Nielsen-Massey is excellent). If avoiding refined sugar, coconut sugar works but alters the caramel notes slightly.
Roasted squash purée keeps 5 days refrigerated or 3 months frozen. The unbaked crust can be refrigerated 2 days or frozen 1 month—roll it out first for convenience. Baked pie stores well at room temperature 2 days or refrigerated 5 days. Always bring to room temperature before serving for optimal texture. Whipped cream is best added fresh.
Why You’ll Love This Recipe
- One Bowl Magic: I love that this comes together in a single mixing bowl—no fancy equipment, no extra dishes. Just roast the squash, mix the buttery flour crust, and let the brown sugar caramelize with the squash’s natural sweetness. Honestly, cleanup is faster than the pie disappears.
- Caramelized Comfort: That first bite where the buttery crust cracks into the spiced squash filling? Ridiculously good. The brown sugar deepens the squash’s earthiness while the granulated sugar keeps it bright—like pumpkin pie’s cooler, more interesting cousin.
- Brunch or Dessert?: I’ve served this warm with whipped cream for Thanksgiving and cold with coffee for a Tuesday breakfast. The squash makes it feel virtuous (fiber!), but the sugar and butter keep it firmly in the “yes, please” category. My picky nephew even skips the crust and just eats the filling.
- Stretches Like Magic: One pie feeds eight—or it feeds me for four days. The flavors actually improve overnight, and reheating a slice for 20 seconds makes it taste fresh-baked. Between us, I’ve also swapped half the squash for sweet potato when my grocery budget was tight. No one noticed.
Step-by-Step Instructions for One-Pie Squash Pie
This method ensures a perfectly balanced pie with flaky crust and velvety filling every time.
Step 1: Prepare the Flaky Crust
In a large bowl, combine the 1.5 cups all-purpose flour and ½ teaspoon salt. Add the ½ cup unsalted butter (cold and cubed) and work it into the flour using your fingertips or a pastry cutter until the mixture resembles coarse crumbs with pea-sized butter pieces visible. This texture ensures flaky layers in your finished crust.
Sprinkle the ¼ cup ice water over the mixture, one tablespoon at a time, tossing gently with a fork after each addition. The dough should just come together when pressed—don’t overwork it. Form the dough into a disk, wrap in plastic, and refrigerate for at least 1 hour. This resting time allows the gluten to relax and prevents shrinkage during baking.
Step 2: Roast and Purée the Squash
Preheat your oven to 400°F. Cut the 3 lb winter squash in half lengthwise and scoop out the seeds. Place the halves cut-side down on a parchment-lined baking sheet and roast for 45-55 minutes until the flesh is completely tender when pierced with a knife.
Allow the squash to cool slightly, then scoop out the flesh and purée it in a food processor until completely smooth. You’ll need 2 cups of purée for the filling—any excess can be saved for another use. The smooth texture is crucial for a creamy, lump-free filling that sets properly when baked.
Step 3: Make the Spiced Filling
In a large mixing bowl, whisk together the ¾ cup granulated sugar, ½ cup brown sugar, 1.5 teaspoons ground cinnamon, ½ teaspoon ground ginger, ¼ teaspoon ground nutmeg, and remaining ¼ teaspoon salt. Add the 3 large eggs one at a time, whisking well after each addition.
Stir in the 2 cups squash purée, 1 cup heavy cream, and 1 teaspoon vanilla extract until completely smooth. The filling should be velvety with no visible sugar granules. Let the mixture rest for 10 minutes before pouring into the crust—this allows the spices to bloom and the flavors to meld.
Step 4: Assemble and Bake the Pie
On a lightly floured surface, roll out the chilled dough to a 12-inch circle about ⅛-inch thick. Transfer it to a 9-inch pie dish, trim the edges to leave a ½-inch overhang, then crimp decoratively. Pour the filling into the crust and smooth the top with a spatula.
Bake at 375°F for 50-60 minutes until the filling is set around the edges but still slightly jiggly in the center. A knife inserted near the edge should come out clean. The pie will continue to set as it cools. Transfer to a wire rack and let cool completely—at least 2 hours—before slicing to ensure clean portions.
Step 5: Serve with Whipped Cream
Once completely cooled, slice the pie into 8 equal wedges. Top each serving with a generous dollop of whipped cream—about 2 tablespoons per slice. The contrast between the spiced, creamy filling and the light, airy whipped cream creates the perfect balance of textures and flavors.
For best results, serve at room temperature. The crust should be crisp and flaky, the filling smooth and rich with visible spice flecks throughout. Store any leftovers covered in the refrigerator for up to 3 days, though the crust is best enjoyed fresh.
Common Mistakes When Making Perfect Results
Overworking the Dough
When making your pie crust, resist the urge to knead or overmix the dough. The moment it just comes together—after adding ¼ cup ice water—stop working it. Overdeveloped gluten creates a tough crust instead of that coveted flaky texture we all love. I use a light hand and let the fridge do the work during the 1-hour rest. 💡
Under-Roasting the Squash
Don’t rush the squash roasting step! At 400°F, it needs 45-55 minutes until completely tender. Under-roasted squash makes for a watery filling that won’t set properly. I check by piercing with a knife—it should slide in like butter. The caramelization developed during roasting is what gives your pie its depth of flavor.
Skipping the Filling Rest
After mixing your filling, let it sit for 10 minutes before pouring into the crust. This brief rest allows the spices to bloom and the sugars to fully dissolve. I’ve found this small step makes a noticeable difference in the final texture—smoother and more cohesive rather than grainy or separated.
Overbaking the Pie
The pie is done when the edges are set but the center still has a slight jiggle—this usually takes 50-60 minutes at 375°F. Overbaking leads to a dry, cracked filling. Remember, it continues to set as it cools. I pull mine when a knife inserted near the edge comes out clean, but the very center still quivers gently.
Slicing Too Soon
Patience is key! Let your pie cool completely—at least 2 hours—before slicing. Cutting into a warm pie results in a runny filling and messy slices. I usually make mine in the morning so it has plenty of time to set before serving. The wait is tough, but the perfect slice is worth it. ⏰
Ignoring Spice Freshness
Old spices lose their potency quickly. For this recipe, your cinnamon, ginger, and nutmeg should be fresh—ideally purchased within the last 6 months. I give mine a quick smell test before using; if the aroma is weak, it’s time for new spices. Freshly grated nutmeg makes a particularly noticeable difference in flavor complexity.
Nutrition Facts

- 6 Egg Cake Recipe with Oil: Light as Air With Buttery Moisture - October 4, 2026
- 4 Bean Casserole Recipe: One-Pan Heartiness With Smoky Paprika Depth - October 4, 2026
- 3-Ingredient Keto Mug Cake Recipe: Microwave Magic in 2 Minutes - October 4, 2026