
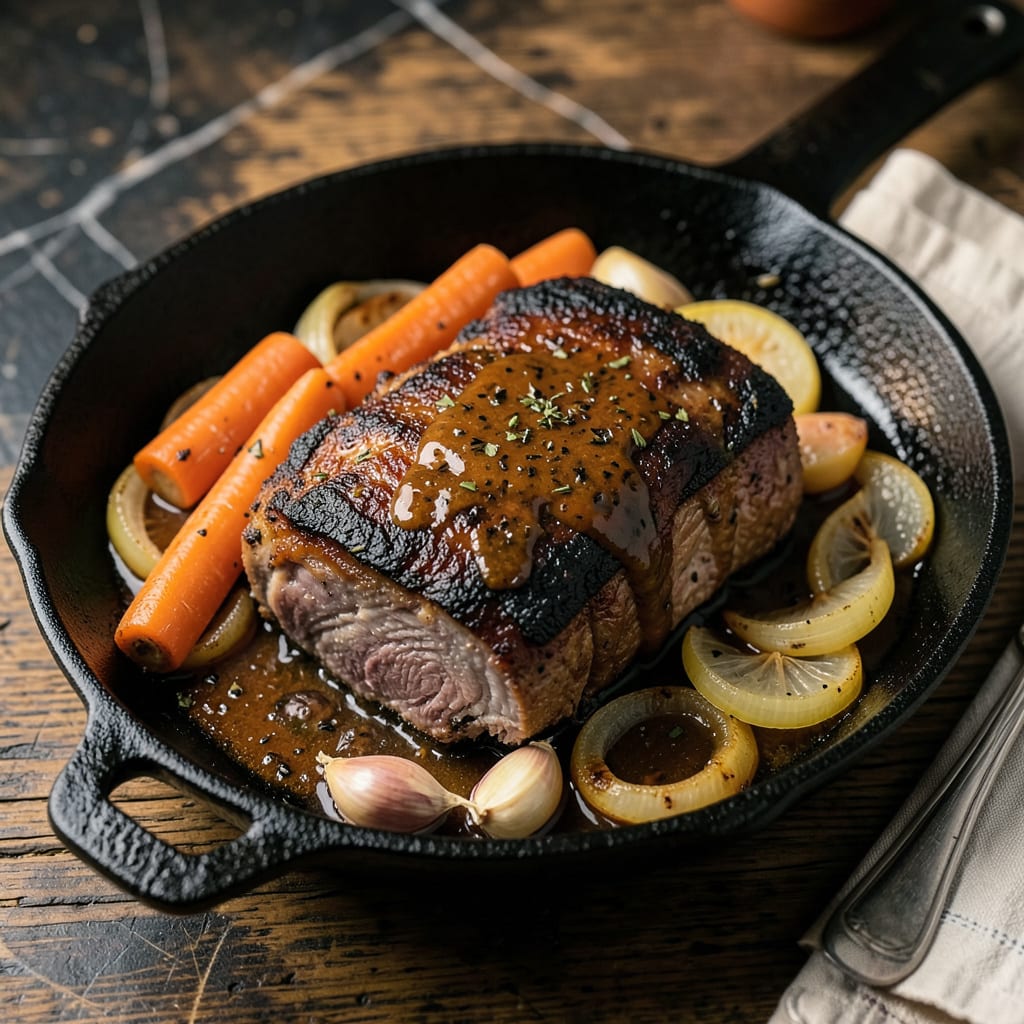
Few cuts of beef deliver the rich, meaty satisfaction of a properly cooked shoulder chuck roast. This fall-apart tender preparation transforms a budget-friendly cut into a centerpiece worthy of any dinner table. The secret lies in patience—slow cooking breaks down the connective tissue until it melts into the meat, creating a texture that’s simultaneously hearty and buttery.
What sets this method apart is the balance of technique and simplicity. A high-heat sear develops deep flavor before the low-and-slow cooking process begins. Whether you choose oven braising or slow cooker convenience, the result remains consistent: meat that pulls apart with minimal effort and a deeply flavorful sauce built from the roast’s natural juices. Perfect for Sunday suppers or impressive weeknight meals.
Ingredients for Shoulder Chuck Roast
Optimal quality requires just fourteen ingredients to achieve fall-apart tender beef chuck roast with professional results.
| Ingredient | Amount | Notes |
|---|---|---|
| Beef Chuck Roast 🥩 | 3 lb | Well-marbled, boneless preferred |
| Kosher Salt 🧂 | 1 ½ tbsp | Diamond Crystal brand recommended |
| Freshly Ground Black Pepper 🌶️ | 1 tbsp | Coarse grind preferred |
| Garlic Cloves 🧄 | 6 cloves | Minced for even distribution |
| Yellow Onion 🧅 | 1 whole | Large, thinly sliced |
| Carrots 🥕 | 3 whole | Peeled, cut into 2-inch pieces |
| Celery Stalks 🌿 | 3 whole | Cut into 2-inch pieces |
| Tomato Paste 🍅 | 2 tbsp | San Marzano preferred |
| Dry Red Wine 🍷 | 1 cup | Cabernet Sauvignon or Merlot |
| Beef Stock 💧 | 2 cups | Low-sodium preferred |
| Fresh Thyme Sprigs 🌿 | 4 pieces | Tied with kitchen twine |
| Bay Leaves 🌿 | 2 whole | Dried, whole leaves |
| Extra-Virgin Olive Oil 🫒 | 2 tbsp | For high-heat searing |
| Unsalted Butter 🧈 | 2 tbsp | European-style preferred |
| All-Purpose Flour 🌾 | 2 tbsp | For thickening sauce |
The chuck roast selection determines final texture. Optimal quality requires well-marbled beef—look for abundant white fat streaks throughout the muscle. Professional kitchens source from USDA Choice or Prime grades, available at Whole Foods or high-end butcher counters. The 3-pound size specified ensures even cooking; larger roasts require adjusted timing. For the tomato paste, San Marzano brand offers superior depth, though standard varieties suffice in a pinch. The wine should be dry and bold—avoid cooking wines with added salt.
Substitutions must maintain the dish’s structural integrity. Red wine vinegar plus beef broth can replace wine at a 1:1 ratio. Fresh rosemary substitutes effectively for thyme, though reduce quantity by one-third. Gluten-free flour blends work for thickening, but cornstarch slurry (1 tbsp cornstarch + 2 tbsp cold water) provides clearer sauce consistency. For alcohol-free preparation, additional beef stock with 1 tsp balsamic vinegar mimics wine’s acidity. The butter can be omitted entirely, though it contributes essential richness to the finished sauce.
Proper storage preserves texture and flavor. Refrigerate cooked roast in its braising liquid for 4-5 days—the collagen continues to soften during storage. For longer preservation, freeze in vacuum-sealed portions for 3 months. Reheat gently in the braising liquid to prevent drying. The sauce will thicken upon cooling; thin with additional stock as needed. Always bring to 165°F internal temperature when reheating to ensure food safety while maintaining tenderness.
Why You’ll Love This Recipe
- One-Pan Magic: I love that this whole dish comes together in a single pot. Just sear the chuck roast, toss in the garlic and onion, and let the oven do the rest—no fancy techniques or constant stirring.
- Garlic-Onion Depth: The way the yellow onions caramelize with the garlic while the beef slow-cooks? That’s where the real flavor lives. It’s rich, savory, and so much better than anything I’ve gotten from a restaurant.
- Sunday or Tuesday: This isn’t just for special occasions—I make it midweek when I need something hearty. Leftovers? Even better. The flavors deepen overnight, so it’s my secret weapon for meal prep.
- Budget-Friendly Feast: Honestly, chuck roast is one of the most affordable cuts, but it tastes like a splurge. A three-pound roast feeds my family for two nights, and the bones? Perfect for homemade broth later.
Step-by-Step Instructions for Shoulder Chuck Roast
Achieving perfectly tender beef requires precise technique and patience—follow this method for exceptional results every time.
Step 1: Season and Sear the Beef Chuck Roast
Pat the 3 lb Beef Chuck Roast completely dry with paper towels. This ensures proper browning rather than steaming. Season all sides aggressively with the 1.5 tbsp Kosher Salt and 1 tbsp Freshly Ground Black Pepper, pressing the seasoning into the meat so it adheres during searing.
Heat the 2 tbsp Extra-Virgin Olive Oil in a heavy Dutch oven over medium-high heat until shimmering. Add the roast and sear undisturbed for 4-5 minutes per side until a deep, mahogany crust forms. You’ll hear a steady sizzle—this is the Maillard reaction developing complex flavors. Transfer the roast to a plate and set aside.
Step 2: Build the Aromatic Base
In the same pot, reduce heat to medium and add the 2 tbsp Unsalted Butter. Once melted, add the thinly sliced yellow onion, peeled carrots, and celery stalks. Cook for 8-10 minutes, stirring occasionally, until the vegetables soften and develop golden edges.
Add the minced garlic cloves and cook for 1 minute until fragrant. Stir in the 2 tbsp Tomato Paste and cook for 2 minutes, allowing it to caramelize slightly—this deepens the umami foundation of your sauce. The mixture should turn a rich, brick-red color.
Step 3: Deglaze and Begin Braising
Pour in the 1 cup Dry Red Wine, scraping up all browned bits from the pot bottom with a wooden spoon. These fond particles contain concentrated beef flavor. Simmer for 3-4 minutes until the liquid reduces by half, allowing the alcohol to cook off while preserving the wine’s acidity.
Add the 2 cups Beef Stock, fresh thyme sprigs, and bay leaves. Return the seared roast to the pot along with any accumulated juices. The liquid should come about two-thirds up the sides of the meat—add water if needed. Bring to a gentle simmer, then cover tightly.
Step 4: Slow-Cook to Fall-Apart Tenderness
Transfer the covered pot to a 325°F oven and braise for 3-3.5 hours. Check at the 3-hour mark—the roast should yield easily to a fork but not completely fall apart. If it resists, return it to the oven for additional 30-minute increments until perfectly tender.
Alternatively, maintain a gentle simmer on the stovetop, adjusting heat as needed to keep the liquid at a lazy bubble. The meat is done when it can be pulled apart with minimal resistance and the internal temperature reaches 195-200°F.
Step 5: Finish and Serve
Carefully transfer the roast to a cutting board and tent with foil. Skim excess fat from the braising liquid, then place the pot over medium heat. Whisk in the 2 tbsp All-Purpose Flour and simmer for 5-7 minutes until the sauce thickens enough to coat the back of a spoon.
Slice the roast against the grain or pull into large chunks. Return to the pot and turn to coat with sauce. Let rest for 10 minutes before serving to allow the juices to redistribute. The final texture should be fork-tender with a glossy, flavorful sauce clinging to each piece.
Essential Equipment for shoulder chuck roast
Dutch Oven Essentials
A heavy 5-7 quart enameled cast iron Dutch oven is non-negotiable for this recipe. I swear by my Le Creuset Signature—its even heat distribution and tight-fitting lid create the perfect braising environment. The enameled surface prevents reactions with acidic ingredients like wine while making cleanup effortless. 🔥
Precision Thermometers
Don’t trust your oven’s built-in thermometer—mine runs 25°F hot. I use a ThermoWorks Dot with a probe alarm to monitor both oven temperature and internal meat temp. The 195-200°F target for chuck roast is critical for collagen breakdown without drying the meat.
Sharp Chef’s Knife
You’ll need an 8-inch chef’s knife for trimming fat and slicing vegetables. My Wüsthof Ikon handles the thick chuck roast connective tissue with ease. A sharp blade ensures clean cuts on onions and carrots, which cook more evenly. Dull knives crush rather than slice—test yours on paper before starting.
Wooden Spoons
When deglazing and stirring, wooden spoons are gentler on your Dutch oven’s surface than metal. I keep a 12-inch olive wood spoon dedicated to braising—the long handle prevents burns when stirring deep pots. The wood also won’t conduct heat like metal utensils, giving you better control.
Fat Separator
After cooking, you’ll need to remove excess fat from the braising liquid. A OXO Good Grips fat separator makes this process foolproof. Pour the liquid through the strainer, let it settle for 2-3 minutes, then pour from the spout—clean sauce every time. This tool saves me from greasy gravy disasters.
Kitchen Twine
For bundling thyme sprigs and securing bay leaves, unbleached cotton kitchen twine is essential. I use 18-inch lengths to tie herb bundles that are easy to remove after cooking. Avoid synthetic twine—it can melt at high temperatures. A simple butcher’s knot keeps everything secure during the long braise. 💡
Nutrition Facts

- 6 Egg Cake Recipe with Oil: Light as Air With Buttery Moisture - October 4, 2026
- 4 Bean Casserole Recipe: One-Pan Heartiness With Smoky Paprika Depth - October 4, 2026
- 3-Ingredient Keto Mug Cake Recipe: Microwave Magic in 2 Minutes - October 4, 2026