
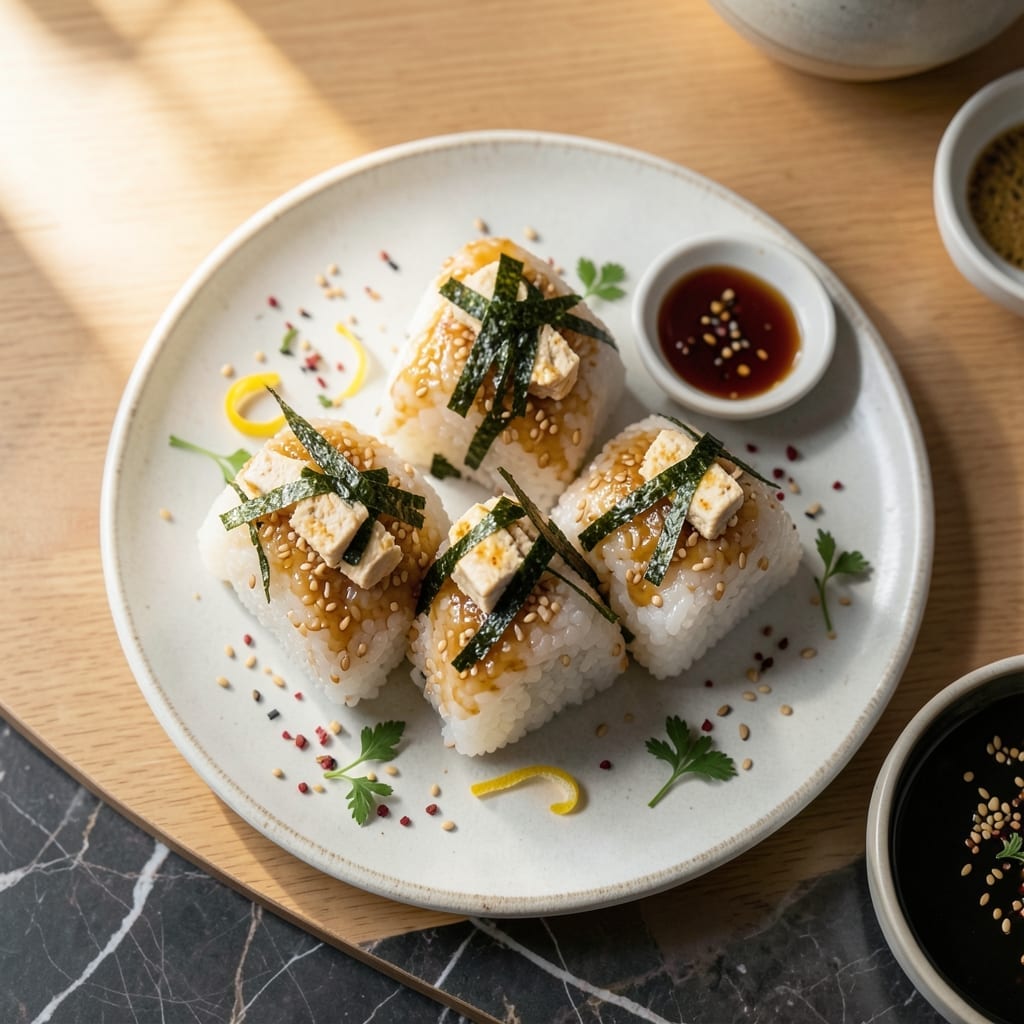
I developed this vegetarian onigiri recipe to deliver crispy results every time, transforming simple rice into an irresistible handheld meal. The secret lies in the right rice consistency and proper shaping technique.
These savory rice balls work beautifully with various fillings, from pickled vegetables to spiced tofu. The exterior achieves that coveted crispy texture through a quick pan-toasting method after shaping.
You’ll appreciate how this method maintains the traditional Japanese street food experience while keeping it completely meat-free. The process is straightforward yet yields professional-quality results.
Each bite offers perfectly seasoned rice with a satisfying crunch, making these ideal for lunches or light meals. The fillings can be customized to suit any vegetarian preference.
Ingredients for Onigiri Recipe Vegetarian
Transform simple rice into crispy handheld meals with these vegetarian onigiri essentials.
| Ingredient | Amount | Notes |
|---|---|---|
| Sushi Rice 🍚 | 2 cups | Short-grain, uncooked, rinsed thoroughly |
| Water 💧 | 2 ½ cups | For cooking rice |
| Rice Vinegar 🍯 | 3 tbsp | Seasoned rice vinegar preferred |
| Granulated Sugar 🍚 | 1 tbsp | Dissolved in vinegar mixture |
| Salt 🧂 | 1 tsp | Fine sea salt for seasoning |
| Firm Tofu 🧈 | 8 oz | Pressed and crumbled for filling |
| Soy Sauce 🫒 | 2 tbsp | Low-sodium for marinating tofu |
| Sesame Oil 🫒 | 1 tsp | Toasted, for tofu marinade |
| Pickled Vegetables 🥬 | ½ cup | Chopped, for filling variation |
| Nori Sheets 🍱 | 2 sheets | Cut into strips for wrapping |
| Neutral Oil 🫒 | 2 tbsp | For pan-toasting onigiri |
| Cornstarch 🌾 | 2 tbsp | For dusting hands while shaping |
| Green Onions 🧅 | 2 whole | Thinly sliced for garnish |
| Sesame Seeds 🌰 | 1 tbsp | Toasted, for garnish |
The rice is non-negotiable here. Short-grain sushi rice delivers the sticky texture required for proper shaping—long-grain or jasmine won’t hold. Koshihikari or Nishiki brands are ideal and widely available at Asian markets or Whole Foods. Rinse until the water runs clear to remove excess starch, which prevents mushiness. The rice vinegar seasoning is what gives onigiri its signature flavor profile.
No firm tofu? Tempeh crumbles work beautifully with the same marinade. For pickled vegetables, store-bought umeboshi or beni shoga (red pickled ginger) at Japanese grocers saves time. The cornstarch is critical for handling—don’t skip it or the rice will stick to your hands. If you’re avoiding gluten, tamari instead of soy sauce keeps the tofu filling vegetarian and safe.
Shaped onigiri keep in the fridge for 2-3 days in an airtight container. For longer storage, freeze without the nori wrappers for up to 1 month. Toast in a pan with oil just before serving to restore that crispy texture. The nori strips go on last—add them after reheating so they stay crisp.
Why You’ll Love This Recipe
- Minimal Effort: I just mix sushi rice with a splash of rice vinegar, sugar, and salt—no fancy techniques or hard-to-find ingredients.
- Addictive Balance: The sweet-savory combo from the vinegar and sugar hits that perfect umami note every time.
- Lunchbox Hero: I pack these for picnics, work lunches, or even a quick snack—they hold their shape and taste great cold.
Step-by-Step Instructions for Crispy Vegetarian Onigiri
Master the technique for perfectly shaped rice balls with a satisfying crunch and flavorful fillings.
Step 1: Cook and Season the Sushi Rice
Rinse the 2 cups sushi rice under cold water until the water runs clear, then drain thoroughly. Combine the rice with 2.5 cups water in a rice cooker or pot and cook according to standard sushi rice methods.
While the rice cooks, heat the 3 tbsp rice vinegar, 1 tbsp granulated sugar, and 1 tsp salt in a small saucepan until the sugar dissolves completely. Once the rice is cooked, transfer it to a large bowl and gently fold in the vinegar mixture using a cutting motion to avoid crushing the grains. The rice should be glossy and slightly sticky when properly seasoned.
Step 2: Prepare the Tofu Filling
Crumble the 8 oz firm tofu into small pieces, about the size of peas. In a mixing bowl, combine the crumbled tofu with 2 tbsp soy sauce and 1 tsp sesame oil. Let it marinate for 10-15 minutes to absorb the flavors.
Heat a pan over medium heat and cook the marinated tofu for 5-6 minutes, stirring occasionally, until the liquid has mostly evaporated and the tofu takes on a light golden color. For variety, fold in the 0.5 cup pickled vegetables just before removing from heat. Set the filling aside to cool slightly.
Step 3: Shape the Onigiri
Dust your hands lightly with 2 tbsp cornstarch to prevent sticking. Take a handful of the seasoned rice (about ½ cup) and flatten it in your palm. Create a shallow indentation in the center and add a spoonful of the tofu filling. Fold the rice over the filling, gently pressing to enclose it completely.
Shape the rice into a triangle or ball, applying even pressure to maintain a uniform shape. The cornstarch helps achieve a smooth surface while preventing the rice from sticking to your hands. Repeat until all rice and filling are used.
Step 4: Pan-Toast for Crispiness
Heat the 2 tbsp neutral oil in a non-stick skillet over medium heat. Place the shaped onigiri in the pan, leaving space between each piece. Cook for 3-4 minutes per side until the surface turns golden brown and crispy.
This toasting step is essential for achieving the promised crispy exterior while keeping the inside tender. Turn the onigiri carefully to avoid breaking their shape, and ensure each side gets equal contact with the pan.
Step 5: Garnish and Serve
Thinly slice the 2 whole green onions and toast the 1 tbsp sesame seeds in a dry pan over low heat for 1-2 minutes until fragrant. Cut the 2 sheets nori sheets into thin strips for wrapping or garnishing.
Arrange the crispy onigiri on a serving plate, and garnish with the sliced green onions, toasted sesame seeds, and nori strips. Serve immediately while the exterior remains crisp and the filling is warm.
Pro Tips For Making Onigiri Recipe Vegetarian
- Wet Your Hands: Keep a bowl of water nearby to dip your fingers in while shaping—prevents the rice from sticking like glue and makes smooth, even onigiri every time.
- Use Warm Rice: Shape the onigiri while the rice is still warm, not piping hot but not cold. I learned this the hard way—cold rice cracks and falls apart.
- Season the Rice: Mix the rice vinegar, sugar, and salt into the cooked rice while it’s hot. Sounds weird, but it works: the flavors absorb better and taste more balanced.
- Let It Rest: After seasoning, let the rice sit for 5-10 minutes before shaping. This gives the grains time to settle and hold together, so your onigiri won’t crumble.
Troubleshooting Perfect Results
Rice Too Sticky
If your rice feels like glue, you likely didn’t rinse it enough. Rinse until the water runs completely clear to remove excess starch. Also check your water ratio—2.5 cups water for 2 cups rice is ideal for sushi rice. 💡
Onigiri Falls Apart
This usually means the rice is too hot when shaping. Let it cool to room temperature before handling. Also ensure you’re using enough cornstarch on your hands and pressing firmly but gently when forming the triangle shape.
Not Crispy Enough
Your pan might not be hot enough. Heat the 2 tbsp oil until shimmering before adding the onigiri. Cook for the full 3-4 minutes per side without moving them. A non-stick skillet works best for even browning.
Filling Leaks Out
You’re likely overfilling the rice pockets. Use no more than 1 tbsp of filling per onigiri.
Dry Rice Texture
This happens when the rice cooks too long or sits uncovered. After cooking, keep the rice covered with a damp towel until ready to use. If it’s already dry, sprinkle a little warm water and fold gently to restore moisture before shaping.
Nori Won’t Stick
The rice surface needs to be slightly tacky for the nori strips to adhere. If it’s too dry, lightly brush the onigiri with water or soy sauce. Wrap the nori just before serving so it stays crisp. 🌟
Nutrition Facts
Frequently Asked Questions
Can I use regular rice instead of sushi rice?
No, short-grain sushi rice is essential for proper texture and shaping. Regular rice lacks the stickiness needed to hold the onigiri together during shaping and toasting.
How do I keep them warm for serving?
Place cooked onigiri on a wire rack in a 200°F oven for up to 20 minutes. This maintains crispiness while keeping them warm. Avoid stacking to prevent sogginess.
What other fillings work well?
Try seasoned mushrooms, edamame, or pickled radish. For a cheesy option, use 1 tbsp cream cheese mixed with herbs. Always ensure fillings are cooled before adding to rice.
Can I make these gluten-free?
Yes! Use tamari instead of soy sauce and check that your rice vinegar is gluten-free. The rest of the ingredients are naturally gluten-free.

- 6 Egg Cake Recipe with Oil: Light as Air With Buttery Moisture - October 4, 2026
- 4 Bean Casserole Recipe: One-Pan Heartiness With Smoky Paprika Depth - October 4, 2026
- 3-Ingredient Keto Mug Cake Recipe: Microwave Magic in 2 Minutes - October 4, 2026