
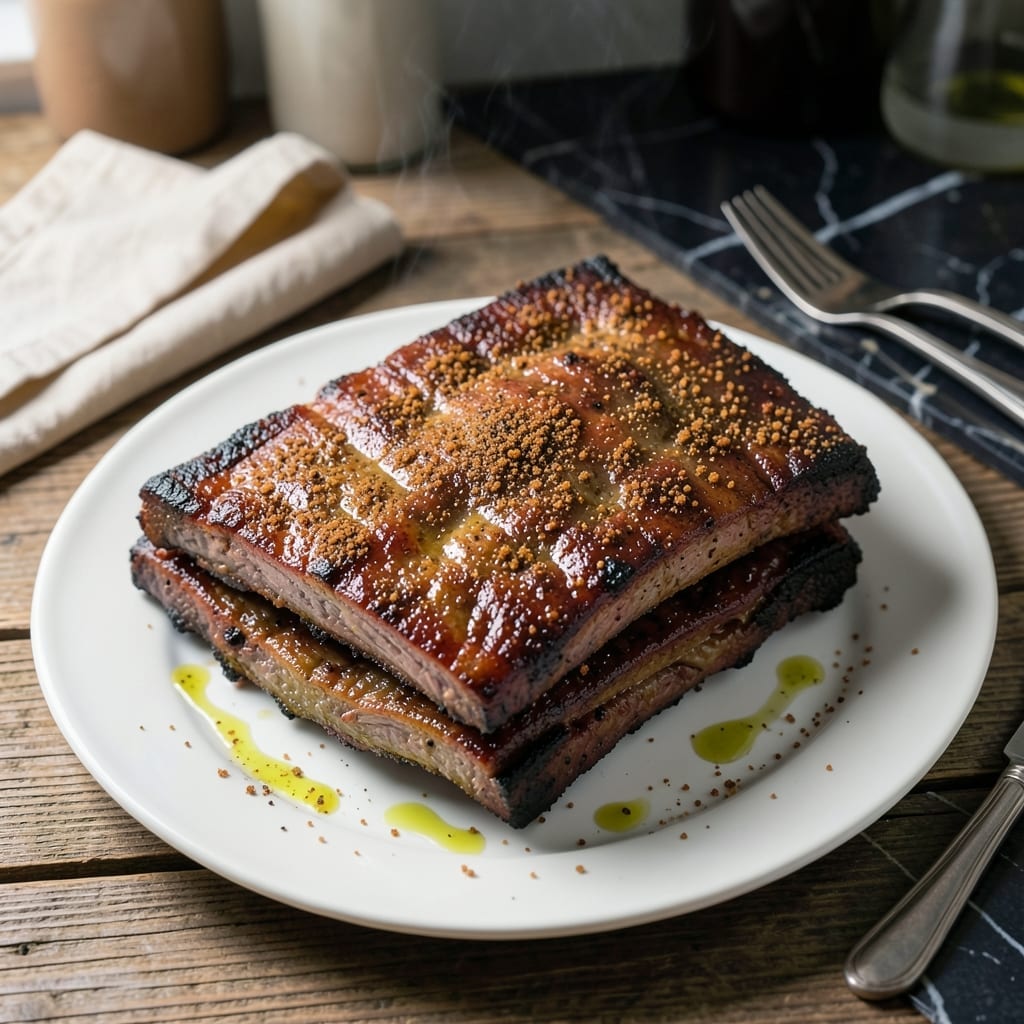
There’s something deeply satisfying about slow-cooked beef ribs that fall effortlessly from the bone with each bite. This method transforms tough cuts into tender, flavorful masterpieces without requiring a smoker or grill.
The secret lies in a well-balanced dry rub and precise oven temperature control. I’ve perfected this technique through countless test batches, ensuring the meat becomes fork-tender while developing a rich, caramelized crust.
What emerges from the oven is rib meat so tender it nearly melts in your mouth, with a robust crust that locks in all the juices. The dry rub creates a flavorful bark that complements the natural richness of the beef.
Perfect for Sunday dinners or special occasions, this recipe delivers restaurant-quality results with minimal active cooking time. The oven does most of the work while you prepare the sides.
Ingredients for Oven Baked Beef Ribs
Transform tough cuts into restaurant-quality ribs with this precise ingredient lineup for oven-baked success.
| Ingredient | Amount | Notes |
|---|---|---|
| Beef Back Ribs 🥩 | 4 lb | Full rack, membrane removed |
| Brown Sugar 🍚 | ½ cup | Light or dark variety |
| Paprika 🌶️ | 2 tbsp | Sweet or smoked variety |
| Garlic Powder 🧄 | 1 tbsp | Not garlic salt |
| Onion Powder 🧅 | 1 tbsp | Fresh ground preferred |
| Ground Black Pepper 🌶️ | 1 tbsp | Freshly cracked for best flavor |
| Kosher Salt 🧂 | 2 tbsp | Diamond Crystal preferred |
| Chili Powder 🌶️ | 1 tbsp | Mild or hot variety |
| Ground Cumin 🌿 | 1 tsp | Toasted for deeper flavor |
| Apple Cider Vinegar 🍏 | ¼ cup | For acidity balance |
| Olive Oil 🫒 | 2 tbsp | For rubbing dry mix |
| Beef Broth 🥩 | 1 cup | Low-sodium preferred |
| Worcestershire Sauce 💧 | 2 tbsp | Anchovy-free if preferred |
The beef ribs are the foundation—look for well-marbled back ribs at your butcher or Costco for the best results. Full racks ensure even cooking, and removing the membrane (that thin, papery layer on the bone side) is non-negotiable for proper dry rub adhesion. Diamond Crystal kosher salt is the professional choice here, but any coarse salt works in a pinch (just adjust the quantity).
No apple cider vinegar? White vinegar or lemon juice at the same amount will provide the needed acidity. For the dry rub, if you’re missing an individual spice, pre-mixed BBQ seasoning can substitute (use 3 tbsp total). The Worcestershire sauce adds depth, but coconut aminos work for a soy-free option. Beef broth can be swapped for water, though the flavor will be less robust.
The dry rub keeps in an airtight container for up to 3 months. Ribs should be cooked immediately after seasoning—don’t let them sit overnight as the salt will draw out too much moisture. Leftovers (if any exist) reheat beautifully wrapped in foil at 350°F for 20 minutes.
Why You’ll Love This Recipe
- Set It and Forget It: I rub the ribs with brown sugar and spices, pop them in the oven, and let the heat do all the work—no babysitting required.
- Smoky Sweet Crust: The mix of paprika, garlic, and onion powder with brown sugar gives these ribs a sticky, caramelized coating that’s downright addictive.
- Crowd-Pleasing Centerpiece: Honestly, these ribs disappear faster than any other dish at my family gatherings—even the picky eaters go back for seconds.
- Leftovers for Days: One batch makes enough to feed us twice, and the flavor only gets richer when reheated the next day.
Step-by-Step Instructions for Oven Baked Beef Ribs
Master these techniques for ribs that are consistently tender with a caramelized crust.
Step 1: Prepare and Season the Beef Back Ribs
Begin by patting the 4 lb Beef Back Ribs completely dry with paper towels. This ensures the dry rub adheres properly and promotes even browning. Position the rack meat-side up on a large baking sheet.
In a bowl, combine the 0.5 cup Brown Sugar, 2 tbsp Paprika, 1 tbsp Garlic Powder, 1 tbsp Onion Powder, 1 tbsp Ground Black Pepper, 2 tbsp Kosher Salt, 1 tbsp Chili Powder, and 1 tsp Ground Cumin. Drizzle in the 2 tbsp Olive Oil and mix until it forms a paste.
Rub this mixture generously over every surface of the ribs, pressing it into the meat. Let the seasoned ribs sit at room temperature for 30 minutes to allow the flavors to penetrate.
Step 2: Slow-Roast the Ribs Until Tender
Preheat your oven to 275°F. This low temperature is crucial for breaking down the connective tissue without drying out the meat. Place the ribs meat-side up on a wire rack set over a baking sheet to allow air circulation.
Pour the 1 cup Beef Broth and 0.25 cup Apple Cider Vinegar into the bottom of the baking sheet. The liquid creates steam, keeping the ribs moist during the long cooking process. Cover the entire setup tightly with heavy-duty aluminum foil.
Roast for 2.5 hours. The ribs are ready for the next step when the meat has pulled back from the bones by about ¼ inch and a fork inserted between the bones meets with slight resistance but no tough resistance.
Step 3: Glaze and Finish for Maximum Flavor
Carefully remove the ribs from the oven and increase the temperature to 400°F. Uncover the ribs and brush them generously with the 2 tbsp Worcestershire Sauce, which adds a deep umami richness to complement the dry rub.
Return the ribs to the oven, uncovered, and roast for an additional 20-25 minutes. This high-heat phase caramelizes the sugars in the rub and the Worcestershire, creating a sticky, flavorful crust. Watch closely to prevent burning—the ribs should develop a deep mahogany color with slightly charred edges.
The ribs are done when the meat easily pulls away from the bone with a fork and the surface is glossy and caramelized. The internal temperature should reach at least 195°F for optimal tenderness.
Step 4: Rest and Serve
Transfer the ribs to a cutting board and let them rest for 10 minutes. This allows the juices to redistribute throughout the meat, ensuring every bite is moist and flavorful. Tent loosely with foil to keep them warm.
Slice the rack between the bones into individual ribs. The meat should be so tender that it nearly falls off the bone with minimal pressure. Serve immediately while hot, with any accumulated pan juices spooned over the top for added moisture and flavor.
Pro Tips For Making Oven Baked Beef Ribs
- Low and Slow Wins: Bake at 275°F for 3-4 hours—this gives the fat time to render and the dry rub with brown sugar to caramelize without burning. I learned this the hard way after rushing at 350°F and ending up with tough ribs.
- Pat Dry First: Blot the beef back ribs with paper towels before seasoning to help the paprika and spices stick better and form a proper crust.
- Skip the Overcrowding: Leave space between ribs on the tray, or they’ll steam instead of roast—your rub won’t crisp up, and the meat won’t brown evenly.
- Rest Before Serving: Let the ribs sit covered for 10 minutes after baking so the juices redistribute. Sounds tedious, but it actually changes the outcome—dry ribs are a sad dinner.
Flavor Customization for This Dish
Sweet and Spicy Heat
Add 1 tbsp cayenne pepper to your dry rub for noticeable heat, or use ½ tsp for milder warmth. Balance it with an extra 2 tbsp brown sugar to create that sweet-spicy contrast. I love how this variation adds complexity without overpowering the beef. 🌶️
Smoky Depth
Swap regular paprika for smoked paprika in the dry rub. For even more intensity, add 1 tsp liquid smoke to the beef broth. This mimics the flavor of traditional smoked ribs without needing a smoker.
Asian-Inspired Fusion
Replace chili powder with 1 tbsp gochugaru (Korean chili flakes) and add 1 tbsp grated ginger to the dry rub. Brush with soy sauce instead of Worcestershire in the final step for an umami-rich Asian twist.
Coffee Crusted Boldness
Mix 2 tbsp finely ground coffee into your dry rub. The coffee doesn’t make it taste like a beverage but adds a deep, earthy richness. I recommend using dark roast for the strongest flavor impact. ✨
Herb-Enhanced Brightness
Add 1 tbsp dried rosemary and 1 tbsp dried thyme to the rub mixture. These herbs complement the beef’s natural flavors beautifully. Fresh herbs work too—just use triple the amount since they’re less concentrated.
Citrus Zing
Increase the apple cider vinegar to ½ cup and add the zest of 1 orange to the dry rub. The citrus brightens the rich flavors and cuts through the fat, making each bite more vibrant.
Nutrition Facts
Frequently Asked Questions
What’s the best way to remove the membrane?
Use a butter knife to lift the thin membrane at one end, then grab it with a paper towel for grip. Pull firmly in one motion. This ensures the dry rub penetrates the meat properly.
Can I use baby back ribs instead?
Yes, but reduce cooking time to 2 hours at 275°F. Baby backs are smaller and cook faster than beef ribs. Check tenderness with a fork after 2 hours.
Why rest the ribs before serving?
Resting for 10 minutes lets juices redistribute. Cutting too soon causes dryness as the moisture escapes. Tent with foil to keep warm.
Can I make this ahead of time?
Cook ribs fully, then refrigerate in an airtight container for up to 3 days. Reheat wrapped in foil at 350°F for 20 minutes.

- 6 Egg Cake Recipe with Oil: Light as Air With Buttery Moisture - October 4, 2026
- 4 Bean Casserole Recipe: One-Pan Heartiness With Smoky Paprika Depth - October 4, 2026
- 3-Ingredient Keto Mug Cake Recipe: Microwave Magic in 2 Minutes - October 4, 2026