
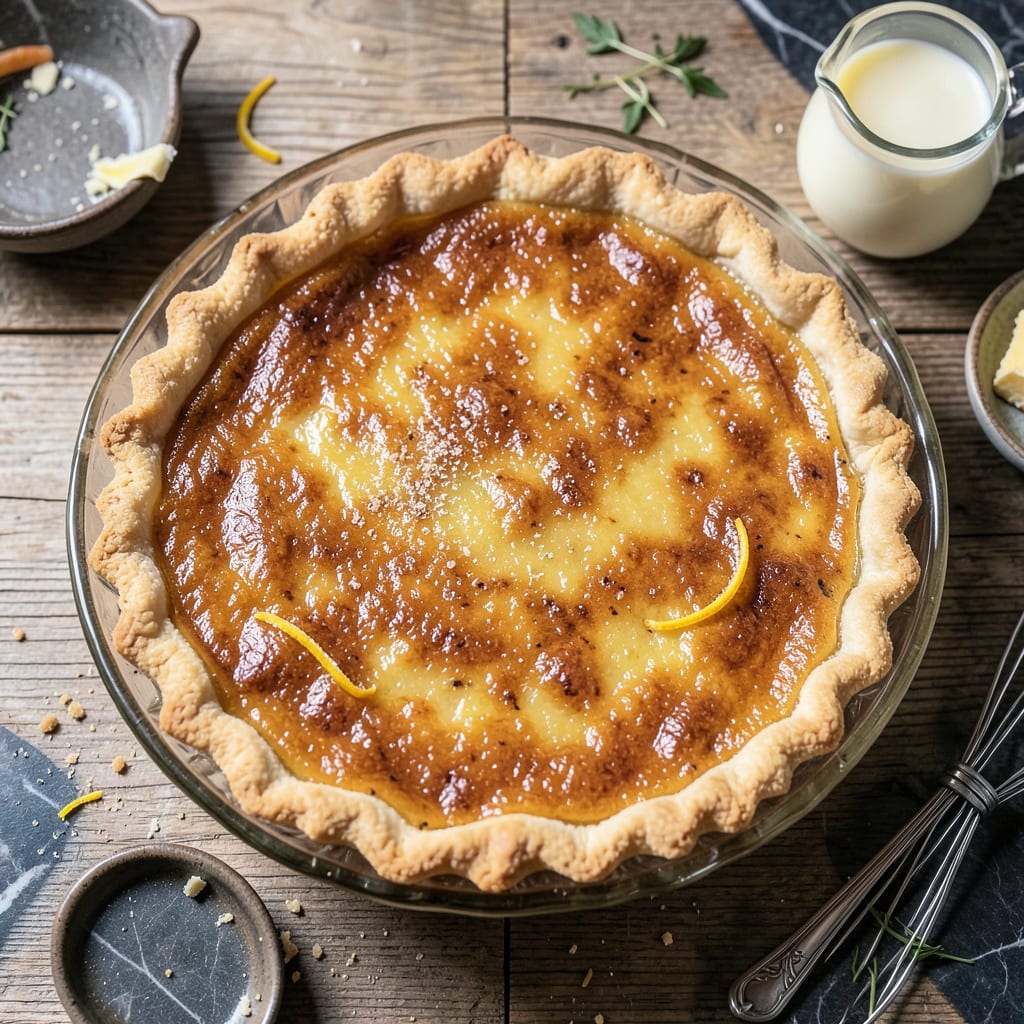
There’s something deeply satisfying about a perfectly baked buttermilk pie—its silky custard filling and golden crust capture the essence of Southern comfort. This recipe delivers that classic balance of sweetness and tang, with a texture so smooth it practically melts on the tongue. The secret lies in the buttermilk, which adds a subtle richness while keeping the filling light and velvety.
What makes this version special is its simplicity. With just a handful of pantry staples and a pre-baked crust, you can achieve professional-quality results. The custard sets beautifully, with a slight jiggle in the center that ensures it stays tender, not rubbery. Serve it warm or chilled, plain or with fresh berries—either way, it’s a dessert worth savoring.
Ingredients for Pioneer Woman Buttermilk Pie
A short list of pantry staples transforms into this velvety Southern classic with its signature tangy-sweet balance.
| Ingredient | Amount | Notes |
|---|---|---|
| Pre-baked pie crust 🥧 | 1 whole | 9-inch deep-dish preferred |
| Granulated sugar 🍬 | 1 ½ cups | For balanced sweetness |
| All-purpose flour 🌾 | 2 tbsp | For structure in filling |
| Buttermilk 🥛 | 1 ½ cups | Full-fat for best texture |
| Large eggs 🥚 | 3 whole | Room temperature preferred |
| Unsalted butter 🧈 | ½ cup | Melted and slightly cooled |
| Vanilla extract 🌿 | 1 tsp | Pure extract recommended |
| Lemon zest 🍋 | 1 tsp | Freshly grated for brightness |
| Salt 🧂 | ¼ tsp | Balances sweetness |
| Nutmeg 🌰 | 0.125 tsp | Freshly grated preferred |
[recipeingredientscaler]
The buttermilk is non-negotiable—full-fat yields the signature silky texture. Whole Foods or Trader Joe’s carry quality organic options. For the crust, a pre-baked deep-dish (like Pillsbury) saves time without sacrificing structure. Use pure vanilla extract (Nielsen-Massey is ideal) and fresh lemon zest—they elevate the filling’s complexity. Butter should be unsalted to control seasoning precisely; Kerrygold offers superior flavor.
No buttermilk? Stir 1 tbsp lemon juice into 1.5 cups whole milk and let sit 10 minutes. For a richer pie, substitute half-and-half for some buttermilk. The nutmeg can be omitted if preferred, but it adds warmth. If avoiding gluten, swap the flour for 1 tbsp cornstarch. Store-bought crusts work fine, but homemade (with vodka for flakiness) takes it to restaurant level.
The pie keeps 3 days refrigerated (cover tightly with plastic). Serve warm or chilled—both showcase different textures. Freezing isn’t recommended; the custard weeps upon thawing. For make-ahead, blind-bake the crust 24 hours in advance and store at room temperature. Leftover filling? Pour into ramekins for individual custards (bake 25 minutes at 350°F).
Why You’ll Love This Recipe
- No-Fuss Mixing: I don’t even need a mixer—just whisk the buttermilk, sugar, and eggs in one bowl while the oven preheats. The flour goes in last, so no overmixing, no stress, and honestly? My 8-year-old could handle this part.
- That Tangy Sweet Magic: Here’s what sold me—the buttermilk gives it this subtle tang that cuts through the sugar, like a creamy chess pie but brighter. The top gets this delicate caramelized crust while the center stays silky, and I’ve caught people licking their forks (yes, even the adults).
- Brunch to Dessert: I’ve served this warm with coffee for Sunday brunch, chilled with berries for a weeknight treat, and even as a “surprise, I baked!” gift for new neighbors. It’s unfussy enough for a Tuesday but fancy enough to pass as intentional hospitality.
- Budget-Friendly Leftovers: Five ingredients, most of which I already have (buttermilk’s the only “special” buy, and it lasts for pancakes later). A slice reheats beautifully in 10 seconds, and the pie keeps for days—if it survives that long. My wallet and my lazy mornings thank me.
Step-by-Step Instructions for Buttermilk Pie
This straightforward method delivers a perfectly set custard with a golden-brown crust every time.
Step 1: Prepare the Custard Base
In a large mixing bowl, whisk together the 1.5 cups granulated sugar, 2 tbsp all-purpose flour, 0.25 tsp salt, and 0.125 tsp nutmeg. The flour acts as a stabilizer, preventing the custard from separating during baking. I’ve found that whisking these dry ingredients first ensures even distribution throughout the filling.
Add the 3 whole large eggs one at a time, whisking vigorously after each addition until the mixture becomes smooth and slightly pale. This step incorporates air into the custard, which contributes to its silky texture. Make sure your eggs are at room temperature—they’ll blend more easily and create a more uniform filling.
Step 2: Incorporate Wet Ingredients
Slowly pour in the 1.5 cups buttermilk while continuing to whisk. The buttermilk’s acidity balances the sweetness and gives the pie its characteristic tang. Add the 1 tsp vanilla extract and 1 tsp lemon zest, whisking until fully combined. The lemon zest adds a subtle brightness that cuts through the richness.
With the mixer running on low speed, gradually stream in the 0.5 cup unsalted butter that you’ve melted and slightly cooled. This slow incorporation prevents the butter from separating and ensures a smooth, velvety custard. The mixture should be completely homogeneous with no visible butter streaks.
Step 3: Prepare the Crust and Fill
Place your pre-baked pie crust on a baking sheet to catch any potential spills during baking. This also makes it easier to transfer the pie in and out of the oven. Pour the custard filling into the crust, filling it to within 1/4 inch of the top edge. The filling will rise slightly during baking but shouldn’t overflow.
Gently tap the baking sheet on the counter 2-3 times to release any air bubbles trapped in the custard. This prevents unsightly holes in your finished pie. The surface should be smooth with just a few small bubbles around the edges.
Step 4: Bake to Perfect Doneness
Preheat your oven to 350°F. Bake the pie on the center rack for 45-55 minutes. You’re looking for the edges to be set and puffed while the center still has a slight wobble when gently shaken. The top should develop a golden brown color, and a toothpick inserted about 1 inch from the edge should come out clean.
The pie will continue to set as it cools, so don’t overbake. If the crust begins to brown too quickly, tent the edges with aluminum foil after the first 30 minutes of baking. The custard should reach an internal temperature of 175°F in the center when fully baked.
Step 5: Cool and Serve
Remove the pie from the oven and transfer it to a wire rack to cool completely. This cooling process takes about 2 hours and is crucial—it allows the custard to fully set and develop its signature creamy texture. The pie will deflate slightly as it cools, which is completely normal.
Once cooled to room temperature, refrigerate the pie for at least 1 hour before serving. This chilling time enhances the flavors and makes for cleaner slices. Serve with lightly sweetened whipped cream or fresh berries to complement the pie’s rich, custardy filling.
Serving Suggestions for This pioneer woman buttermilk pie
Classic Presentation
Serve this buttermilk pie at room temperature for the perfect texture balance—the custard will be creamy yet firm enough to hold its shape. I love using a pie server (like the OXO Good Grips model) to get clean slices every time. A light dusting of powdered sugar through a fine-mesh sieve adds an elegant touch. 💛
Whipped Cream Pairing
Top each slice with a dollop of freshly whipped cream for a delightful contrast. I whip 1 cup heavy cream with 2 tbsp powdered sugar and ½ tsp vanilla extract until soft peaks form. The cream’s lightness balances the pie’s richness beautifully. Serve immediately to prevent sogginess.
Fresh Fruit Accents
Bright, acidic fruits cut through the pie’s sweetness perfectly. I arrange ½ cup fresh raspberries or ¼ cup blackberries around each slice. For extra flair, macerate the berries with 1 tsp granulated sugar and let sit 15 minutes to create a light syrup. The colors pop against the golden crust.
Warm Serving Option
For cozy gatherings, serve the pie slightly warm (about 90°F). Reheat individual slices in the microwave for 10-15 seconds or in a 250°F oven for 5-7 minutes. The warmth enhances the vanilla and nutmeg notes. Pair with vanilla ice cream for a decadent treat.
Beverage Pairings
A cup of hot coffee or chilled iced tea complements this pie wonderfully. For coffee, I recommend a light roast to avoid overpowering the delicate flavors. Sweet tea lovers should try Texas-style black tea with a lemon wedge. Both beverages cleanse the palate between bites.
Plating for Special Occasions
For dinner parties, plate individual slices on white dessert plates with a drizzle of caramel sauce and a mint leaf garnish. The contrast of colors makes the pie look restaurant-worthy. I use Smucker’s caramel topping warmed slightly for easy pouring. The presentation elevates this humble pie to centerpiece status. ✨
Nutrition Facts

- 6 Egg Cake Recipe with Oil: Light as Air With Buttery Moisture - October 4, 2026
- 4 Bean Casserole Recipe: One-Pan Heartiness With Smoky Paprika Depth - October 4, 2026
- 3-Ingredient Keto Mug Cake Recipe: Microwave Magic in 2 Minutes - October 4, 2026