
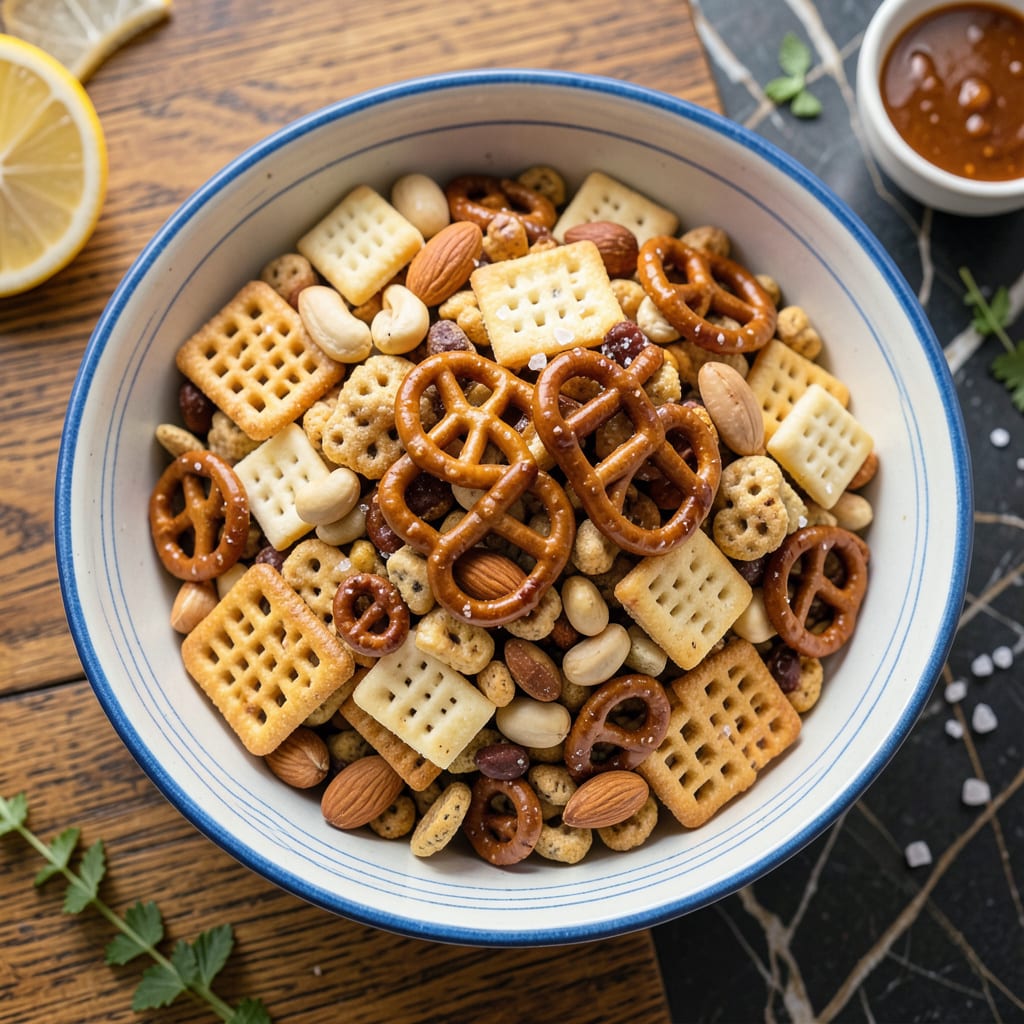
I’ve made this Texas Trash mix for every party, game day, and family gathering for years—it’s the one snack that always disappears first. There’s something magical about that perfect balance of salty, cheesy, and just a little spicy that keeps people coming back for more.
What makes this version special is how easy it is to customize. Whether you like it extra cheesy, super spicy, or with a mix of different cereals and pretzels, the basic method stays the same. Just toss everything with melted butter and seasonings, bake it low and slow, and you’ve got a snack mix that’s way better than anything from the store.
Ingredients for Pioneer Woman Texas Trash
This party-perfect mix starts with pantry staples and delivers that irresistible crunchy, cheesy magic everyone loves.
| Ingredient | Amount | Notes |
|---|---|---|
| Corn Chex Cereal 🌽 | 3 cups | Or substitute Rice Chex |
| Rice Chex Cereal 🌾 | 3 cups | Or substitute Corn Chex |
| Mini Pretzel Twists 🥨 | 2 cups | Regular pretzels work too |
| Mixed Nuts 🥜 | 1 cup | Salted or unsalted |
| Butter 🧈 | ½ cup | Salted or unsalted |
| Worcestershire Sauce 💧 | 2 tbsp | Adds umami depth |
| Garlic Powder 🧄 | 1 tsp | Fresh minced works too |
| Onion Powder 🧅 | 1 tsp | Or substitute dried minced onion |
| Seasoned Salt 🧂 | 1 tbsp | Lawry's preferred |
| Cayenne Pepper 🌶️ | ½ tsp | Adjust for heat preference |
| Shredded Cheddar Cheese 🧀 | 1 cup | Sharp cheddar recommended |
| Grilled Cheese Crackers 🧀 | 2 cups | Or substitute cheese crackers |
| Oyster Crackers 🍪 | 1 cup | Optional for extra crunch |
The cereal base is what makes this special—Corn Chex and Rice Chex give that perfect crunch. I grab mine from Target or Walmart (the big boxes are cheaper). For the pretzels, the mini twists work best (they coat evenly), but regular pretzels are fine too. The seasoned salt is key—Lawry’s is my go-to, but any brand works. If you’re nut-averse, swap the mixed nuts for extra crackers or cereal (the nuts add great texture though).
Want it extra cheesy? Add another half-cup of shredded cheddar before baking. No Worcestershire? Soy sauce at half the amount gets you close. The cayenne is flexible—start with half the amount if you’re sensitive to heat. For gluten-free, use gluten-free pretzels and cereal (they toast up just as crispy). The grilled cheese crackers are optional but honestly worth it—they get extra toasty and delicious.
This keeps in an airtight container for up to 2 weeks (if it lasts that long). Store at room temp—no fridge needed. I like to portion it into small bags for easy snacking. The flavors actually get better after a day as everything melds together. Perfect for making ahead!
Why You’ll Love This Recipe
- I’ll be real: I always have Chex cereal and pretzels on hand, and mixed nuts are a freezer staple. No last-minute grocery runs, just a reliable snack that costs less than store-bought mixes.
- One-Bowl Wonder: I dump everything—Chex, pretzels, nuts—right into the same bowl, pour the buttery seasoning over, and stir. One mixing bowl, one baking sheet, and zero fuss.
- Sweet-Salty Obsession: That first bite where the buttery coating hits the salty pretzels and crunchy nuts? Honestly, it’s the snack I crave when I want something savory but can’t decide between chips or popcorn.
- Road Trip Hero: Between us, this is my secret weapon for long car rides, movie nights, or when friends drop by unexpectedly. It keeps for days in an airtight container—if it lasts that long.
Step-by-Step Instructions for Texas Trash Snack Mix
This couldn’t be easier—just combine, season, and bake for the ultimate party snack.
Step 1: Combine the Base Ingredients
In a very large mixing bowl, add the 3 cups Corn Chex Cereal, 3 cups Rice Chex Cereal, 2 cups Mini Pretzel Twists, 1 cup Mixed Nuts, 2 cups Grilled Cheese Crackers, and 1 cup Oyster Crackers. I like to use my hands for this step—it’s the best way to gently toss everything together without crushing the delicate pieces.
Make sure to break up any clusters of cereal or crackers that stick together. You want an even distribution of all the components so every bite has the perfect mix of textures. This is also your chance to pick out any broken pieces of pretzels or crackers—save those for snacking while you work!
Step 2: Prepare the Seasoning Mixture
In a small saucepan, melt the 0.5 cup Butter over medium heat. Once melted, remove from heat and stir in the 2 tbsp Worcestershire Sauce, 1 tsp Garlic Powder, 1 tsp Onion Powder, 1 tbsp Seasoned Salt, and 0.5 tsp Cayenne Pepper. The mixture will smell incredibly savory and slightly spicy—that’s exactly what you want.
Whisk everything together until completely combined. The butter will turn a light golden color as it emulsifies with the Worcestershire sauce. Let this mixture sit for 1-2 minutes to allow the flavors to meld before pouring it over your dry ingredients.
Step 3: Coat and Season the Snack Mix
Pour the warm seasoning mixture evenly over the dry ingredients in your large bowl. Using a large silicone spatula or your clean hands, gently fold everything together until all pieces are lightly coated. Be thorough but gentle—you want every piece covered without breaking the delicate cereal and crackers.
The mixture will look slightly damp at first, but don’t worry. As it bakes, the butter will crisp up beautifully. At this point, sprinkle the 1 cup Shredded Cheddar Cheese over the top and fold it in gently. The cheese will melt slightly in the oven, creating delicious cheesy pockets throughout the mix.
Step 4: Bake to Crispy Perfection
Spread the coated mixture evenly onto two large rimmed baking sheets lined with parchment paper. Bake in a preheated 250°F oven for 1 hour, stirring every 15 minutes. This low-and-slow method ensures everything gets crispy without burning.
You’ll know it’s done when the cereal and crackers are golden brown and the nuts are toasted. The kitchen will smell amazing—like buttery, cheesy, slightly spicy goodness. Remove from the oven and let cool completely on the baking sheets. The mix will crisp up even more as it cools.
Step 5: Store and Serve
Once completely cooled, transfer the Texas Trash to an airtight container or divide it into individual serving bowls. The flavors will continue to develop over the next few hours, making it even more addictive. This mix stays fresh at room temperature for up to 2 weeks, though it never lasts that long at my house!
Serve in bowls around your party space or package it in cute bags for guests to take home. The combination of salty, cheesy, spicy, and crunchy makes it impossible to stop at just one handful. I promise this will be the hit of any gathering!
Make-Ahead Tips for pioneer woman texas trash
Prep Ahead Strategy
You can mix all your dry ingredients—Corn Chex, Rice Chex, Mini Pretzel Twists, Mixed Nuts, and crackers—up to 2 days ahead. Store them in a large ziplock bag or airtight container. This saves time on party day and keeps everything fresh. I always do this when I’m hosting—one less thing to worry about! 💡
Seasoning Mixture Prep
The butter and seasoning mixture can be made 1 day ahead and stored in the fridge. When ready to use, gently reheat it on the stove until just melted again. The flavors actually deepen overnight, making your snack mix even more flavorful. Just whisk it well before pouring over the dry ingredients.
Baking in Batches
If you’re making a double batch (which I highly recommend for parties), bake the mix in two separate batches for even crispiness. The oven temperature stays at 250°F, but you’ll need to extend the baking time by 10-15 minutes per batch. Stir every 15 minutes as usual.
Cooling and Storage
After baking, let the Texas Trash cool completely on the baking sheets—this takes about 30 minutes. Once cooled, transfer it to an airtight container. The mix stays fresh at room temperature for up to 2 weeks, but honestly, it’s so good it’s usually gone in days. 🥜
Portioning for Parties
For easy serving, portion the cooled mix into small paper bags or mason jars 1 day ahead. Tie them with ribbon for a cute presentation. This also makes it easy for guests to grab and go. I love using quart-sized mason jars—they hold about 2 cups of mix each.
Re-crisping if Needed
If your mix loses its crunch after a few days, spread it on a baking sheet and warm in a 300°F oven for 5-10 minutes. Stir once halfway through. This brings back that fresh-baked texture without overcooking. I do this right before guests arrive for maximum crunch!
Nutrition Facts

- 6 Egg Cake Recipe with Oil: Light as Air With Buttery Moisture - October 4, 2026
- 4 Bean Casserole Recipe: One-Pan Heartiness With Smoky Paprika Depth - October 4, 2026
- 3-Ingredient Keto Mug Cake Recipe: Microwave Magic in 2 Minutes - October 4, 2026