
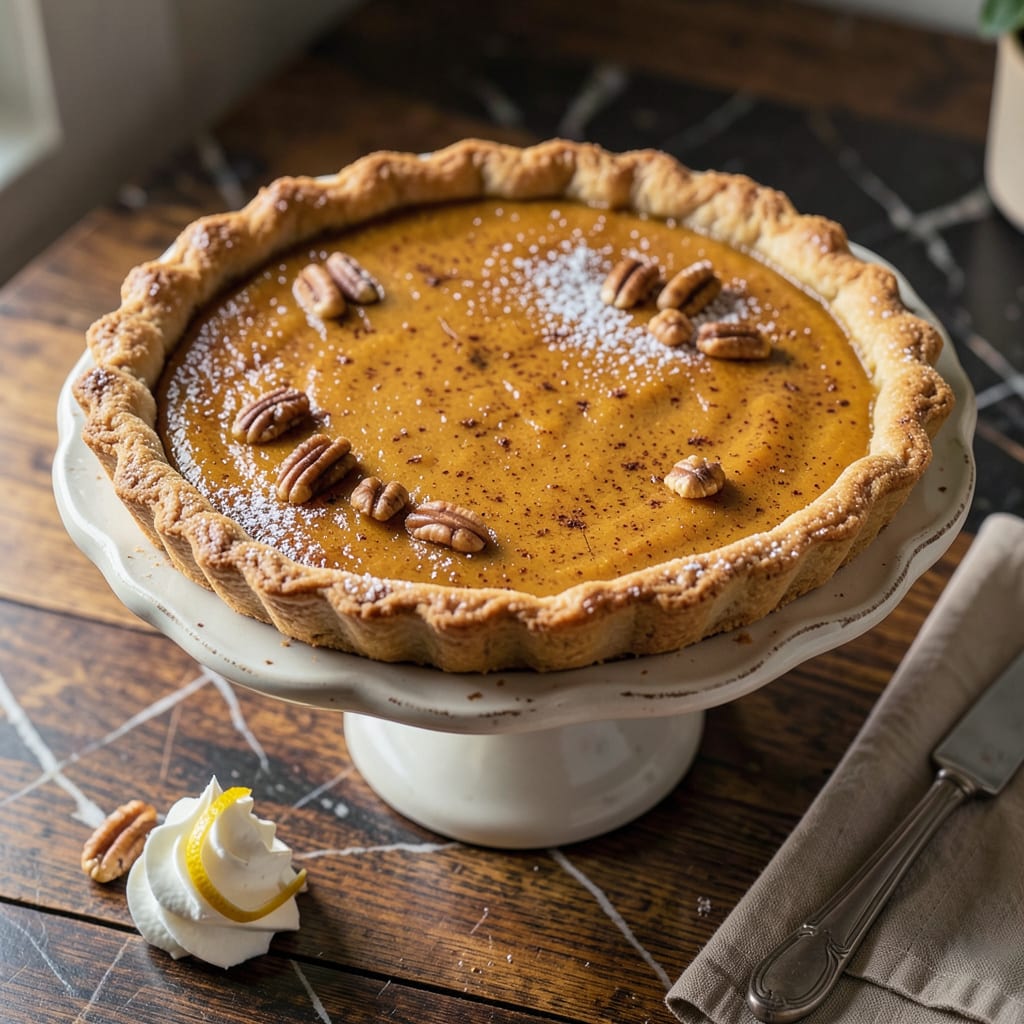
When America’s Test Kitchen develops a pumpkin pie recipe, you know it’s been rigorously tested to solve every common pie problem. This version delivers what others promise but often fail to achieve: a flaky, golden crust that stays crisp beneath the filling, and a silky-smooth pumpkin center with perfectly balanced spices.
The method combines precise techniques with simple ingredients. Blind-baking the crust ensures it won’t turn soggy, while a carefully calibrated mix of pumpkin, eggs, and dairy creates a filling that’s rich yet light. No watery slices, no cracked tops—just professional-quality results that make this the only pumpkin pie recipe you’ll need.
Ingredients for America’s Test Kitchen Pumpkin Pie
Precisely measured ingredients ensure the flaky crust and silky filling America’s Test Kitchen is known for.
| Ingredient | Amount | Notes |
|---|---|---|
| All-Purpose Flour 🌾 | 1 ¼ cups | Plus extra for dusting |
| Salt 🧂 | ½ tsp | Fine table salt |
| Granulated Sugar 🍚 | 1 tbsp | For crust sweetness |
| Unsalted Butter 🧈 | 8 tbsp | Cold, cut into cubes |
| Ice Water 💧 | 3 tbsp | Plus more as needed |
| Canned Pumpkin Puree 🎃 | 15 oz | Not pumpkin pie filling |
| Heavy Cream 🥛 | ¾ cup | Full-fat for richness |
| Whole Milk 🥛 | ¾ cup | Room temperature |
| Large Eggs 🥚 | 3 whole | Room temperature |
| Light Brown Sugar 🍚 | ⅔ cup | Packed, for depth |
| Ground Cinnamon 🌿 | 1 tsp | Freshly ground preferred |
| Ground Ginger 🌿 | ½ tsp | Freshly ground preferred |
| Ground Nutmeg 🌰 | ¼ tsp | Freshly grated ideal |
| Ground Cloves 🌿 | 0.125 tsp | Use sparingly |
| Vanilla Extract 💧 | 1 tsp | Pure extract only |
| Table Salt 🧂 | ½ tsp | For filling balance |
The butter is critical for crust texture. Land O’Lakes or Plugra deliver consistent results due to their 82% fat content—higher than standard butter. Use King Arthur Flour for its reliable protein content (11.7%), which creates structure without toughness. The pumpkin puree must be Libby’s 100% Pure Pumpkin; other brands vary in moisture content, affecting filling consistency. Blind-baking requires pie weights or dried beans to prevent slumping.
No fresh pumpkin? Canned is mandatory here—fresh contains too much water. For dairy substitutions, full-fat coconut milk replaces cream (though flavor differs slightly), and 2% milk works in a pinch. Spices should be freshly ground; pre-ground loses potency after 6 months. The vanilla extract must be pure—imitation contains artificial flavors that alter the filling’s depth.
Prepare the crust dough up to 2 days ahead; wrap tightly in plastic. The filled pie keeps at room temperature for 4 hours (ideal for serving) or refrigerated for 3 days. Freezing isn’t recommended—it compromises the crust’s flakiness. Store leftover slices in an airtight container with parchment between layers to prevent sticking.
Why You’ll Love This Recipe
- I’ll be real: this butter-and-ice-water combo makes the flakiest crust with zero stress. No blind-baking, no soggy bottoms—just a golden, crisp shell that holds up to the filling like a dream.
- No-Fuss Crust: I’ll be real: this butter-and-ice-water combo makes the flakiest crust with zero stress. No blind-baking, no soggy bottoms—just a golden, crisp shell that holds up to the filling like a dream.
- That First-Bite Magic: The balance of sugar and salt in the crust? It’s the quiet hero. One slice and you’ll notice how it cuts through the spiced pumpkin richness—no cloying sweetness, just that “I need another forkful” harmony.
- Thanksgiving and Tuesday: Honestly, I make this year-round. The dough freezes beautifully (just wrap it tight), so I can pull it out for potlucks, weekend desserts, or even a solo treat with whipped cream. No holiday required.
Step-by-Step Instructions for Perfect Pumpkin Pie
This method delivers a flaky crust and velvety filling with precise timing and technique.
Step 1: Prepare the Flaky Pie Crust
In a food processor, combine the 1.25 cups all-purpose flour, 0.5 tsp salt, and 1 tbsp granulated sugar. Pulse briefly to mix. Add the 8 tbsp unsalted butter (cold and cubed) and pulse until the mixture resembles coarse crumbs with pea-sized butter pieces visible.
With the processor running, drizzle in the 3 tbsp ice water through the feed tube, processing just until the dough begins to come together. The dough should hold when pinched but not be sticky. Turn it out onto a lightly floured surface and shape into a disk.
Wrap the dough in plastic wrap and refrigerate for at least 1 hour or up to 24 hours. This chilling step is crucial for developing a flaky texture and preventing shrinkage during baking.
Step 2: Blind-Bake the Crust
Roll the chilled dough on a lightly floured surface to a 12-inch circle, about 1/8-inch thick. Transfer to a 9-inch pie plate, trim the edges to leave a 1/2-inch overhang, then crimp decoratively. Freeze the crust for 20 minutes to firm up before baking.
Preheat the oven to 375°F. Line the frozen crust with parchment paper and fill with pie weights or dried beans. Bake on the lower oven rack for 20 minutes. Remove the parchment and weights, then continue baking for 5-7 minutes until the bottom appears dry and the edges are light golden brown.
Let the crust cool slightly while you prepare the filling. This prevents a soggy bottom when the filling is added.
Step 3: Mix the Pumpkin Filling
In a large bowl, whisk together the 15 oz canned pumpkin puree, 0.66 cup light brown sugar, 1 tsp ground cinnamon, 0.5 tsp ground ginger, 0.25 tsp ground nutmeg, 0.125 tsp ground cloves, and 0.5 tsp table salt until smooth and well combined.
Add the 3 whole large eggs, 0.75 cup heavy cream, 0.75 cup whole milk, and 1 tsp vanilla extract. Whisk vigorously for 1-2 minutes until completely smooth and homogenous. The mixture should be thick but pourable, with no visible streaks of spice or egg.
Step 4: Bake and Set the Pie
Pour the filling into the warm pre-baked crust. Return the pie to the 375°F oven and bake for 45-55 minutes. The pie is done when the edges are set but the center still has a slight wobble (about 2 inches in diameter) when gently shaken.
Transfer to a wire rack and cool completely at room temperature for at least 2 hours. This gradual cooling prevents cracks from forming on the surface. The filling will continue to set as it cools, reaching the perfect sliceable consistency.
Step 5: Chill and Serve
Once completely cooled, refrigerate the pie for at least 4 hours or overnight. This chilling time allows the flavors to meld and the filling to fully set. The crust will maintain its crispness while the filling becomes perfectly creamy.
To serve, use a sharp knife dipped in hot water and wiped dry between cuts for clean slices. The pie should hold its shape when sliced, with a smooth filling and flaky crust that doesn’t crumble excessively.
Serving Suggestions for This Recipe
Classic Whipped Cream
The perfect topping starts with 1 cup heavy cream chilled overnight. I whip it with 2 tbsp powdered sugar and 1 tsp vanilla extract until soft peaks form—about 2-3 minutes with a hand mixer. The secret? Stop before stiff peaks to keep it billowy. 💛
Spiced Garnish Ideas
A light dusting of ground cinnamon or freshly grated nutmeg adds warmth and visual appeal. For texture, toast 1/4 cup chopped pecans in a dry skillet for 3 minutes until fragrant. Sprinkle over whipped cream just before serving.
Caramel Drizzle
Store-bought caramel sauce works, but I love making my own with 1/2 cup granulated sugar melted until amber, then whisked with 1/4 cup heavy cream and 1 tbsp butter. Drizzle warm sauce over each slice for a luxurious touch.
Beverage Pairings
Coffee with a splash of cinnamon syrup cuts through the richness beautifully. For alcohol, try bourbon or spiced rum—just 1 oz poured over the pie enhances the warm spices. A crisp hard cider also balances the sweetness.
Plating Tips
Use a pie server dipped in hot water for clean slices. I serve each piece on a chilled plate with whipped cream dolloped beside it, not on top, so guests can add their preferred amount. A mint leaf adds a pop of color without competing flavors.
Make-Ahead Presentation
For stress-free hosting, bake the pie 1 day ahead and refrigerate. Add toppings just before serving. I keep whipped cream in a piping bag in the fridge—it holds its shape for 4 hours when properly chilled. ✨
Nutrition Facts

- 6 Egg Cake Recipe with Oil: Light as Air With Buttery Moisture - October 4, 2026
- 4 Bean Casserole Recipe: One-Pan Heartiness With Smoky Paprika Depth - October 4, 2026
- 3-Ingredient Keto Mug Cake Recipe: Microwave Magic in 2 Minutes - October 4, 2026