
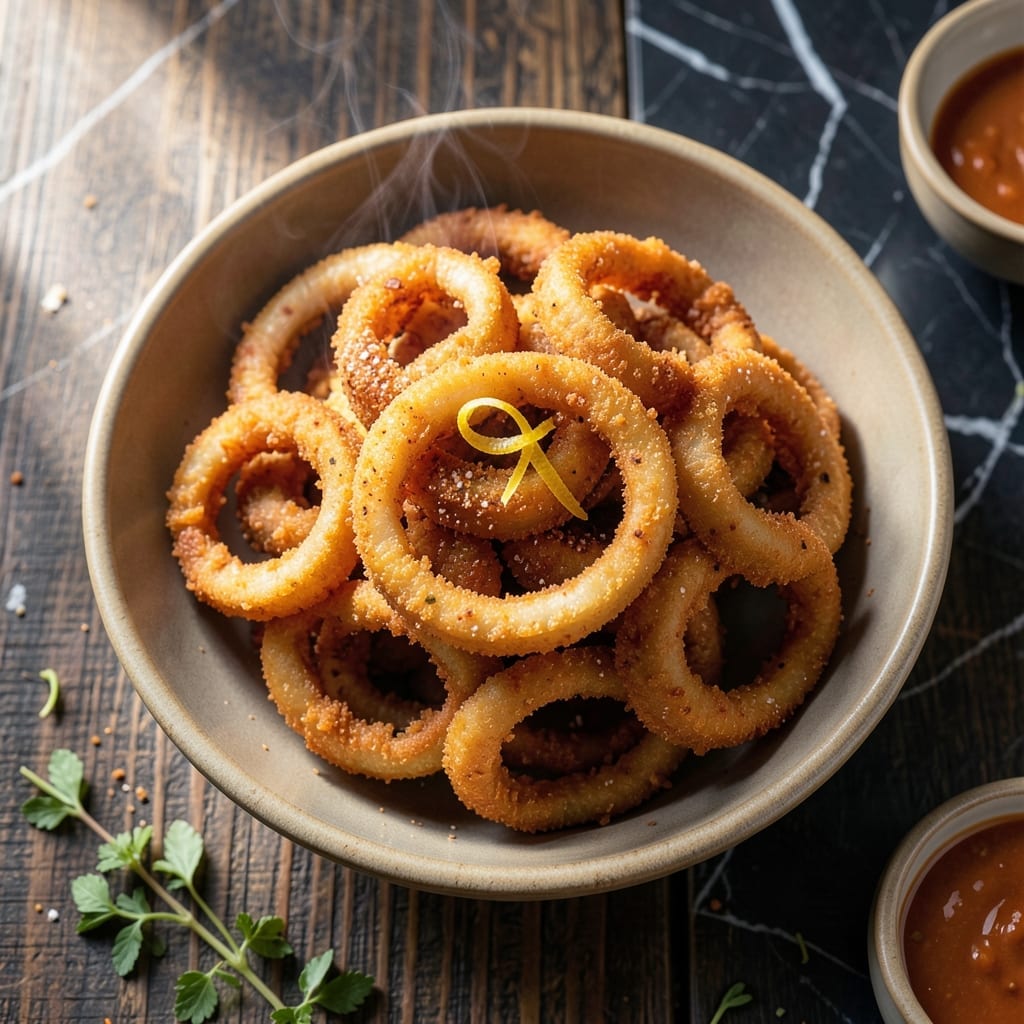
This recipe delivers the signature Popeyes-style onion rings with a crispy, golden batter that shatters with every bite. I’ve refined the technique to achieve that perfect crunch without a deep fryer.
The secret lies in a double-dredge method and maintaining the right oil temperature for even cooking. Each ring emerges with a light, airy coating that stays crispy long after frying.
You’ll get that familiar fast-food texture—shatteringly crispy outside, tender inside—using simple pantry staples. The batter clings perfectly to the onions, creating ridges that hold seasoning.
Serve these hot for the best experience. The recipe scales easily for crowds or small batches.
Ingredients for Popeyes Onion Rings
Simple pantry staples transform into restaurant-quality crispy rings with ease.
| Ingredient | Amount | Notes |
|---|---|---|
| Large Yellow Onions 🧅 | 2 whole | Sliced into 1/2-inch rings |
| All-Purpose Flour 🌾 | 2 cups | Divided for dredging and batter |
| Cornstarch 🌾 | ½ cup | For extra crispiness |
| Baking Powder 🧂 | 1 tbsp | Leavening agent for lightness |
| Salt 🧂 | 1 ½ tsp | Divided for batter and seasoning |
| Paprika 🌶️ | 1 tsp | For color and mild flavor |
| Garlic Powder 🧄 | 1 tsp | Enhances savory notes |
| Onion Powder 🧅 | 1 tsp | Boosts onion flavor |
| Black Pepper 🌶️ | ½ tsp | Freshly ground preferred |
| Cayenne Pepper 🔥 | ¼ tsp | Optional for heat |
| Buttermilk 🥛 | 1 ½ cups | Cold, for batter base |
| Vegetable Oil 🫒 | 6 cups | For frying, high smoke point |
For the onions, sweet yellow onions are ideal—firm, with tight skin and no sprouting. The flour should be all-purpose, unbleached for best texture. Cornstarch is non-negotiable here; it’s what gives that signature shatter. Clabber Girl baking powder is a reliable choice. Most grocery stores carry all these, but I source my spices from Penzeys for superior freshness.
No buttermilk? Stir 1.5 tbsp lemon juice or vinegar into regular milk and let sit 5 minutes. Swap cornstarch with arrowroot at a 1:1 ratio if needed. For gluten-free, use a 1:1 gluten-free flour blend. The cayenne can be omitted for milder flavor. Vegetable oil can be swapped with peanut or canola oil—just ensure a high smoke point.
Batter can be prepped 1 hour ahead and kept chilled. Onions can be sliced and soaked in cold water 30 minutes ahead to reduce pungency. Fried rings stay crispy for 2-3 hours at room temperature but are best served immediately. Store leftovers in the fridge for up to 2 days, though they’re best fresh.
Why You’ll Love This Recipe
- Minimal Effort: I just slice the onions, toss them in flour and cornstarch, and fry—the baking powder does all the crisping work for me.
- That Popeyes Crunch: The cornstarch gives them that signature shatter with every bite, while the salt hits just right.
- Party or Solo: I serve these at game night or hoard them all to myself for a late-night snack.
- Pocket-Friendly Feast: A bag of yellow onions and pantry staples stretch into a restaurant-worthy batch for pennies.
Step-by-Step Instructions for Crispy Onion Rings
Master the technique for achieving that signature golden crunch with every batch.
Step 1: Prepare and Season the Onion Rings
Slice the 2 whole Large Yellow Onions into ½-inch rings and separate them carefully. Discard the small center pieces—they won’t hold up to frying. Soak the rings in cold water for 15 minutes to remove excess starch, which helps achieve maximum crispiness.
Drain the rings and pat them completely dry with paper towels. Any moisture will cause the batter to slide off during frying. I spread them on a clean kitchen towel to air-dry for an additional 5 minutes while preparing the batter.
Step 2: Create the Crispy Batter
In a large bowl, whisk together 1½ cups All-Purpose Flour, ½ cup Cornstarch, 1 tbsp Baking Powder, 1 tsp Paprika, 1 tsp Garlic Powder, 1 tsp Onion Powder, ½ tsp Black Pepper, and ¼ tsp Cayenne Pepper. The cornstarch is the secret to extra crunch.
Pour in the 1½ cups Buttermilk and whisk until just combined. The batter should be thick enough to coat the back of a spoon but still pourable. Lumps are fine—overmixing develops gluten, which makes the coating tough rather than light and crispy.
Step 3: Double-Dredge for Maximum Crunch
Place the remaining ½ cup All-Purpose Flour and ½ tsp Salt in a shallow dish. Working in batches, dredge the onion rings in the flour mixture, shaking off any excess. This first coat helps the batter adhere better.
Dip the floured rings into the batter, allowing any excess to drip off. Then, for extra crispiness, dredge them once more in the flour mixture. This double-dredging technique creates a thicker, crunchier crust that mimics the restaurant-quality texture.
Step 4: Fry to Golden Perfection
Heat the 6 cups Vegetable Oil in a deep, heavy-bottomed pot over medium-high heat to 350°F. Use a deep-fry thermometer for accuracy. The oil is ready when a drop of batter sizzles and floats immediately upon contact.
Fry the rings in batches to avoid overcrowding the pot, which lowers the oil temperature. Cook for 2-3 minutes per side until they’re deep golden brown and crisp. Transfer to a wire rack set over a paper towel-lined tray to drain excess oil while keeping them crisp.
Step 5: Season and Serve Immediately
While still hot, sprinkle the rings with any remaining salt to taste. The residual heat helps the seasoning adhere. Serve immediately—they’re best straight from the fryer when the exterior is at its crispiest.
If you must hold them briefly, place them on a wire rack in a 200°F oven for no more than 10 minutes. Any longer and they’ll lose their signature crunch. Pair with your favorite dipping sauce and enjoy while hot.
Pro Tips For Making Popeyes Onion Rings
- Chill the Onions: Soak your sliced onions in ice water for 20 minutes before coating—it cuts the sharpness and helps the batter cling better.
- Double Fry for Crisp: Fry the rings at 350°F for 2 minutes, rest 1 minute, then fry again at 375°F for a golden, shatter-crisp finish.
- Skip the Overmixing: Stir the batter just until combined—overmixing develops gluten, making the coating dense instead of light and airy.
- Use Cornstarch Boost: Replace 2 tablespoons of flour with cornstarch in your dry mix for extra crunch without changing the flavor.
Essential Equipment for This Dish
Deep Fryer Options
For home cooks, a 5.5-quart electric deep fryer like the Presto 05466 handles batches perfectly. It maintains consistent 350°F and has a built-in thermostat. I’ve used mine for years with excellent results.
Heavy-Duty Pot
No fryer? Use a 5-6 quart Dutch oven with tall sides—Lodge enameled cast iron works beautifully. The heavy base prevents hot spots. Fill with 2-3 inches of oil for safe frying. 🔥
Pair with a candy thermometer clipped to the side to monitor temperature. I prefer Taylor Precision’s for its accuracy.
Wire Rack Setup
Drain fried rings on a wire cooling rack over paper towels. This allows air circulation, keeping them crispy rather than soggy. I use a stainless steel rack that fits over a half-sheet pan.
Batter Tools
For the double-dredging, shallow pie plates work better than bowls for the flour mixture. Use one for dredging and another for batter. I keep a rimmed baking sheet nearby to rest rings between coats.
Safety Essentials
Always have a fire extinguisher rated for grease fires nearby. Keep a splash guard handy to prevent oil burns. Never leave hot oil unattended—temperature can climb dangerously fast.
Nutrition Facts
Frequently Asked Questions
Can I bake these instead of frying?
Yes, but the texture differs. Bake at 425°F for 15-20 minutes, flipping halfway. You’ll get a lighter crunch, not the deep-fried shatter. Use a wire rack for air circulation to avoid sogginess.
Why soak the onions first?
Soaking removes excess starch, which prevents the batter from sliding off. It also mellows the onion’s sharpness. Pat them completely dry afterward—any moisture ruins the coating’s crispiness.
How do I keep them crispy longer?
Drain on a wire rack, not paper towels, to avoid steam. Hold in a 200°F oven for up to 10 minutes if needed. Re-crisp in a 375°F oven for 5 minutes if they soften.

- 6 Egg Cake Recipe with Oil: Light as Air With Buttery Moisture - October 4, 2026
- 4 Bean Casserole Recipe: One-Pan Heartiness With Smoky Paprika Depth - October 4, 2026
- 3-Ingredient Keto Mug Cake Recipe: Microwave Magic in 2 Minutes - October 4, 2026