
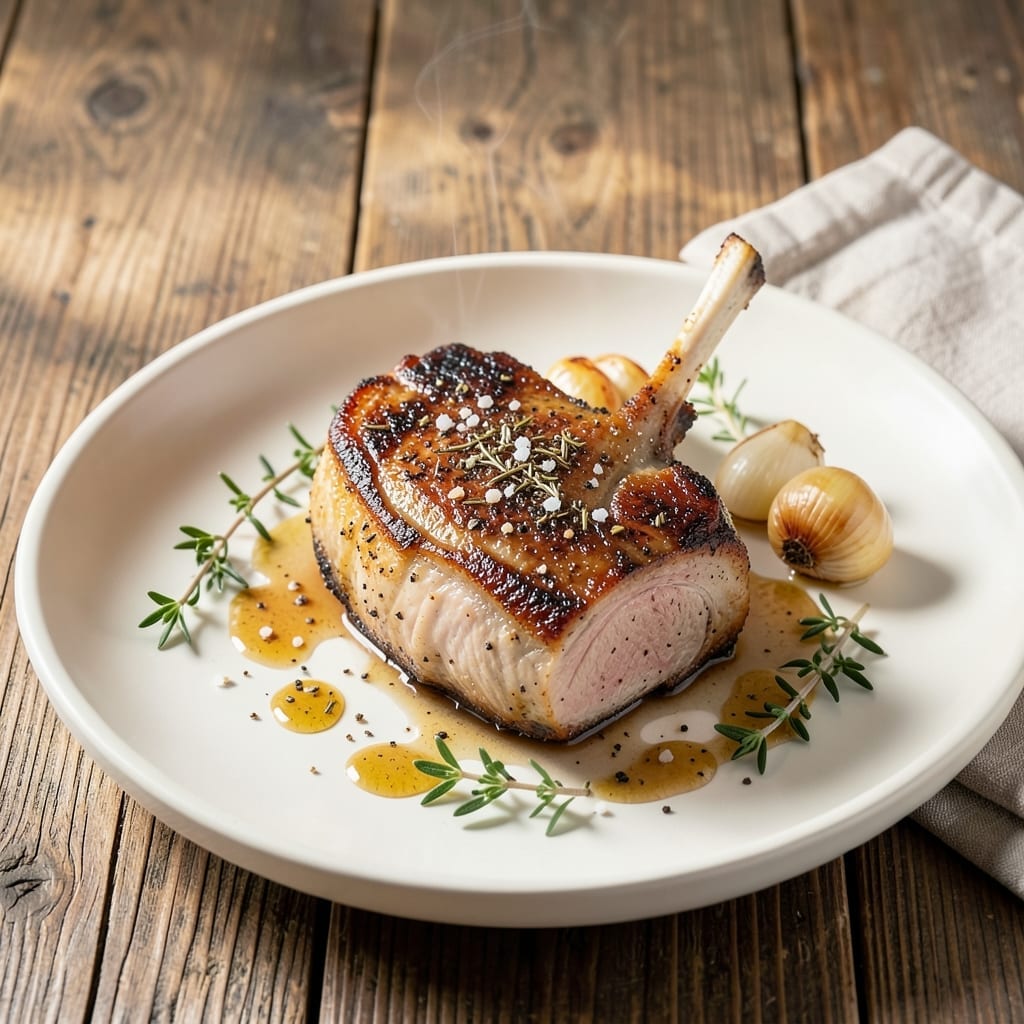
Cooking for one doesn’t mean sacrificing quality, and this pork chop proves it. A juicy, perfectly seared cut can be on your plate in under 20 minutes with minimal effort.
The secret lies in proper timing and temperature. Sear the chop in a hot pan to lock in moisture, then finish it in the oven for even cooking. The result is tender meat with a golden crust every time.
This method ensures a restaurant-worthy meal without leftovers. The pork stays succulent, and the simple seasoning lets the natural flavor shine through.
Serve with a side of roasted vegetables or a fresh salad for a complete, satisfying dinner.
Ingredients for Pork Chop Recipe for One Person
A single thick-cut chop and pantry staples deliver restaurant quality at home.
| Ingredient | Amount | Notes |
|---|---|---|
| Bone-In Pork Chop 🥩 | 1 whole | 1-inch thick, rib chop preferred |
| Kosher Salt 🧂 | ½ tsp | Diamond Crystal brand preferred |
| Freshly Ground Black Pepper 🌶️ | ¼ tsp | Coarse grind for texture |
| Garlic Powder 🧄 | ¼ tsp | Not garlic salt |
| Dried Thyme 🌿 | ¼ tsp | Rubbed between fingers to release oils |
| Olive Oil 🫒 | 1 tbsp | High smoke point variety |
| Unsalted Butter 🧈 | 1 tbsp | For basting while searing |
| Fresh Rosemary Sprig 🌿 | 1 whole | Optional for aromatic finish |
| Fresh Lemon 🍋 | ¼ whole | For brightness, zested or juiced |
The pork chop quality is non-negotiable here. Bone-in rib chops with good marbling yield the juiciest results—look for 1-inch thickness at your butcher or the meat counter at Whole Foods. Avoid pre-brined chops as they can throw off your seasoning balance. The thickness ensures even cooking without drying out, which is critical for single-serving portions.
No fresh rosemary? Dried rosemary at half the amount works, but crush it to release the oils. Garlic powder can be replaced with fresh minced garlic (1 clove), but be mindful of burning. For a different herb profile, sage or oregano complement pork beautifully. The lemon is optional but adds a bright finish that cuts through the richness.
Cook immediately or store the raw chop in its packaging on a plate in the fridge for 1-2 days. Leftovers (if any) keep for 3-4 days and reheat beautifully in a skillet with a splash of water. The seasoning blend can be pre-mixed and stored in an airtight container for 6 months.
Why You’ll Love This Recipe
- One Pan Meal: I just sear the chop, pop it in the oven, and clean up is a breeze.
- Herb-Crusted Perfection: The garlic powder and thyme make every bite ridiculously flavorful.
- Weeknight Savior: Honestly, it’s my go-to when I need a quick, satisfying dinner for one.
- Budget-Friendly Cut: A single bone-in chop stays juicy and fills me up without breaking the bank.
Step-by-Step Instructions for Seared Bone-In Pork Chop
Master this technique for a perfectly seared, juicy chop with minimal effort and maximum flavor.
Step 1: Season and Temper the Pork Chop
Pat the bone-in pork chop dry with paper towels to ensure a good sear. This step is crucial—moisture prevents proper browning. Season both sides generously with the 0.5 tsp kosher salt, 0.25 tsp freshly ground black pepper, 0.25 tsp garlic powder, and 0.25 tsp dried thyme. Rub the spices into the meat to create an even coating.
Let the seasoned chop sit at room temperature for 20-30 minutes. This allows the salt to penetrate the meat and ensures even cooking. Cold meat seizes up in a hot pan, leading to uneven doneness and a tougher texture.
Step 2: Sear the Chop in Hot Oil
Heat a heavy skillet (cast iron preferred) over medium-high heat until very hot. Add the 1 tbsp olive oil and swirl to coat the pan. The oil should shimmer but not smoke—this is the optimal temperature for searing.
Place the pork chop in the pan, pressing down gently with tongs for the first 30 seconds to ensure full contact with the pan. Sear undisturbed for 4-5 minutes until a deep golden-brown crust forms. Flip and sear the other side for another 4 minutes. The edges should also develop a crispy, caramelized exterior.
Step 3: Baste with Butter and Aromatics
Reduce the heat to medium and add the 1 tbsp unsalted butter, 1 whole fresh rosemary sprig, and a squeeze of juice from the 0.25 whole fresh lemon. Tilt the pan slightly and use a spoon to baste the pork chop with the foaming butter continuously for 1-2 minutes.
The butter will brown slightly, adding a nutty richness, while the rosemary and lemon infuse aromatic depth. Basting also helps cook the chop evenly and adds a glossy finish. The internal temperature should reach 145°F at this stage.
Step 4: Rest and Serve
Transfer the pork chop to a cutting board or plate and let it rest for 5-10 minutes. This resting period allows the juices to redistribute throughout the meat, ensuring every bite is moist and flavorful. Tent loosely with foil to keep warm.
Serve immediately with any pan juices spooned over the top. The chop should be juicy with a perfectly seared crust and fragrant with the subtle notes of rosemary and lemon. For an extra touch, garnish with a lemon wedge or additional rosemary sprig.
Pro Tips For Making Pork Chop Recipe For One Person
- Dry the Chop: Pat the bone-in pork chop thoroughly dry with paper towels before seasoning—this guarantees a better sear instead of steaming the meat.
- Season Twice: Salt the chop at least 20 minutes before cooking, then add a second light sprinkle of kosher salt, garlic powder, and thyme just before it hits the pan for deeper flavor.
- Skip the Cold Start: Pull the pork chop from the fridge 30 minutes before cooking so it cooks evenly; I learned this the hard way after too many dry edges with raw centers.
- Rest Before Serving: Let the chop rest for 5-10 minutes after cooking—it keeps the juices inside where they belong instead of all over your plate.
Essential Equipment for This Recipe
The Right Pan
For single-serving pork chops, I swear by my 10-inch Lodge cast iron skillet. Its even heat distribution and retention create that perfect sear. A stainless steel skillet like All-Clad works too if you prefer lighter cookware. Avoid nonstick—it won’t get hot enough for proper browning.
Essential Utensils
You’ll need tongs for flipping (never pierce the meat!) and a meat thermometer for precision. I use the ThermoWorks Instant Read—it gives accurate temps in 2-3 seconds. A paper towel stack nearby helps with quick drying and cleanup.
Heat Control Tools
Since you’re cooking one chop, a gas stove gives the best heat control for searing. If using electric, preheat the pan 5 minutes longer. I also keep a silicone brush handy for oiling the pan between batches if making multiple chops.
Basting Helpers
A metal spoon is perfect for basting with butter and aromatics. I also recommend a small heatproof bowl to hold your seasonings within reach. The rosemary sprig doubles as both flavoring and a natural basting brush. 🔥
Resting Setup
Have a cutting board and aluminum foil ready for resting. I use a wooden board that won’t slide around. The foil tent keeps the chop warm while allowing steam to escape, preventing soggy crust.
Optional Upgrades
For serious cooks, a cast iron grill press helps flatten thicker chops for even cooking. I also love my splatter screen—it keeps the stovetop clean during aggressive searing. A lemon squeezer ensures you get every drop of juice for finishing.
Nutrition Facts
Frequently Asked Questions
How thick should the pork chop be for best results?
Use a 1-inch thick bone-in rib chop. Thinner cuts dry out quickly, while thicker ones take longer to cook through. The 1-inch thickness ensures even cooking and a juicy interior with a perfect sear.
Can I use boneless instead of bone-in?
Yes, but bone-in adds flavor and helps keep the meat moist. If using boneless, reduce cooking time by 1-2 minutes per side to prevent overcooking. Always check the internal temperature reaches 145°F.
What if I don’t have a meat thermometer?
Press the chop with tongs—the meat should feel firm but still springy. For a more reliable test, make a small cut near the bone to check for doneness. Avoid cutting into the thickest part to retain juices.
Can I skip the resting time?
Never skip resting! Letting it rest for 5-10 minutes allows juices to redistribute. Cutting too soon causes all the flavorful juices to spill out, leaving the meat dry.

- 6 Egg Cake Recipe with Oil: Light as Air With Buttery Moisture - October 4, 2026
- 4 Bean Casserole Recipe: One-Pan Heartiness With Smoky Paprika Depth - October 4, 2026
- 3-Ingredient Keto Mug Cake Recipe: Microwave Magic in 2 Minutes - October 4, 2026