
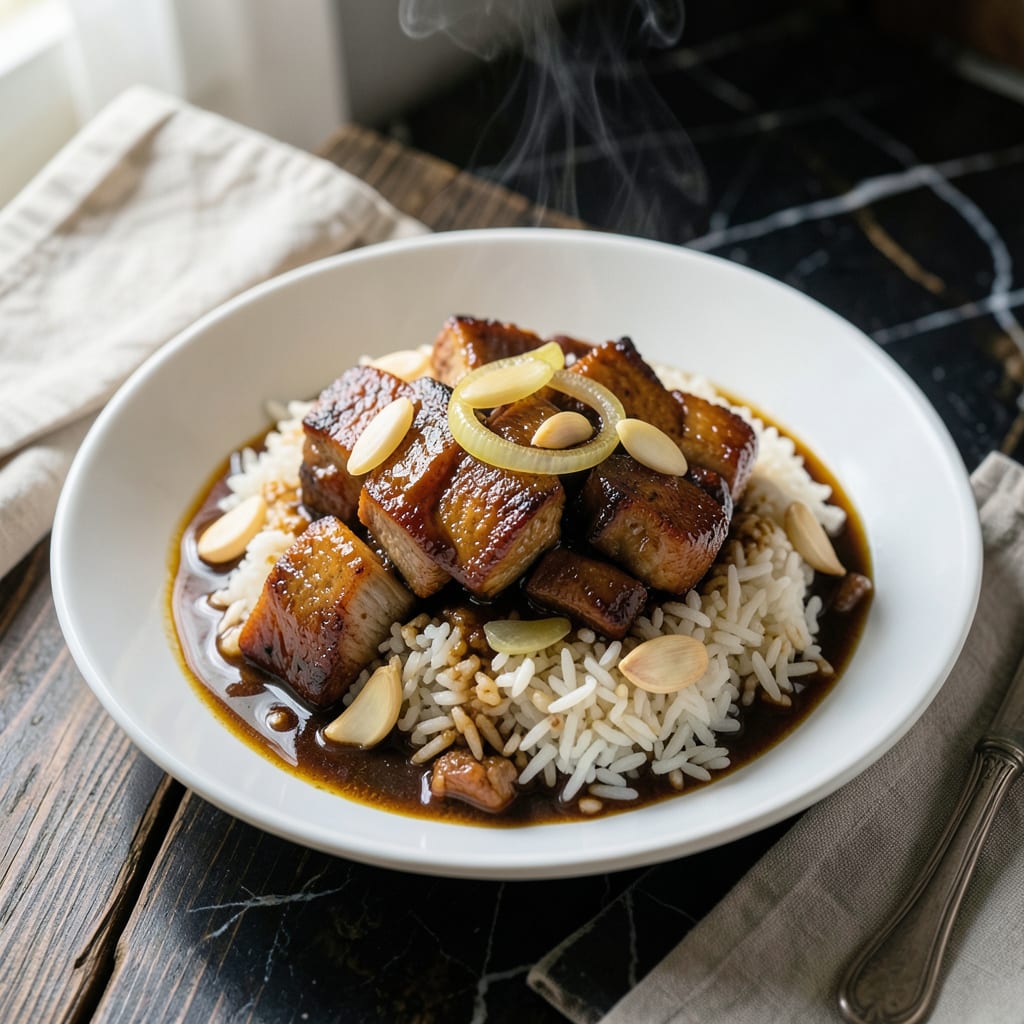
This one-pot dish brings Filipino comfort to your table with minimal effort. The savory pork and fluffy rice cook together, creating layers of flavor in every bite.
What makes this recipe special is its simplicity. The pork tenderizes as it steams the rice, resulting in a perfectly balanced meal that’s ready in under an hour. No extra pots, no fuss.
Ingredients for Pork Steamed Rice Cebu
One pot, a handful of ingredients, and Filipino comfort food is served.
| Ingredient | Amount | Notes |
|---|---|---|
| Pork Belly 🥩 | 1 ½ lb | Cut into 1-inch cubes |
| Jasmine Rice 🍚 | 2 cups | Rinsed until water runs clear |
| Garlic Cloves 🧄 | 6 cloves | Minced finely |
| Yellow Onion 🧅 | 1 whole | Diced into small pieces |
| Soy Sauce 🫒 | ½ cup | Use Filipino brand like Silver Swan |
| Fish Sauce 🐟 | 2 tbsp | Patis or Thai fish sauce |
| Bay Leaves 🌿 | 3 pieces | Dried or fresh |
| Black Peppercorns 🌶️ | 1 tsp | Lightly crushed |
| Water 💧 | 2 ½ cups | Or use chicken broth for extra flavor |
| Green Onions 🧅 | 3 whole | Thinly sliced for garnish |
| Calamansi 🍋 | 2 whole | Juiced, or substitute lime |
| Vegetable Oil 🫒 | 2 tbsp | For sautéing pork |
| Salt 🧂 | 1 tsp | Adjust to taste |
[recipeingredientscaler]
The pork belly is non-negotiable here—look for skin-on cuts at Asian markets or the meat counter at Whole Foods. It renders down beautifully, infusing the rice with rich flavor. For authentic taste, use Silver Swan soy sauce (available at most Filipino grocers or online). Jasmine rice is ideal for its fragrant, slightly sticky texture, but any long-grain white rice will work in a pinch.
No pork belly? Pork shoulder at half the quantity works but won’t be as tender. Out of fish sauce? Soy sauce plus a pinch of salt gets you close. Calamansi can be hard to find outside Filipino communities—lime or lemon work fine. For the bay leaves, fresh is superior but dried are acceptable. The green onions add a bright finish, so don’t skip them.
Leftovers keep well in the fridge for up to 4 days—the flavors deepen over time. Reheat gently with a splash of water to restore moisture. This dish doesn’t freeze well, as the rice texture changes. Best enjoyed fresh, straight from the pot.
Why You’ll Love This Recipe
- One Pot Wonder: I toss everything in the rice cooker and let it work its magic—no extra pans, no fuss.
- Garlic Soy Heaven: The pork belly soaks up that soy-garlic-onion combo, and honestly, it’s the kind of flavor I crave all week.
- Feeds a Hungry Crowd: Between us, this stretches perfectly for family dinners or meal prep—leftovers taste even better the next day.
- Budget Keeper: Pork belly and jasmine rice are affordable staples, and I’ll be real: it feels like a luxury meal without the cost.
Step-by-Step Instructions for Pork Steamed Rice Cebu
This one-pot method delivers perfectly flavored rice with tender pork in a single vessel.
Step 1: Sauté Aromatics and Brown the Pork
Heat the 2 tbsp vegetable oil in a heavy pot over medium heat. Add the 1 whole yellow onion and cook for 2-3 minutes until translucent and fragrant. This builds the flavor foundation for your dish.
Add the 6 cloves garlic cloves and sauté for 30 seconds until golden but not browned. Immediately stir in the 1.5 lb pork belly cubes and sear for 5-6 minutes, turning occasionally, until all sides develop a light golden crust. The pork should release its fat, which will coat the rice grains beautifully.
Step 2: Build the Flavor Base
Pour in the 0.5 cup soy sauce and 2 tbsp fish sauce, stirring to deglaze the pot. Add the 3 pieces bay leaves and 1 tsp black peppercorns, then cook for 2 minutes to allow the spices to bloom in the hot fat.
Squeeze in the juice from the 2 whole calamansi, then add the 1 tsp salt. This acidic brightness balances the richness of the pork. The liquid should reduce slightly, creating a glossy, concentrated sauce that will infuse every bite of rice.
Step 3: Add Rice and Water
Stir in the 2 cups jasmine rice, ensuring each grain is thoroughly coated with the pork and aromatics. This step is crucial—every kernel should glisten with the savory mixture before adding liquid.
Pour in the 2.5 cups water and stir once to distribute the rice evenly. Bring the mixture to a boil over high heat. Watch for the edges to bubble vigorously—the rice should be mostly submerged with just the tops peeking through the liquid.
Step 4: Steam to Perfection
Once boiling, reduce the heat to low, cover the pot tightly with a lid, and cook for 20 minutes. Resist the urge to peek—the trapped steam is what transforms the rice into a fluffy, uniformly cooked base.
After 20 minutes, turn off the heat but leave the pot covered for an additional 10 minutes. This resting period allows the rice to absorb any remaining liquid and the flavors to meld completely. The pork should be fork-tender, and the rice should have a slight sheen from the rendered pork fat.
Step 5: Garnish and Serve
Fluff the rice gently with a fork, breaking up any clumps while keeping the pork pieces intact. The grains should be separate yet moist, with the pork distributed evenly throughout.
Scatter the 3 whole green onions, thinly sliced, over the top just before serving. The green onions add a fresh, crisp contrast to the rich, savory rice and pork. Serve hot, with extra calamansi on the side for those who prefer an extra tangy kick.
Pro Tips For Making Pork Steamed Rice Cebu
- Parboil the Belly: Simmer the pork belly in water for 10 minutes first to remove impurities and keep the rice from turning greasy—I learned this the hard way after ruining two batches with oily, heavy rice.
- Soak the Rice: Rinse the jasmine rice until the water runs clear, then soak it for 20 minutes. It cooks more evenly and absorbs the pork and soy flavors better.
- Don’t Overcrowd: Use a wide, heavy pot so the pork has space to brown properly before steaming. Crowding it just boils the meat instead of searing it.
- Layer the Aromatics: Place crushed garlic and sliced onion under the pork, not mixed in. This way, their flavors infuse the rice without burning during the long steam.
Dietary Considerations for This Dish
Gluten-Free Adaptations
This dish is naturally gluten-free if you use tamari instead of regular soy sauce. I recommend San-J tamari for authentic flavor without the wheat. Always check labels on fish sauce, as some brands add gluten-containing thickeners. 💪
Lower-Fat Option
Swap the pork belly for pork shoulder and trim visible fat before cooking. You’ll lose some richness but keep all the flavor. Use 1 lb instead of 1.5 lb to maintain the rice-to-protein ratio.
Sodium Considerations
To reduce sodium, cut the soy sauce to ¼ cup and fish sauce to 1 tbsp. Boost flavor with extra garlic, calamansi, and 1 tsp ginger instead. The pork’s natural savoriness will still shine through.
Vegetarian Variation
Replace pork with 1.5 lb mushrooms (shiitake or oyster work best). Sauté until they release their moisture, then proceed with the recipe. Add 1 tbsp miso paste for umami depth that mimics pork’s richness.
Allergen Notes
This recipe contains no dairy, nuts, or eggs. The only potential allergens are soy (in soy sauce) and fish (in fish sauce). For soy-free versions, coconut aminos make a great substitute at a 1:1 ratio. 🌱
Diabetic-Friendly
Use brown rice or cauliflower rice to reduce the glycemic impact. With cauliflower rice, reduce water to 1 cup and cook for just 8-10 minutes. The pork and seasonings work beautifully with either base.
Nutrition Facts
Frequently Asked Questions
Can I use a different cut of pork?
Yes, but pork shoulder needs 10 extra minutes to tenderize. Pork belly’s fat gives the best flavor, but leaner cuts work in a pinch. Just adjust cooking time accordingly.
How do I prevent mushy rice?
Rinse the rice until water runs clear and use the exact 2.5 cups water ratio. Avoid stirring after boiling starts—this breaks the grains. Let it rest covered for 10 minutes after cooking.
What if I don’t have calamansi?
Lime or lemon juice works perfectly at a 1:1 ratio. The acidity balances the pork’s richness just as well. Add it at the same step in the recipe.
Can I make this in a rice cooker?
Sauté pork and aromatics first, then transfer everything to the cooker. Use the standard rice setting and let it rest 10 minutes after cooking.

- 6 Egg Cake Recipe with Oil: Light as Air With Buttery Moisture - October 4, 2026
- 4 Bean Casserole Recipe: One-Pan Heartiness With Smoky Paprika Depth - October 4, 2026
- 3-Ingredient Keto Mug Cake Recipe: Microwave Magic in 2 Minutes - October 4, 2026