
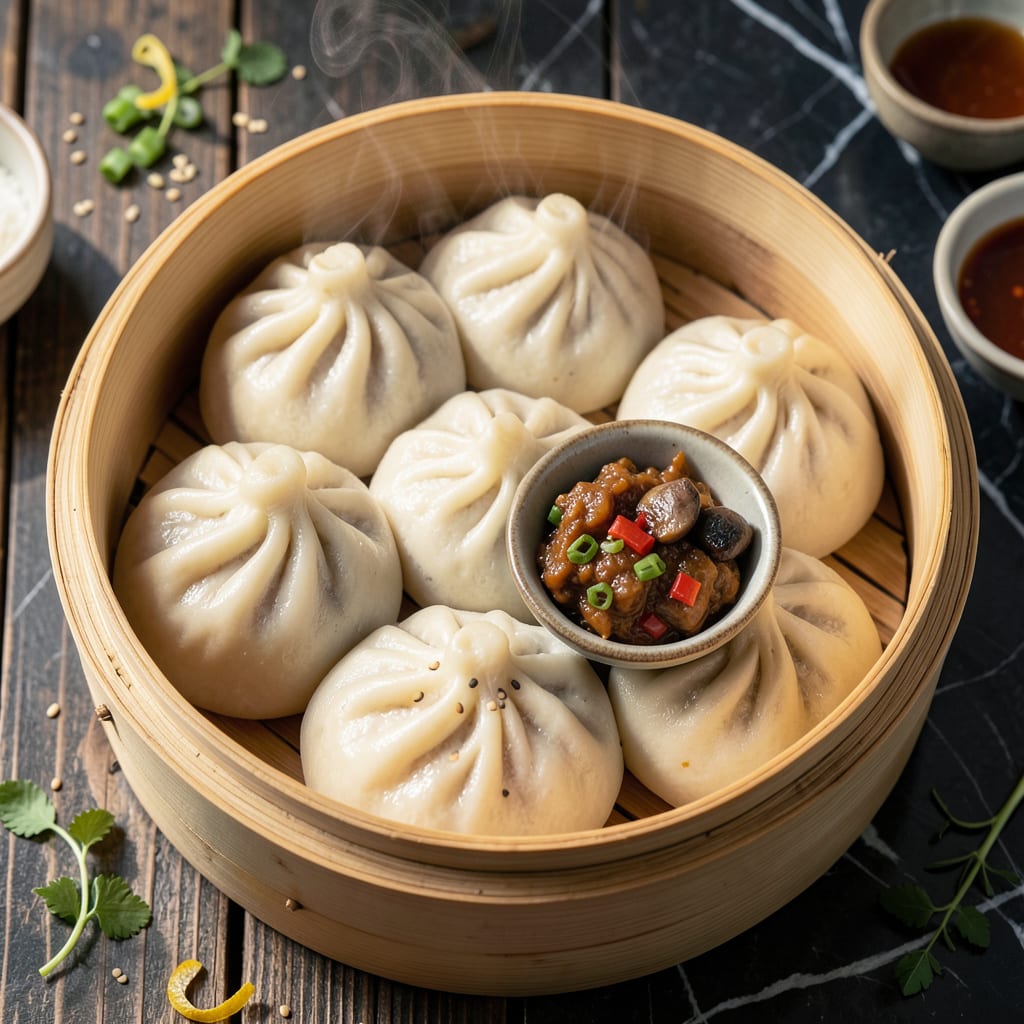
These fluffy, cloud-like buns prove that plant-based dough can achieve the same soft, pillowy texture as traditional versions. The secret lies in the precise balance of vegan ingredients and proper steaming technique.
Whether you fill them with sweet red bean paste or savory vegetables, these buns deliver restaurant-quality results at home. The steaming process ensures they stay tender and moist for days.
Ingredients for Vegan Steamed Buns
Simple plant-based pantry staples create these restaurant-quality pillowy buns at home with ease.
| Ingredient | Amount | Notes |
|---|---|---|
| All-Purpose Flour 🌾 | 4 cups | Plus extra for dusting |
| Instant Yeast 🍞 | 2 tsp | Active dry yeast works too |
| Granulated Sugar 🍚 | ¼ cup | For activating yeast |
| Warm Water 💧 | 1 ¼ cups | About 110°F |
| Unsweetened Plant-Based Milk 🥛 | ½ cup | Almond or soy preferred |
| Vegan Butter 🧈 | 3 tbsp | Melted, for dough softness |
| Baking Powder 🧂 | 1 tsp | For extra lift |
| Salt 🧂 | 1 tsp | Fine sea salt preferred |
| Cornstarch 🌽 | 2 tbsp | For dusting parchment |
| Sweet Red Bean Paste 🍡 | 1 cup | Or savory filling of choice |
| Neutral-Flavored Oil 🫒 | 1 tbsp | For greasing bowl |
The flour is the foundation—King Arthur or Bob’s Red Mill all-purpose give the best rise. Instant yeast is ideal for quick activation, but active dry works if you proof it first (just add 5 minutes). The plant-based milk adds tenderness; Silk or Califia Farms brands perform consistently. Vegan butter should be unsalted (I like Miyoko’s or Earth Balance), as salt content varies wildly between brands.
No instant yeast? Active dry at the same quantity—just bloom it in warm water with sugar first. Swap red bean paste for crushed peanuts with sugar or vegetable stir-fry for savory versions. Baking powder can be omitted in a pinch, but your buns will be slightly denser. The cornstarch prevents sticking during steaming—arrowroot works too if that’s what you have.
Dough can be made a day ahead—cover tightly and refrigerate. Steamed buns keep 2-3 days in an airtight container (re-steam to refresh). Freeze unsteamed buns on trays first, then transfer to bags—they’ll hold for 1 month.
Why You’ll Love This Recipe
- No Fuss Dough: I mix the flour, yeast, sugar, and warm plant-based milk in one bowl—no kneading, no waiting hours for proofing.
- Pillowy Soft Bites: The steam transforms the simple dough into cloud-like buns with just the right chew.
- Meal Prep Hero: I make a batch on Sunday and freeze them—pop in the steamer for fresh buns any night.
- Pantry Staples: All-purpose flour and instant yeast mean I can whip these up without a special grocery trip. Honestly, I always have these on hand.
Step-by-Step Instructions for Vegan Steamed Buns
This method ensures pillowy texture and perfect rise every time without dairy or eggs.
Step 1: Activate the Yeast and Prepare Dough
In a small bowl, combine the 2 tsp Instant Yeast, 0.25 cup Granulated Sugar, and 1.25 cups Warm Water at about 110°F. Let it sit for 5-7 minutes until foamy and frothy—this confirms the yeast is active and ready to proof your dough.
In a large mixing bowl, whisk together the 4 cups All-Purpose Flour, 1 tsp Baking Powder, and 1 tsp Salt. Pour in the yeast mixture, 0.5 cup Unsweetened Plant-Based Milk, and 3 tbsp Vegan Butter melted. Stir until a shaggy dough forms.
Step 2: Knead and First Rise
Turn the dough onto a lightly floured surface and knead for 8-10 minutes until smooth and elastic. The dough should spring back slowly when pressed with a finger. If it feels too sticky, add a bit more All-Purpose Flour, but avoid over-flouring.
Lightly oil a clean bowl with the 1 tbsp Neutral-Flavored Oil and place the dough inside. Cover with a damp towel and let it rise in a warm, draft-free place for 1-1.5 hours or until doubled in size. This first rise develops the gluten structure for that signature fluffy texture.
Step 3: Shape the Buns and Add Filling
Once risen, punch down the dough and divide it into 8 equal portions. Roll each portion into a ball, then flatten into a 3-inch circle with a rolling pin. Place 2 tbsp Sweet Red Bean Paste in the center of each circle.
Gather the edges of the dough around the filling, pinching to seal completely. Twist the top gently and press down lightly to create a smooth, rounded bun. Place each bun on a square of parchment dusted with the 2 tbsp Cornstarch to prevent sticking.
Step 4: Second Rise and Steam
Arrange the buns in a steamer basket, leaving 1-2 inches between each for expansion. Cover and let them rise for an additional 30-45 minutes until puffy and nearly doubled in size. This second rise ensures an airy, light crumb.
Bring water to a boil in a wok or large pot. Place the steamer basket over the boiling water, ensuring the lid is tightly sealed. Steam the buns for 12-15 minutes until fully set and glossy. Avoid lifting the lid during steaming, as the sudden temperature change can cause them to deflate.
Step 5: Serve Warm
Carefully remove the buns from the steamer using the parchment squares to handle them. Let them cool for 2-3 minutes before serving—the filling will be extremely hot. The buns should have a soft, slightly sticky exterior with a tender, fluffy interior.
Serve immediately while warm, as they are best fresh from the steamer. Store any leftovers in an airtight container and reheat by steaming for 3-4 minutes to restore their softness.
Pro Tips For Making Vegan Steamed Buns
- Check Water Temp: Use a thermometer to hit 105-110°F for the warm water—any hotter kills the yeast, any cooler slows the rise. I learned this the hard way after my first few batches refused to puff.
- Knead Longer: Don’t stop at smooth—knead the dough for a full 8-10 minutes until it’s elastic and slightly tacky. Sounds tedious, but it’s what gives the buns that soft, chewy texture.
- Skip Cold Milk: Warm your plant-based milk to room temperature before mixing, or the yeast will struggle to activate. Cold ingredients are a surefire way to end up with dense, flat buns.
- Double the Proof: Let the dough rise once in the bowl, then again after shaping—both steps are non-negotiable for fluffy buns. I was skeptical until I tried it, and now I never skip the second proof.
Regional Styles of This Recipe
Chinese Char Siu Style
In Cantonese tradition, these buns often feature mock char siu made from marinated tofu or seitan. I use 1 cup shredded seitan tossed in 3 tbsp hoisin, 1 tbsp soy sauce, and 1 tsp five-spice powder for that signature sweet-savory profile. 🌟
Japanese Anpan Variation
Japanese anpan typically uses anko (red bean paste) as filling. For authenticity, I sweeten the dough slightly more with 1 extra tbsp sugar and use shiroan (white bean paste) for a milder flavor. The texture is denser than Chinese versions.
Thai Coconut Style
Thai-inspired buns incorporate coconut milk in the dough for richness. Replace 0.5 cup plant-based milk with full-fat coconut milk. Fill with lemongrass tofu and peanut sauce for a fragrant, creamy twist that pairs beautifully with the soft bun.
Korean Kimchi Style
For a Korean take, I add 1 tsp gochugaru to the dough for subtle heat. The filling combines vegan kimchi (well-drained) with tofu crumbles and 1 tsp sesame oil. These buns have a tangy, spicy kick that’s distinctly Korean.
Vietnamese Bánh Bao
Vietnamese versions often include mushrooms and glass noodles. Sauté 1 cup shiitake mushrooms with ½ cup mung bean noodles, 1 tbsp vegetarian oyster sauce, and 1 tsp black pepper for a hearty, umami-packed filling. 💫
Nutrition Facts
Frequently Asked Questions
Can I use whole wheat flour instead?
Yes, but replace only 25% of the all-purpose flour. Whole wheat is heavier and can make the buns denser. Add 1 extra tbsp of plant-based milk to compensate for the dryness.
Why did my buns collapse after steaming?
This usually happens if the lid was lifted too soon or the water wasn’t boiling hard enough. Ensure the steamer is fully sealed and the water maintains a rolling boil for the full 12-15 minutes.
How do I store leftovers?
Keep in an airtight container for up to 2 days. To revive, steam for 3-4 minutes until soft. Avoid microwaving as it can make them gummy.

- 6 Egg Cake Recipe with Oil: Light as Air With Buttery Moisture - October 4, 2026
- 4 Bean Casserole Recipe: One-Pan Heartiness With Smoky Paprika Depth - October 4, 2026
- 3-Ingredient Keto Mug Cake Recipe: Microwave Magic in 2 Minutes - October 4, 2026