
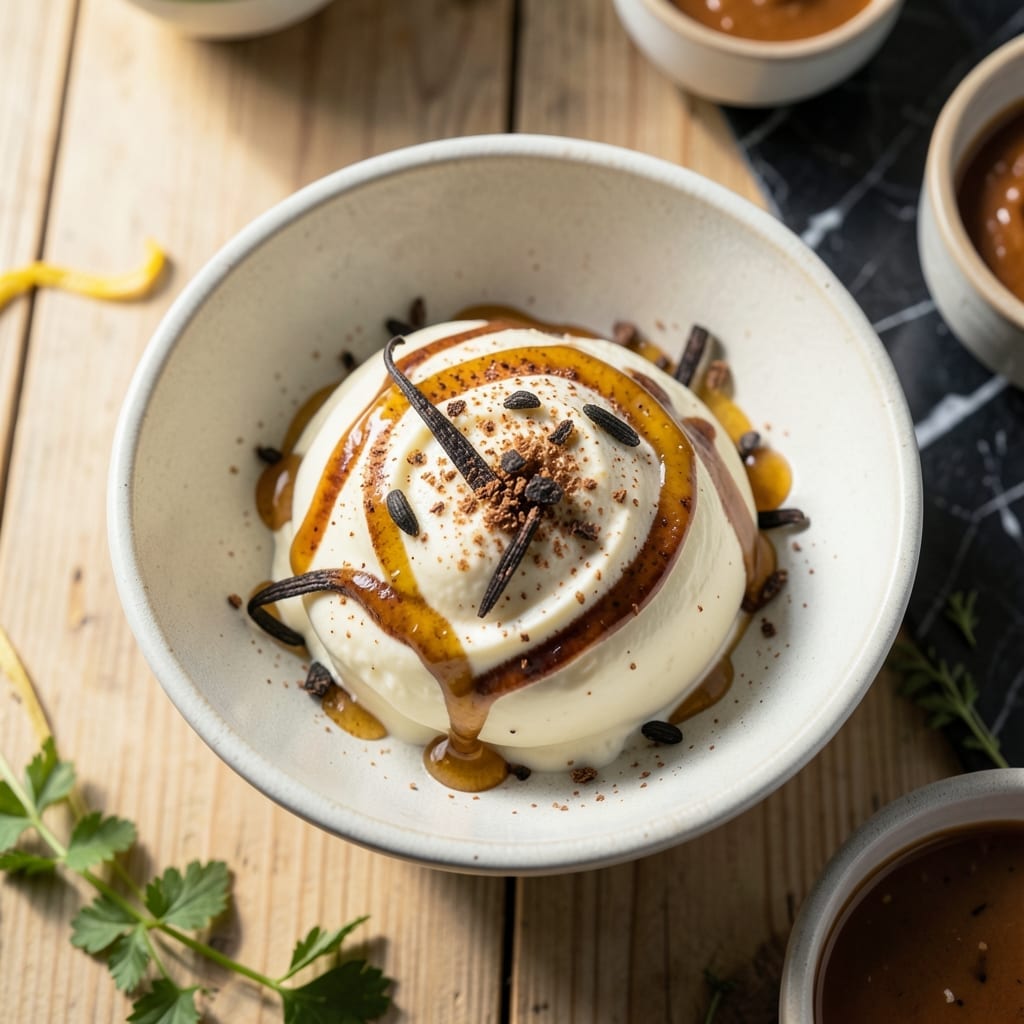
This recipe transforms fresh raw milk into the most velvety ice cream you’ll ever taste. The natural fats and enzymes create a richness that store-bought versions simply can’t match.
I’ve perfected the churning process to achieve a smooth, creamy texture without ice crystals. The key is patience—letting the base chill thoroughly before spinning it in your machine.
What you’ll get is a luxurious dessert with a clean, pure dairy flavor that’s both simple and extraordinary. The consistency is so perfect, it’ll rival any artisanal shop.
Serve it plain or with fresh fruit, nuts, or a drizzle of honey. This is ice cream at its finest.
Ingredients for Raw Milk Ice Cream
Luxurious raw dairy and a handful of pantry staples make this velvety dessert extraordinary.
| Ingredient | Amount | Notes |
|---|---|---|
| Raw Whole Milk 🥛 | 4 cups | Fresh, unhomogenized preferred |
| Heavy Cream 🥛 | 2 cups | Organic for best texture |
| Granulated Sugar 🍚 | 1 cup | Fine grain for smooth dissolution |
| Pure Vanilla Extract 🌿 | 2 tsp | Real vanilla, not imitation |
| Large Egg Yolks 🥚 | 6 whole | Pasture-raised recommended |
| Sea Salt 🧂 | ¼ tsp | Fine grain, kosher okay |
| Whole Milk Yogurt 🥛 | ½ cup | Plain, unsweetened for tang |
| Vanilla Bean 🌿 | 1 whole | Split and scraped |
| Honey 🍯 | 2 tbsp | Raw or local preferred |
| Lemon Juice 🍋 | 1 tsp | Freshly squeezed for brightness |
| Almond Extract 🌰 | ¼ tsp | Optional depth of flavor |
The raw milk is non-negotiable here. Local dairy farms or farmers markets are your best bet—look for cream-top bottles with a sell-by date at least 5 days out (that’s how you know it’s fresh). Heavy cream should be organic and ultra-pasteurized for the smoothest churn. If you can’t find raw milk, whole milk from a trusted source works but won’t have the same depth. The egg yolks add richness, so opt for pasture-raised if possible.
No raw milk? Whole milk plus extra cream (replace 1 cup milk with 1 cup cream) gets you close. Vanilla extract can be swapped for vanilla bean paste at a 1:1 ratio. Skip the almond extract if you dislike the flavor, but it adds a subtle complexity. For a lighter version, half-and-half works but won’t be as decadent. The honey can be replaced with maple syrup—use the same amount.
The base keeps in the fridge for 24 hours (actually improves with time). Churned ice cream holds for 1 week in an airtight container, but it’s best eaten within 3 days for peak texture. Press plastic wrap directly on the surface to prevent ice crystals from forming.
Why You’ll Love This Recipe
- One-Bowl Wonder: I just whisk the yolks, sugar, and vanilla in one bowl, then mix in the raw milk and cream—no fancy equipment needed.
- Ridiculously Creamy: The raw whole milk and heavy cream give it that ultra-rich texture you can’t get from store-bought.
- Summer or Sunday: It’s my go-to for backyard BBQs, but honestly, I’ve made it just because it’s Tuesday.
- Leftovers? Please: Between us, there never are— but if there were, they’d keep beautifully for a week.
Step-by-Step Instructions for Raw Milk Ice Cream
Master the technique for ultra-smooth, luxurious ice cream with these careful steps.
Step 1: Infuse and Heat the Dairy Base
Split the vanilla bean lengthwise and scrape out the seeds. Combine the 4 cups Raw Whole Milk, 2 cups Heavy Cream, and scraped vanilla bean (seeds and pod) in a heavy saucepan. Heat over medium heat until steaming but not boiling—you’ll see tiny bubbles forming at the edges.
This gentle heating allows the vanilla to infuse into the dairy while preventing scorching. Stir occasionally with a silicone spatula, scraping the bottom to prevent milk solids from sticking. The mixture is ready when it reaches 170°F on an instant-read thermometer.
Step 2: Temper the Egg Yolks for a Silky Custard
In a separate bowl, whisk together the 6 whole Large Egg Yolks and 1 cup Granulated Sugar until pale yellow and slightly thickened. This step incorporates air for a lighter texture.
Slowly ladle about 1 cup of the hot dairy mixture into the egg yolks while whisking constantly. This tempering prevents the eggs from scrambling. Once combined, pour the tempered eggs back into the saucepan with the remaining dairy. Cook over low heat, stirring constantly, until the custard thickens enough to coat the back of a spoon—about 5-7 minutes.
Step 3: Strain, Flavor, and Chill the Base
Immediately strain the custard through a fine-mesh sieve into a clean bowl to remove the vanilla bean pod and any cooked egg bits. Stir in the 0.5 cup Whole Milk Yogurt, 2 tbsp Honey, 1 tsp Lemon Juice, 2 tsp Pure Vanilla Extract, 0.25 tsp Sea Salt, and 0.25 tsp Almond Extract.
Press plastic wrap directly onto the surface of the custard to prevent a skin from forming. Refrigerate for at least 4 hours, but preferably overnight. This chilling step is crucial—it allows the flavors to meld and ensures a smooth, creamy texture when churned.
Step 4: Churn to Perfection
Pour the chilled custard into your ice cream maker and churn according to the manufacturer’s instructions, typically 20-25 minutes. The ice cream is ready when it resembles soft-serve and holds its shape when scooped.
For best results, use an ice cream maker with a pre-frozen bowl. If you don’t have one, pour the custard into a shallow freezer-safe container and freeze, stirring vigorously with a fork every 30 minutes for 2-3 hours to break up ice crystals.
Step 5: Freeze to Ideal Consistency
Transfer the churned ice cream to a lidded container and freeze for at least 4 hours to firm up. The texture should be scoopable but still velvety smooth.
Let it sit at room temperature for 5-10 minutes before serving to soften slightly. This makes scooping easier and enhances the creamy mouthfeel. Store leftovers in an airtight container with parchment paper pressed directly on the surface to minimize ice crystals.
Pro Tips For Making Raw Milk Ice Cream
- Temper the Yolks: Slowly whisk about 1/2 cup of the hot milk mixture into the egg yolks before combining everything—this prevents scrambled eggs in your ice cream base. After ruining a batch by dumping yolks straight in, I now do this every time.
- Strain the Base: Pour the custard through a fine-mesh sieve after cooking to remove any cooked bits or undissolved sugar. Sounds tedious, but it guarantees silky-smooth ice cream.
- Use Fresh Raw Milk: The flavor of raw milk degrades fast, so use it within 2-3 days of purchase for the richest, cleanest taste. I learned this the hard way when my ice cream had a slight tang from milk that sat too long.
- Chill Overnight: Let the custard chill in the fridge for at least 8 hours (or overnight) before churning. This isn’t just for food safety—it actually changes the texture, making it creamier and easier to churn.
Essential Equipment for Great raw milk ice cream
Ice Cream Maker
The Cuisinart ICE-21 is my go-to for home churning—it’s affordable, reliable, and makes 1.5 quarts per batch. The pre-frozen bowl needs 12-24 hours in the freezer before use. I’ve had mine for years with zero issues. 💪
Heavy Saucepan
A 3-quart heavy-bottomed saucepan prevents scorching during custard cooking. I use my All-Clad Stainless Steel pan—it distributes heat evenly and won’t react with dairy. Avoid nonstick for this recipe as it can’t handle the high heat needed.
Fine-Mesh Sieve
Straining the custard through a fine-mesh sieve removes vanilla pod and any cooked egg bits for ultra-smooth texture. I recommend the OXO Good Grips model—it’s sturdy, easy to clean, and fits over most bowls.
Instant-Read Thermometer
Precision matters when heating dairy. The ThermoWorks ThermoPop gives accurate readings in 3-4 seconds. Target 170°F for the dairy base and 165°F for the custard to ensure safety without curdling.
Whisk and Bowls
A balloon whisk incorporates air into egg yolks for a lighter texture. I use a stainless steel mixing bowl set over ice to chill the custard faster. These are kitchen staples that make the process smoother.
Storage Containers
Transfer churned ice cream to airtight containers with parchment paper pressed on the surface. I love Glasslock containers with snap-on lids—they’re durable and easy to stack in the freezer. 💫
Nutrition Facts
Frequently Asked Questions
Is it safe to use raw milk?
Only use raw milk from a trusted, reputable source that follows strict hygiene practices. Pasteurized milk can be substituted, though the flavor will be less rich. Always check local regulations about raw milk consumption.
Why chill the base overnight?
Chilling for 4+ hours (preferably overnight) allows flavors to fully develop and ensures a smooth texture. Rushing this step can result in icy, grainy ice cream.
Can I make this without an ice cream maker?
Yes! Freeze the base in a shallow container and stir vigorously with a fork every 30 minutes for 2-3 hours to break up ice crystals. It won’t be as smooth but still delicious.
How long does homemade ice cream keep?
Store in an airtight container with parchment on the surface for up to 1 week. For best texture, enjoy within 3 days.

- 6 Egg Cake Recipe with Oil: Light as Air With Buttery Moisture - October 4, 2026
- 4 Bean Casserole Recipe: One-Pan Heartiness With Smoky Paprika Depth - October 4, 2026
- 3-Ingredient Keto Mug Cake Recipe: Microwave Magic in 2 Minutes - October 4, 2026