
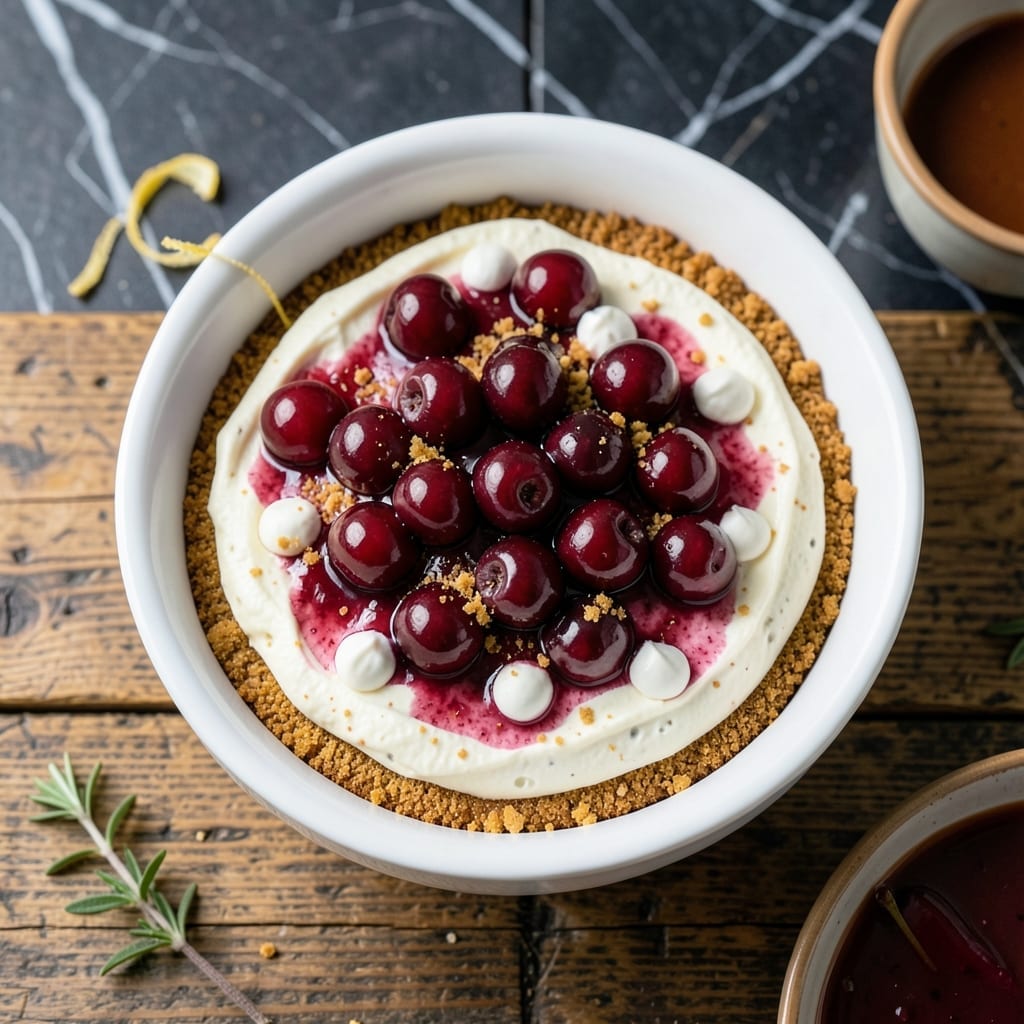
This cheesecake recipe delivers velvety smooth texture with vibrant tart cherry swirls that cut through the richness beautifully.
I’ve perfected a method that prevents cracking while ensuring a creamy, dense filling every time. The graham cracker crust adds the ideal buttery crunch to balance the silky topping.
Baking at a precise temperature and cooling gradually are the secrets to that professional finish. The cherry layer stays bright and tangy, never bleeding into the cheesecake.
Serve chilled for clean slices that showcase the marbled effect. This dessert impresses with minimal effort and maximum flavor.
Ingredients for Recipe Cherry Cheesecake
Creamy filling, buttery crust, and vibrant tart cherries create the perfect dessert balance.
| Ingredient | Amount | Notes |
|---|---|---|
| Graham Cracker Crumbs 🍪 | 1 ½ cups | Fine crumbs preferred |
| Granulated Sugar 🍚 | ¼ cup | Divided for crust and filling |
| Unsalted Butter 🧈 | ½ cup | Melted for crust binding |
| Cream Cheese 🧀 | 2 lb | Full-fat, room temperature |
| Sour Cream 🥛 | 1 cup | Full-fat for richness |
| Large Eggs 🥚 | 3 whole | Room temperature for smooth texture |
| Vanilla Extract 🌿 | 2 tsp | Pure extract recommended |
| Tart Cherry Pie Filling 🍒 | 1 ½ cups | Canned or homemade |
| All-Purpose Flour 🌾 | 2 tbsp | For thickening cherry swirl |
| Lemon Juice 🍋 | 1 tbsp | Freshly squeezed for brightness |
| Salt 🧂 | ¼ tsp | Fine sea salt preferred |
The cream cheese is non-negotiable for that velvety texture—Philadelphia brand is my go-to, but any full-fat block works. Ensure it’s truly room temperature (sit out 2 hours or microwave in short bursts, stirring between). The graham cracker crumbs should be fine, not coarse. Keebler or store-brand graham crackers pulse into perfect crumbs in a food processor.
No tart cherry pie filling? Frozen tart cherries (thawed and drained) mixed with 2 tbsp sugar and 1 tbsp cornstarch make a great substitute. For a lighter version, Neufchâtel cheese works but may be slightly less dense. The sour cream can be swapped for Greek yogurt (same tang, slightly less fat). Always use full-fat dairy—this isn’t the time for low-fat shortcuts.
Baked cheesecake keeps in the fridge for 5-7 days (covered tightly). Freeze slices on a tray first, then transfer to a bag for up to 2 months. Thaw overnight in the fridge. The crust may soften slightly, but the texture holds beautifully.
Why You’ll Love This Recipe
- No-Bake Base: The graham cracker crust comes together in 5 minutes—just crush, mix with butter, and press.
- Creamy Dream: That tangy cream cheese and sour cream combo with sweet cherry topping? Ridiculously good.
- Crowd Pleaser: I bring this to potlucks and always come home with an empty pan.
- Budget Friendly: Honestly, the ingredients are pantry staples and stretch to feed 8+ for less than a takeout dessert.
Step-by-Step Instructions for Cherry Cheesecake
Achieve a professional-quality dessert with these precise, tested steps for a creamy cheesecake with fruit swirls.
Step 1: Prepare and Press the Graham Cracker Crust
Preheat your oven to 350°F. In a medium bowl, combine 1.5 cups Graham Cracker Crumbs, 0.25 cup Granulated Sugar, and 0.5 cup Unsalted Butter melted. Stir until the mixture resembles wet sand and holds together when pressed.
Press the crumb mixture firmly into the bottom of a 9-inch springform pan, using the bottom of a measuring cup to create an even layer. Extend the crust about 1 inch up the sides of the pan. Bake for 10 minutes, then set aside to cool. The crust should be light golden brown and firm to the touch.
Step 2: Beat the Cream Cheese Filling to Silky Smoothness
In a stand mixer fitted with the paddle attachment, beat 2 lb Cream Cheese on medium speed for 2-3 minutes until completely smooth and free of lumps. Scrape down the sides of the bowl as needed—this ensures even mixing and prevents overworking later.
Gradually add 1 cup Sour Cream, 0.25 cup Granulated Sugar, 2 tsp Vanilla Extract, and 0.25 tsp Salt, mixing on low speed just until combined. Add 3 whole Large Eggs one at a time, mixing thoroughly after each addition. The batter should be thick, glossy, and velvety smooth.
Step 3: Prepare the Tart Cherry Swirl
In a small bowl, combine 1.5 cups Tart Cherry Pie Filling, 2 tbsp All-Purpose Flour, and 1 tbsp Lemon Juice. Stir until the flour is fully incorporated and the mixture thickens slightly. The flour helps stabilize the swirl, preventing it from bleeding into the cheesecake batter during baking.
Set aside ½ cup of the filling for topping the cheesecake after baking. The remaining 1 cup will be used for the swirl.
Step 4: Assemble, Swirl, and Bake the Cheesecake
Pour the cream cheese filling over the cooled crust, spreading it evenly with a spatula. Drop spoonfuls of the 1 cup reserved cherry mixture evenly across the surface. Using a butter knife or skewer, gently swirl the filling into the batter with figure-eight motions—avoid overmixing, as this can blur the distinct layers.
Bake in a water bath at 325°F for 55-65 minutes. The edges should be set with a slight wobble in the center when gently shaken. Turn off the oven and let the cheesecake cool in the oven with the door slightly ajar for 1 hour to prevent cracking.
Step 5: Chill, Top, and Serve
Transfer the cheesecake to the refrigerator and chill uncovered for at least 4 hours, or preferably overnight. Once fully set, spread the reserved ½ cup cherry filling evenly over the top. Run a warm knife around the edge to loosen, then release the springform ring.
Slice with a hot, clean knife for smooth edges, wiping the blade between cuts. Serve chilled, with each slice showcasing a marbled swirl of tart cherry and creamy cheesecake. The texture should be dense yet silky, with the crust holding firm beneath the filling.
Pro Tips For Making Recipe Cherry Cheesecake
- Room Temp Cream Cheese: Let the cream cheese sit out for at least an hour before mixing—it blends smoother and prevents lumps. I learned this the hard way after my first three cheesecakes looked like cottage cheese.
- Press the Crust Hard: Pack those graham cracker crumbs into the pan like you mean it. A loose crust falls apart when you slice it, and nobody wants a crumbly mess.
- Skip the Overmixing: Once the eggs go in, mix just until combined. Overbeating adds air, which can cause cracks—my first cheesecake looked like a canyon.
- Water Bath Every Time: Bake the cheesecake in a water bath to keep the edges from baking too fast. It’s a pain to set up, but it’s the difference between a smooth top and a cracked one.
Essential Equipment for This Recipe
Springform Pan Essentials
Invest in a 9-inch springform pan—this is non-negotiable for clean release and professional presentation. I use Wilton’s non-stick version for its durable construction and reliable seal. Avoid cheap pans with flimsy latches that can leak batter. 💡
Mixer Matters
A stand mixer with paddle attachment makes the filling effortlessly smooth. The KitchenAid Classic handles the thick batter without straining. If using a hand mixer, beat at medium speed for 3-4 minutes to achieve the same velvety texture.
Water Bath Setup
Prevent cracking with a water bath during baking. Wrap the springform pan tightly with heavy-duty aluminum foil, then place it in a larger roasting pan. Add hot water halfway up the sides. This gentle, even heat ensures a creamy, crack-free finish.
Measuring Tools
Precision matters: use measuring cups for dry ingredients and liquid measuring cups for wet. I prefer OXO Good Grips for their clear markings and comfortable handles. A kitchen scale is ideal for the 2 lb cream cheese to ensure accuracy.
Cooling Rack
After the water bath cooling, transfer to a wire cooling rack for 30 minutes before refrigerating. This prevents condensation from pooling underneath, which can make the crust soggy. A rack with a grid pattern allows maximum airflow.
Serving Tools
For those perfect slices, invest in a long, thin-bladed knife (I love Wüsthof’s 8-inch chef’s knife). Dip it in hot water and wipe clean between cuts for smooth, professional-looking pieces. 🔥
Nutrition Facts
Frequently Asked Questions
Why does my cheesecake crack on top?
Cracks happen due to uneven cooling or overmixing. Always cool gradually in the oven with the door ajar for 1 hour before refrigerating. Also, avoid overbeating the batter after adding eggs.
Can I use fresh cherries instead of pie filling?
Yes! Simmer 2 cups pitted tart cherries with ¼ cup sugar and 1 tbsp lemon juice until thickened. Cool completely before swirling into the batter.
How long should it chill before slicing?
For clean slices, chill at least 4 hours, but overnight is best. This allows the filling to set fully and the flavors to meld perfectly.
Can I make this without a water bath?
You can, but the risk of cracking increases. If skipping, bake at 300°F instead and check 10 minutes earlier. A water bath is strongly recommended for best results.

- 6 Egg Cake Recipe with Oil: Light as Air With Buttery Moisture - October 4, 2026
- 4 Bean Casserole Recipe: One-Pan Heartiness With Smoky Paprika Depth - October 4, 2026
- 3-Ingredient Keto Mug Cake Recipe: Microwave Magic in 2 Minutes - October 4, 2026