
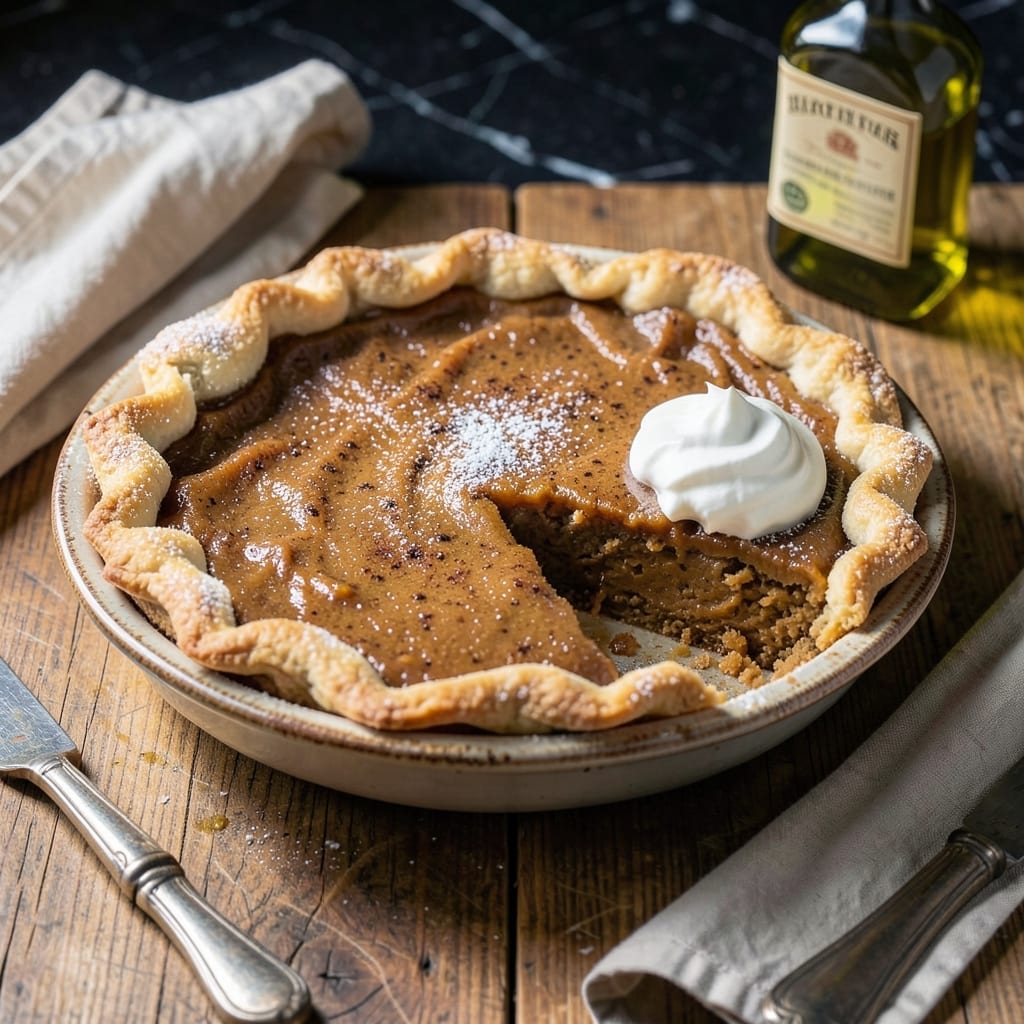
This silky smooth pie proves that canned sweet potatoes can deliver restaurant-quality results with minimal effort. The secret lies in proper draining and blending to achieve that perfect creamy texture.
I developed this method after realizing how consistent canned potatoes are for baking. The filling comes together in 10 minutes with basic pantry spices, creating a spiced depth that tastes like it simmered for hours.
What emerges from the oven is a pie with a velvety filling and perfectly balanced sweetness. The crust stays flaky while the center sets to that ideal sliceable consistency.
Serve warm or chilled—this dessert satisfies either way. Here’s how to make it.
Ingredients for Sweet Potato Pie Recipe Using Canned Sweet Potatoes
Canned sweet potatoes and pantry spices create this velvety, restaurant-quality dessert with ease.
| Ingredient | Amount | Notes |
|---|---|---|
| Canned Sweet Potatoes 🍠 | 40 oz | Drained and rinsed well |
| Granulated Sugar 🍚 | 1 cup | Adjust to taste preference |
| Brown Sugar 🟤 | ½ cup | Light or dark variety |
| Unsalted Butter 🧈 | ½ cup | Melted and slightly cooled |
| Large Eggs 🥚 | 2 whole | Room temperature preferred |
| Evaporated Milk 🥛 | 1 can | 12 oz can, undiluted |
| Vanilla Extract 🌿 | 2 tsp | Pure extract recommended |
| Ground Cinnamon 🌶️ | 1 ½ tsp | Freshly ground if possible |
| Ground Nutmeg 🌰 | ½ tsp | Freshly grated for best flavor |
| Ground Ginger 🌿 | ½ tsp | Complements the sweetness |
| Salt 🧂 | ½ tsp | Balances the sweetness |
| Unbaked Pie Crust 🥧 | 1 whole | 9-inch standard size |
| All-Purpose Flour 🌾 | 2 tbsp | For thickening if needed |
The canned sweet potatoes are key here—Bruce’s or Allan’s brands yield the most consistent texture. Drain and rinse them thoroughly to remove excess syrup, which can make the filling too thin. The evaporated milk adds a creamy richness that whole milk can’t match. For the butter, Plugrá or Land O’Lakes are reliable choices that melt smoothly without separating.
Need a dairy-free version? Swap the evaporated milk for coconut milk and use vegan butter. No nutmeg? Allspice at half the amount works in a pinch, though the flavor profile shifts slightly. Brown sugar can be increased to 3/4 cup if you prefer a deeper caramel note. The pie crust can be homemade or store-bought—Pillsbury makes a dependable ready-to-use option.
The filling can be mixed a day ahead and refrigerated—24 hours max. Baked pie keeps well at room temperature for 2 days or refrigerated for 5 days. For longer storage, freeze the baked pie for up to 2 months.
Why You’ll Love This Recipe
- No Peeling Needed: I just dump the canned sweet potatoes in—no scrubbing, no chopping, and honestly, that’s half the battle won.
- Rich Caramel Depth: The brown sugar and butter melt into this deep, almost toffee-like sweetness that makes the filling taste like it simmered for hours.
- Holiday or Tuesday: Between us, I’ve served this at Thanksgiving and also for a random weeknight dessert—it fits both perfectly.
- Budget Stretch: One can of sweet potatoes makes a full pie, and I always have the rest of the ingredients on hand. It’s my go-to when I need to feed a crowd without overspending.
Step-by-Step Instructions for Sweet Potato Pie Using Canned Sweet Potatoes
This method ensures a velvety filling with balanced spice and perfect texture every time.
Step 1: Prepare the Sweet Potato Base
Drain and rinse the 40 oz Canned Sweet Potatoes thoroughly under cold water to remove excess syrup and starch. Pat them dry with paper towels—this prevents a watery filling. I like to mash them immediately while they’re still slightly warm, as it makes the process smoother.
Transfer the potatoes to a large mixing bowl and mash until completely smooth with no lumps. A potato masher works well, but for ultra-smooth results, I use an electric mixer on medium speed for 1-2 minutes. The texture should resemble thick pudding before adding other ingredients.
Step 2: Incorporate Sugars and Butter
Add the 1 cup Granulated Sugar, 0.5 cup Brown Sugar, and melted 0.5 cup Unsalted Butter to the mashed sweet potatoes. The butter should be warm but not hot to avoid cooking the eggs when added later.
Mix thoroughly until the sugars are fully dissolved and the mixture takes on a uniform caramel color. This step develops the foundation of your filling’s sweetness and richness. The combination of both sugar types creates a complex depth of flavor that granulated sugar alone can’t achieve.
Step 3: Build the Custard with Eggs and Dairy
Incorporate the 2 whole Large Eggs one at a time, mixing well after each addition until fully combined. Then add the 1 can Evaporated Milk and 2 tsp Vanilla Extract, mixing until the filling becomes silky smooth.
The eggs provide structure while the evaporated milk adds creaminess without thinning the mixture. I always use room temperature eggs here—they incorporate more evenly into the warm sweet potato base. The filling should now have a pourable but thick consistency.
Step 4: Season and Thicken the Filling
Sprinkle in the 1.5 tsp Ground Cinnamon, 0.5 tsp Ground Nutmeg, 0.5 tsp Ground Ginger, and 0.5 tsp Salt. These spices should be evenly distributed throughout the filling for consistent flavor in every bite.
Finally, add the 2 tbsp All-Purpose Flour and mix until just combined. The flour acts as a stabilizer, preventing the filling from separating during baking. Taste and adjust sweetness if needed, remembering that the flavors will concentrate slightly as it bakes.
Step 5: Bake in the Prepared Crust
Pour the filling into the 1 whole Unbaked Pie Crust, smoothing the top with a spatula. Place the pie on a rimmed baking sheet to catch any potential spills during baking.
Bake in a preheated 375°F oven for 50-60 minutes until the center is set with only a slight jiggle when gently shaken. The edges should be puffed and golden brown, while the center will firm up as it cools. A knife inserted near the center should come out clean.
Cool completely on a wire rack for at least 2 hours before slicing. This resting period allows the filling to set properly, ensuring clean slices with that perfect custard-like texture.
Pro Tips For Making Sweet Potato Pie Recipe Using Canned Sweet Potatoes
- Drain and Press: Drain the canned sweet potatoes well, then press them gently in a colander to remove excess syrup—this keeps the pie from turning out watery. I learned this the hard way after my first attempt had a soggy crust.
- Warm the Butter: Take the unsalted butter out 30 minutes ahead so it softens evenly when creamed with the sugars. Cold butter leaves lumps, and nobody wants a lumpy filling.
- Skip the Overmixing: Once you add the eggs, mix just until combined—overbeating adds air that can make the pie puff up and then sink as it cools.
- Use Both Sugars: Don’t skip the brown sugar even if you love granulated—its molasses depth actually changes the outcome, giving that classic pie flavor.
Essential Equipment for Perfect Results
Pie Dish Selection
I always use a 9-inch glass pie dish for even heat distribution and that perfect golden crust. The transparency lets you monitor the bottom for doneness. Pyrex is my go-to brand—it’s durable and handles temperature changes beautifully.
Mixing Tools
An electric mixer with paddle attachment makes the filling ultra-smooth in 2 minutes. For smaller batches, a sturdy whisk and some elbow grease work too. I prefer my KitchenAid stand mixer for hands-free blending.
Measuring Essentials
Precise measurements matter here. Use dry measuring cups for sugars and liquid measuring cups for milk and butter. A kitchen scale can verify canned sweet potato weight if you’re unsure about drainage.
Baking Equipment
A rimmed baking sheet under your pie dish catches spills and prevents oven messes. I line mine with parchment paper for easy cleanup. A cooling rack is essential for proper air circulation after baking. 💡
Crust Tools
If making your own crust, a pastry cutter helps blend cold butter into flour perfectly. For store-bought, I recommend Pillsbury’s refrigerated crust—it rolls out easily and bakes up flaky. A fork for docking prevents air bubbles.
Serving Accessories
A sharp pie server ensures clean slices without crushing the filling. I use a thin, flexible metal server that glides right under each piece. A fine-mesh sieve helps dust powdered sugar evenly for garnish.
Nutrition Facts
Frequently Asked Questions
Do I need to cook canned sweet potatoes first?
No, canned sweet potatoes are already cooked and soft. Just drain, rinse, and mash them well before mixing with other ingredients.
Why does my filling turn out watery?
This usually happens if the potatoes aren’t drained thoroughly. Press them in a colander and pat completely dry with paper towels before mashing.
Can I make this pie ahead of time?
The filling can be mixed 1 day ahead and refrigerated. Bake as directed, then store the finished pie at room temperature for up to 2 days or refrigerate for 5 days.
What if I don’t have evaporated milk?
Whole milk works in a pinch, but the texture won’t be as rich. For best results, use coconut milk as a dairy-free alternative.

- 6 Egg Cake Recipe with Oil: Light as Air With Buttery Moisture - October 4, 2026
- 4 Bean Casserole Recipe: One-Pan Heartiness With Smoky Paprika Depth - October 4, 2026
- 3-Ingredient Keto Mug Cake Recipe: Microwave Magic in 2 Minutes - October 4, 2026