
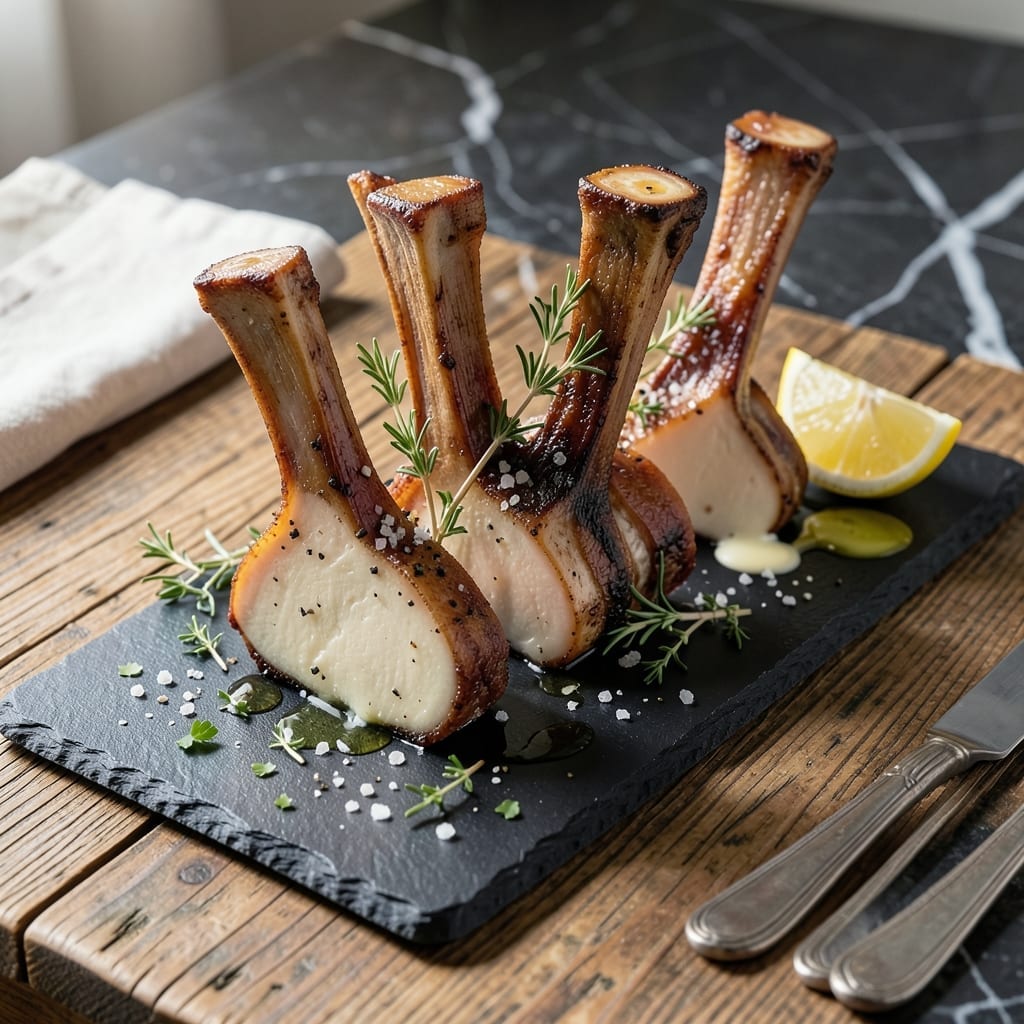
This roasted bone marrow recipe delivers an indulgent appetizer with minimal effort. The rich, buttery flavor of properly prepared marrow is unmatched, making it a standout dish for special occasions.
I’ve perfected a simple method that ensures the marrow stays intact while achieving a golden, caramelized crust. The key is high heat and precise timing to bring out its natural depth without overcooking.
Serve it with crusty bread to soak up every last bit of its velvety texture. The contrast between the crisp exterior and creamy interior is what makes this dish unforgettable.
Pair with a bold red wine or a sprinkle of sea salt to elevate the experience even further.
Ingredients for Recipe for Bone Marrow
Minimal ingredients for maximum indulgence. Rich, buttery flavor with every bite.
| Ingredient | Amount | Notes |
|---|---|---|
| Beef Marrow Bones 🍖 | 4 pieces | Center-cut, 3-4 inches long |
| Sea Salt 🧂 | 1 tsp | Coarse flakes preferred |
| Freshly Ground Black Pepper 🌶️ | ½ tsp | Coarsely ground |
| Fresh Thyme Sprigs 🌿 | 4 pieces | Optional for garnish |
| Fresh Parsley 🍃 | 2 tbsp | Chopped, for garnish |
| Lemon Wedges 🍋 | 4 pieces | For serving |
| Olive Oil 🫒 | 1 tbsp | For drizzling |
| Crusty Bread 🍞 | 8 slices | Sourdough or baguette |
| Garlic Cloves 🧄 | 2 cloves | Minced, optional |
| Red Wine 🍷 | ¼ cup | Bold variety for pairing |
The marrow bones are everything—ask your butcher for center-cut femur bones (about 3-4 inches long). They should be pre-cut and cleaned. Whole Foods or a good local butcher will have them, but call ahead. Look for bones with a good amount of marrow visible. The salt should be coarse sea salt for that perfect finish. Don’t skimp on quality here.
No sea salt flakes? Kosher salt works in a pinch, but the texture won’t be the same. Fresh herbs are ideal, but dried thyme at half the amount is fine. The bread can be any crusty variety—sourdough or baguette are classics. If you’re skipping the wine, a splash of balsamic vinegar adds a nice tang to cut through the richness.
Marrow bones keep in the fridge for 1-2 days before cooking. Leftovers? Unlikely, but if you have any, they’ll keep for 3 days refrigerated. Best served fresh though—the texture changes when reheated.
Why You’ll Love This Recipe
- Minimal Effort: I just pop the bones in the oven with salt, pepper, and thyme—no complicated steps.
- Rich Indulgence: That creamy, buttery marrow with crispy edges and fresh parsley? Pure decadence.
- Impresses Every Time: I serve this as an appetizer at dinner parties, and it always steals the show.
- Budget Luxury: Honestly, it feels fancy but costs less than a steak dinner for four.
Step-by-Step Instructions for Bone Marrow
This straightforward method guarantees perfectly roasted marrow with a rich, buttery center every time.
Step 1: Prep and Season the Beef Marrow Bones
Place the 4 pieces beef marrow bones on a clean work surface. Pat them dry thoroughly with paper towels to remove any moisture, as this ensures even browning. Season all over with the 1 tsp sea salt and 0.5 tsp freshly ground black pepper, pressing the seasoning gently into the meat to help it adhere.
This step is crucial for flavor development. The coarse texture of the sea salt and pepper creates a balanced crust that enhances the natural richness of the marrow. Don’t skip this—it’s the foundation of your dish.
Step 2: Drizzle with Olive Oil and Add Aromatics
Arrange the seasoned beef marrow bones on a rimmed baking sheet, standing them upright so the marrow stays contained during roasting. Drizzle each piece evenly with the 1 tbsp olive oil, ensuring the tops are well coated. This adds richness and helps the seasoning stick.
For added aroma, place the 4 pieces fresh thyme sprigs around the bones on the baking sheet. The thyme will infuse the marrow with a subtle earthy note as it roasts. The bones are now ready for the oven.
Step 3: Roast Until Golden and Bubbling
Preheat your oven to 400°F. Roast the bones for 20-25 minutes until the tops are deeply golden brown and the marrow is bubbling and slightly puffed. You’ll see the marrow pull away from the edges of the bone slightly when it’s done.
Watch closely during the last few minutes—this is when the marrow can go from perfectly roasted to overcooked. The aroma will fill your kitchen with a rich, savory scent that signals it’s ready.
Step 4: Garnish and Serve Immediately
Remove the baking sheet from the oven and let the bones rest for 2-3 minutes. This brief rest allows the marrow to settle slightly, making it easier to scoop out without spilling. While the bones are still hot, sprinkle the 2 tbsp fresh parsley over the top for a fresh, vibrant contrast.
Serve the bones upright on a platter with the 8 slices crusty bread arranged alongside. Place the 4 pieces lemon wedges and minced 2 cloves garlic cloves (if using) on the side for guests to add as desired. Pair with the 0.25 cup red wine for a bold, complementary finish.
Pro Tips For Making Recipe For Bone Marrow
- Soak the Bones: I learned this the hard way—soak the marrow bones in cold, salted water for at least 2 hours before roasting to draw out any blood, which keeps the flavor clean and rich.
- Roast Hot and Fast: Crank the oven to 450°F (230°C) and roast for 15-20 minutes—high heat renders the fat quickly and gives the marrow that creamy, buttery texture without turning greasy.
- Skip the Overcrowding: After burning a batch, I finally figured out to space the bones on the tray so they roast, not steam—crowding just makes them soggy and bland.
- Finish with Fresh Herbs: Sounds weird, but it works: sprinkle the thyme and parsley right after roasting so their oils bloom in the hot marrow, adding brightness without bitterness.
Pro Cooking Tips for Great recipe for bone marrow
Bone Selection Matters
Always ask your butcher for center-cut femur bones about 3-4 inches long. These provide the best marrow-to-bone ratio. I source mine from Whole Foods or a trusted local butcher—call ahead to ensure availability. 💪
Perfect Roasting Setup
Use a rimmed baking sheet to catch any drippings and prevent oven messes. Stand the bones upright to keep the marrow contained during roasting. This position also ensures even heat distribution for that golden-brown crust.
Temperature Precision
Preheat your oven to 400°F and maintain it consistently. The high heat is critical for caramelizing the exterior while keeping the interior buttery. I use an oven thermometer to verify accuracy—many home ovens run 25°F off.
Timing is Everything
Roast for 20-25 minutes, watching closely after 18 minutes. The marrow should be bubbling and slightly puffed. Overcooking by even 2-3 minutes can turn it from luxurious to dry.
Rest and Serve
Let the bones rest for 2-3 minutes after removing from the oven. This allows the marrow to settle, making it easier to scoop. Serve immediately while hot—the texture changes as it cools.
Pro Equipment Tip
A wire cooling rack placed on the baking sheet elevates the bones, allowing heat to circulate underneath. This prevents the bottoms from steaming and ensures all sides develop that perfect crust. ✨
Nutrition Facts
Frequently Asked Questions
How do I know when it’s done roasting?
Look for a golden-brown crust and bubbling marrow that pulls slightly from the bone. This typically happens after 20-25 minutes at 400°F.
Can I use other bones besides femur?
Yes, but femur bones are ideal for their size and marrow content. Shank bones work too, but may require 5-10 extra minutes due to their density.
What if my marrow slides out while cooking?
Stand bones upright on a rimmed baking sheet to contain the marrow. If it still leaks, reduce oven temperature by 25°F next time.
How should I store leftovers?
Refrigerate in an airtight container for up to 3 days. Reheat gently in a 350°F oven for 5-7 minutes.

- 6 Egg Cake Recipe with Oil: Light as Air With Buttery Moisture - October 4, 2026
- 4 Bean Casserole Recipe: One-Pan Heartiness With Smoky Paprika Depth - October 4, 2026
- 3-Ingredient Keto Mug Cake Recipe: Microwave Magic in 2 Minutes - October 4, 2026