
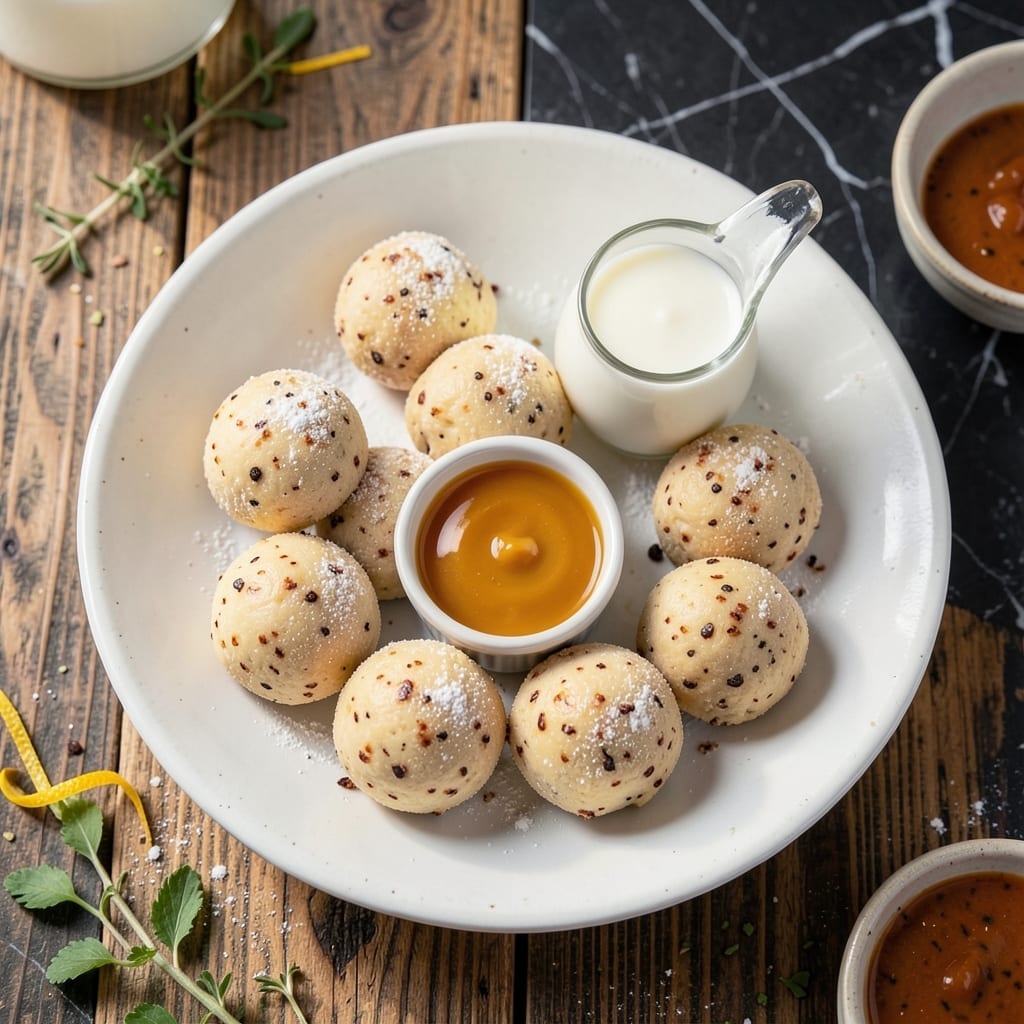
I’ve got a treat that lets you eat cookie dough straight from the bowl—safely and deliciously. These no-bake bites deliver all the rich, buttery flavor you crave without any risk.
No eggs here, just heat-treated flour and a few pantry staples. The texture is spot-on: soft, chewy, and packed with chocolate chips in every bite.
Roll them into balls or dig in with a spoon—either way, you’re getting that classic cookie dough experience in minutes. No oven, no waiting, no guilt.
Perfect for snacking, gifting, or satisfying that late-night sweet tooth. Let’s make them.
Ingredients for Recipe for Edible Cookie Dough Balls
Rich, buttery, and packed with chocolate chips—these require just pantry staples and heat-treated flour.
| Ingredient | Amount | Notes |
|---|---|---|
| All-Purpose Flour 🌾 | 1 ½ cups | Heat-treated to eliminate bacteria |
| Unsalted Butter 🧈 | ½ cup | Softened to room temperature |
| Granulated Sugar 🍚 | ½ cup | Fine white sugar preferred |
| Brown Sugar 🟤 | ¼ cup | Packed, light or dark |
| Vanilla Extract 🌿 | 1 tsp | Pure extract for best flavor |
| Milk 🥛 | 2 tbsp | Whole milk for creaminess |
| Salt 🧂 | ¼ tsp | Fine sea salt preferred |
| Semi-Sweet Chocolate Chips 🍫 | 1 cup | Mini chips for even distribution |
| Heavy Cream 🥛 | 1 tbsp | Optional for richer texture |
| Vanilla Bean Seeds 🌿 | ½ tsp | Scraped from 1 bean |
The flour is non-negotiable here—heat-treat it first. Spread it on a baking sheet and microwave in 30-second bursts until it hits 165°F, or bake at 350°F for 5-10 minutes. I use King Arthur Flour for consistency, but any all-purpose works. The butter needs to be truly soft, not melted (leave it out for an hour or so). For the sugars, Domino or C&H are reliable brands—no need for fancy stuff.
No chocolate chips? Chop up a chocolate bar (about 6 oz) instead. Brown sugar can be swapped for all granulated, but you’ll lose some depth. Need this dairy-free? Vegan butter and almond milk work perfectly. The vanilla matters—Nielsen-Massey or Rodelle are worth the splurge. Skip the heavy cream if you don’t have it, but it adds that extra richness.
This dough keeps in an airtight container in the fridge for 5 days, or freeze for 3 months (roll into balls before freezing for easy grab-and-go). Let it sit at room temp for 10 minutes before eating for the best texture.
Why You’ll Love This Recipe
- No-Bake Simplicity: I just mix, roll, and chill—no oven, no waiting for dough to bake.
- Sweet Vanilla Punch: The brown sugar and vanilla make it taste like the best part of a cookie, only better.
- Party or Snack: I bring these to potlucks or keep a batch in the fridge for late-night cravings.
- Budget-Friendly Treat: A cup of flour, some butter, and sugar stretch into dozens of little bites.
Step-by-Step Instructions for Edible Cookie Dough Balls
Here’s the method. Straightforward, tested, works every time.
Step 1: Heat-Treat the All-Purpose Flour
Spread all 1.5 cups All-Purpose Flour evenly on a microwave-safe plate. Microwave on high power for 1 minute intervals, stirring between each, until the flour reaches 165°F. This step is non-negotiable—it eliminates any bacteria that could make raw flour unsafe to eat.
Let the flour cool completely before using. I typically spread it in a thin layer and give it 10-15 minutes to come to room temperature. You’ll notice the flour may clump slightly; break it up with a fork. This treated flour forms the safe base of your edible dough.
Step 2: Cream the Butter and Sugars
In a large mixing bowl, beat the 0.5 cup Unsalted Butter with the 0.5 cup Granulated Sugar and 0.25 cup Brown Sugar using an electric mixer on medium speed for 2-3 minutes. You’re aiming for a light, fluffy texture where the mixture pales slightly in color.
The butter should be properly softened—not melted—but still hold its shape. If it’s too cold, it won’t cream properly; too warm, and your dough will be greasy. Scrape the bowl occasionally to ensure even mixing. This creaming process incorporates air, which gives your dough its characteristic cookie texture.
Step 3: Incorporate Vanilla and Liquid Ingredients
Add the 1 tsp Vanilla Extract, 0.5 tsp Vanilla Bean Seeds, 2 tbsp Milk, and 0.25 tsp Salt to the butter-sugar mixture. Beat on low speed just until fully combined—about 30 seconds. The vanilla bean seeds add those beautiful black specks and an extra depth of flavor.
Now, gradually add the cooled, heat-treated flour. Mix on low speed until the flour is just incorporated and no dry spots remain. Don’t overmix here—you want a soft, slightly sticky dough, not a tough one. If the dough seems too thick, resist adding more milk; it should be dense enough to hold its shape when rolled.
Step 4: Fold in Chocolate Chips and Optional Heavy Cream
Using a silicone spatula, fold in all 1 cup Semi-Sweet Chocolate Chips by hand. Distribute them evenly throughout the dough. For an even richer texture, add the 1 tbsp Heavy Cream at this stage and mix until just combined. The mini chips work particularly well here, as they distribute more evenly in each bite.
The dough should now be thick, slightly sticky, and studded with chocolate. If it’s too soft to handle, refrigerate for 15-20 minutes to firm up. This step ensures every ball will have that perfect chocolate-to-dough ratio we all crave.
Step 5: Shape, Chill, and Enjoy
Scoop the dough into 1-inch portions (about 1 tablespoon each) and roll between your palms into smooth balls. Place them on a parchment-lined baking sheet. You should get about 24-28 balls from this recipe, perfect for sharing—or not.
Refrigerate the balls for at least 30 minutes to set. This chilling step firms them up, making them easier to handle and enhancing the flavor development. Serve chilled or at room temperature. Store any leftovers in an airtight container in the refrigerator for up to 1 week.
Pro Tips For Making Recipe For Edible Cookie Dough Balls
- Heat Treat Flour: Spread flour on a baking sheet and bake at 350°F for 5-7 minutes to kill bacteria—this makes it safe to eat raw without changing the texture.
- Soften Butter Right: Let butter sit at room temperature for 30-45 minutes until it gives slightly when pressed, but isn’t greasy or melted—I learned this the hard way after ending up with a soupy dough.
- Cream Thoroughly: Beat butter and sugars for at least 2-3 minutes until light and fluffy, or your dough balls will taste dense and grainy.
- Chill Before Rolling: Refrigerate the dough for 20-30 minutes before shaping—this prevents sticking and helps the balls hold their shape.
Common Mistakes When Making This Dish
Skipping the Heat-Treat
Never skip heat-treating the 1.5 cups All-Purpose Flour. Raw flour can contain bacteria like E. coli. Microwave it in 1-minute intervals until it hits 165°F, stirring between each. I learned this the hard way after a batch went bad. 🔥
Over-Softening Butter
Your 0.5 cup Unsalted Butter should be soft but still hold its shape. If it’s melted or greasy, your dough will be oily. Leave it out for exactly 1 hour at room temperature. Too warm? Chill the bowl for 10 minutes before mixing.
Overmixing the Dough
Mix just until the flour disappears. Overmixing develops gluten, making your dough tough instead of tender. Use low speed and stop as soon as it comes together. The texture should be soft, not elastic.
Using Cold Ingredients
All ingredients, especially 2 tbsp Milk and 1 tbsp Heavy Cream, should be at room temperature. Cold liquids can cause the butter to seize, resulting in a lumpy dough. Take them out 30 minutes before starting.
Skipping the Chill
Don’t rush the 30-minute chill before rolling. Warm dough sticks to your hands and won’t hold its shape. I use a cookie scoop for even portions, then roll quickly. Patience here ensures perfect balls. ❄️
Wrong Chocolate Chips
Stick to 1 cup Semi-Sweet Chocolate Chips. Larger chips make the dough hard to shape. Mini chips distribute better. If using a chopped bar, ensure pieces are ¼-inch or smaller for even texture.
Nutrition Facts
Frequently Asked Questions
Why do I need to heat-treat the flour?
Raw flour can contain harmful bacteria like E. coli. Heat-treating to 165°F kills these pathogens, making it safe to eat. This step is essential for any no-bake recipe.
Can I make these dairy-free?
Yes! Use vegan butter and swap the milk for almond or oat milk. The texture and flavor will be nearly identical. Ensure all chocolate chips are dairy-free too.
How long do these keep in the fridge?
Store in an airtight container and they’ll stay fresh for up to 1 week. For longer storage, freeze for up to 3 months. Let them sit at room temperature for 10 minutes before eating.
Can I add mix-ins like nuts or sprinkles?
Fold in up to ½ cup of your favorite add-ins. Chopped nuts, sprinkles, or dried fruit all work well. Adjust chocolate chips to balance the texture.

- 6 Egg Cake Recipe with Oil: Light as Air With Buttery Moisture - October 4, 2026
- 4 Bean Casserole Recipe: One-Pan Heartiness With Smoky Paprika Depth - October 4, 2026
- 3-Ingredient Keto Mug Cake Recipe: Microwave Magic in 2 Minutes - October 4, 2026