
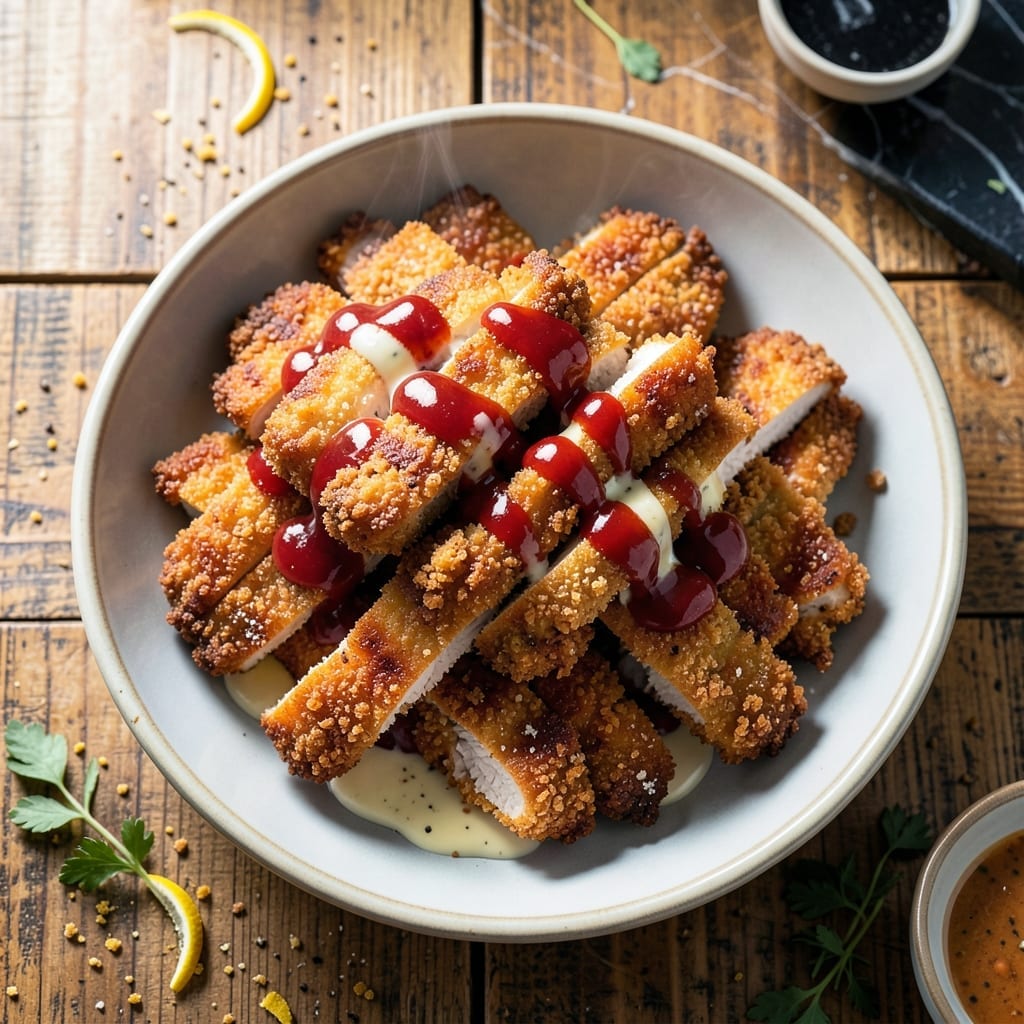
Achieving perfectly juicy fried chicken breast at home is simpler than you might think. The key lies in proper preparation and precise cooking times.
This method delivers a golden crust with tender white meat every time. The secret is maintaining consistent oil temperature throughout the frying process.
You’ll find that using boneless pieces ensures even cooking and eliminates the guesswork of bone-in varieties. The result is chicken that stays moist inside while developing that coveted crispy exterior.
Serve this as a main course with your favorite sides or slice it for sandwiches. The versatility makes it a go-to for weeknight dinners or casual gatherings.
Ingredients for Recipe for Fried Boneless Chicken Breast
Pantry staples plus chicken create that crispy, juicy magic at home.
| Ingredient | Amount | Notes |
|---|---|---|
| Boneless Chicken Breast 🍗 | 1 ½ lb | Pounded to even thickness |
| Buttermilk 🥛 | 1 cup | For marinating chicken |
| All-Purpose Flour 🌾 | 1 ½ cups | For dredging coating |
| Cornstarch 🌽 | ½ cup | Adds extra crispiness |
| Large Egg 🥚 | 1 whole | Beaten for binding |
| Hot Sauce 🌶️ | 1 tbsp | For buttermilk marinade |
| Garlic Powder 🧄 | 1 tsp | For seasoning flour |
| Onion Powder 🧅 | 1 tsp | For seasoning flour |
| Paprika 🌶️ | 1 tsp | For color and flavor |
| Salt 🧂 | 1 tsp | Kosher or sea salt |
| Black Pepper 🌶️ | ½ tsp | Freshly ground preferred |
| Cayenne Pepper 🔥 | ¼ tsp | Optional for heat |
| Vegetable Oil 🫒 | 4 cups | For deep frying |
| Baking Powder 🧂 | ½ tsp | Makes coating extra crispy |
The chicken is the star here. Boneless, skinless breasts work best—uniform thickness means even cooking. I grab mine from Costco for bulk savings, but any supermarket will do. Look for pieces with even coloring (no grayish spots) and a slight bounce when pressed. The buttermilk marinade (use whole milk variety if you can find it) is what keeps everything moist inside that golden crust.
No buttermilk? Whole milk plus 1 tbsp vinegar or lemon juice gets you 90% there. Short on cornstarch? Arrowroot powder works the same. For extra crunch, swap half the flour for crushed cornflakes. The cayenne is optional but worth it—just a whisper of heat. If you’re frying for a crowd, peanut oil has a higher smoke point than vegetable oil.
Marinate the chicken for at least 4 hours (overnight is even better). Fry in batches to avoid crowding the pan—this keeps the oil temp steady. Leftovers hold up well, actually. Store in the fridge for 3-4 days, or freeze for 1 month (reheat in the oven to revive the crisp).
Why You’ll Love This Recipe
- One Pan Wonder: I just coat, fry, and serve—no fancy equipment or complicated steps, just a skillet and these simple ingredients.
- Crispy Perfection: That buttermilk soak and cornstarch crust make it juicy inside with a shatteringly crisp outside every single time.
- Weeknight Hero: Honestly, it’s my go-to for busy evenings—great hot out of the pan or cold in a sandwich the next day.
- Budget Friendly: Boneless chicken breast stretches further than you think, and flour plus egg keep the cost down without sacrificing flavor.
Step-by-Step Instructions for Fried Boneless Chicken Breast
Here’s the method I rely on for crispy, juicy chicken with a perfectly golden exterior.
Step 1: Marinate the Chicken in Buttermilk and Hot Sauce
Cut the 1.5 lb Boneless Chicken Breast into 1-inch thick strips or cutlets. Pound them to an even thickness if needed. In a large bowl, whisk together the 1 cup Buttermilk and 1 tbsp Hot Sauce until smooth.
Add the chicken pieces to the buttermilk mixture, ensuring each piece is fully submerged. Cover and refrigerate for at least 1 hour, or up to 4 hours for maximum tenderness. The buttermilk tenderizes the meat while the hot sauce adds a subtle tang that balances the richness.
Step 2: Prepare the Crispy Dredging Mixture
In a large shallow dish, combine the 1.5 cups All-Purpose Flour, 0.5 cup Cornstarch, 1 tsp Garlic Powder, 1 tsp Onion Powder, 1 tsp Paprika, 1 tsp Salt, 0.5 tsp Black Pepper, 0.25 tsp Cayenne Pepper, and 0.5 tsp Baking Powder. Whisk until fully blended.
The baking powder reacts with the buttermilk to create tiny air pockets in the coating, giving it an extra crispy texture. The cornstarch adds an additional crunch and helps the coating adhere better to the chicken. This blend ensures every bite is flavorful and perfectly seasoned.
Step 3: Dredge and Double-Coat for Maximum Crispiness
Beat the 1 whole Large Egg in a separate shallow dish. Working one piece at a time, remove the chicken from the buttermilk, letting excess drip off, then dip it into the beaten egg. Immediately press it into the flour mixture, turning to coat evenly and pressing firmly to adhere.
For an extra crispy coating, repeat the process: dip back into the buttermilk, then back into the flour mixture. This double-dredging technique creates a thicker, crunchier crust that stays put during frying. Place the coated chicken on a wire rack to rest for 5-10 minutes before frying.
Step 4: Deep-Fry to Golden Perfection
In a large, heavy-bottomed pot or Dutch oven, heat the 4 cups Vegetable Oil to 350°F over medium-high heat. Use a deep-fry or candy thermometer to monitor the temperature accurately. The oil is ready when a small piece of breading dropped in sizzles and floats immediately.
Carefully lower the chicken into the hot oil, working in batches to avoid overcrowding the pot. Fry for 6-8 minutes per side, or until the coating is deep golden brown and the internal temperature reaches 165°F. Drain on a wire rack set over a paper towel-lined baking sheet to keep the coating crispy.
Step 5: Rest and Serve While Hot
Allow the fried chicken to rest for 5 minutes before serving. This brief rest lets the juices redistribute throughout the meat, ensuring every bite is moist and tender. The coating will also set slightly, making it less likely to fall off when served.
Serve immediately while still hot and crispy. The exterior should be a beautiful golden brown with a satisfying crunch, while the interior remains juicy and full of flavor. This method guarantees a consistent result every time, with perfectly cooked chicken that’s never dry or greasy.
Pro Tips For Making Recipe For Fried Boneless Chicken Breast
- Pound the Breasts: Use a rolling pin or meat mallet to even out the thickness to ½ inch—this guarantees even cooking and no dry, overdone edges. I learned this the hard way after too many chewy bites.
- Buttermilk Overnight: Soak the chicken in buttermilk for at least 4 hours, or ideally overnight. The longer it sits, the more tender and flavorful it becomes—sounds obvious, but I used to rush it.
- Double Dredge: Dip the chicken in flour, then egg, then flour again with a little cornstarch mixed in. This double coat makes the crust extra crispy and helps it stick better than a single layer.
- Rest Before Frying: Let the dredged chicken rest for 10 minutes before frying. This gives the coating time to set, so it doesn’t slide off in the oil—I skip this when I’m in a hurry, and it always shows.
Regional Styles of This recipe for fried boneless chicken breast
Southern Style
In the South, we keep it classic with a well-seasoned flour coating. I use 1.5 cups all-purpose flour mixed with 1 tsp each of garlic powder, onion powder, paprika, and a touch of cayenne for kick. The buttermilk marinade is non-negotiable—it’s the secret to that signature tenderness. 💛
Nashville Hot
For that fiery Nashville twist, I douse the fried chicken in a spicy oil blend. Melt ½ cup lard or vegetable oil with 2 tbsp cayenne, 1 tbsp brown sugar, and 1 tsp each of garlic powder and paprika. Brush it onto the chicken right after frying for that iconic heat and sheen.
Korean Double-Fried
Korean fried chicken gets its ultra-crispy texture from double-frying. First fry at 325°F for 8-10 minutes, rest, then fry again at 375°F for 3-4 minutes. I add 1 tbsp gochujang to the buttermilk marinade for depth. Toss in a sweet-spicy glaze after the second fry.
Japanese Karaage
For karaage, I marinate the chicken in ¼ cup soy sauce, 2 tbsp sake, and 1 tbsp grated ginger for 30 minutes. The coating uses ½ cup potato starch instead of flour for a lighter, crispier texture. Fry at 340°F until golden and serve with lemon wedges.
This version is my go-to for a lighter, Asian-inspired take. ✨
Texas Crunch
Everything’s bigger in Texas, including the crunch. I add 1 cup crushed cornflakes to the dredging mix for extra texture. The chicken gets a final dip in buttermilk before coating, then fried at 360°F for a deep golden hue. It’s hearty, crispy, and perfect for sandwiches.
Nutrition Facts
Frequently Asked Questions
What oil works best for frying?
Vegetable or peanut oil are ideal for their high smoke points. Maintain oil temperature at 350°F for perfect crispiness without burning.
How do I ensure the chicken stays juicy?
Marinate in buttermilk for at least 1 hour, and don’t overcook. Use a meat thermometer to check for 165°F internally.
Why does my coating fall off during frying?
Let the coated chicken rest for 5-10 minutes before frying. This helps the dredge adhere better. Also, avoid moving pieces too much in the oil.
Can I oven-bake instead of frying?
Yes! Bake at 400°F for 20-25 minutes, flipping halfway. Spray with oil for extra crispiness, though texture won’t match deep-frying.

- 6 Egg Cake Recipe with Oil: Light as Air With Buttery Moisture - October 4, 2026
- 4 Bean Casserole Recipe: One-Pan Heartiness With Smoky Paprika Depth - October 4, 2026
- 3-Ingredient Keto Mug Cake Recipe: Microwave Magic in 2 Minutes - October 4, 2026